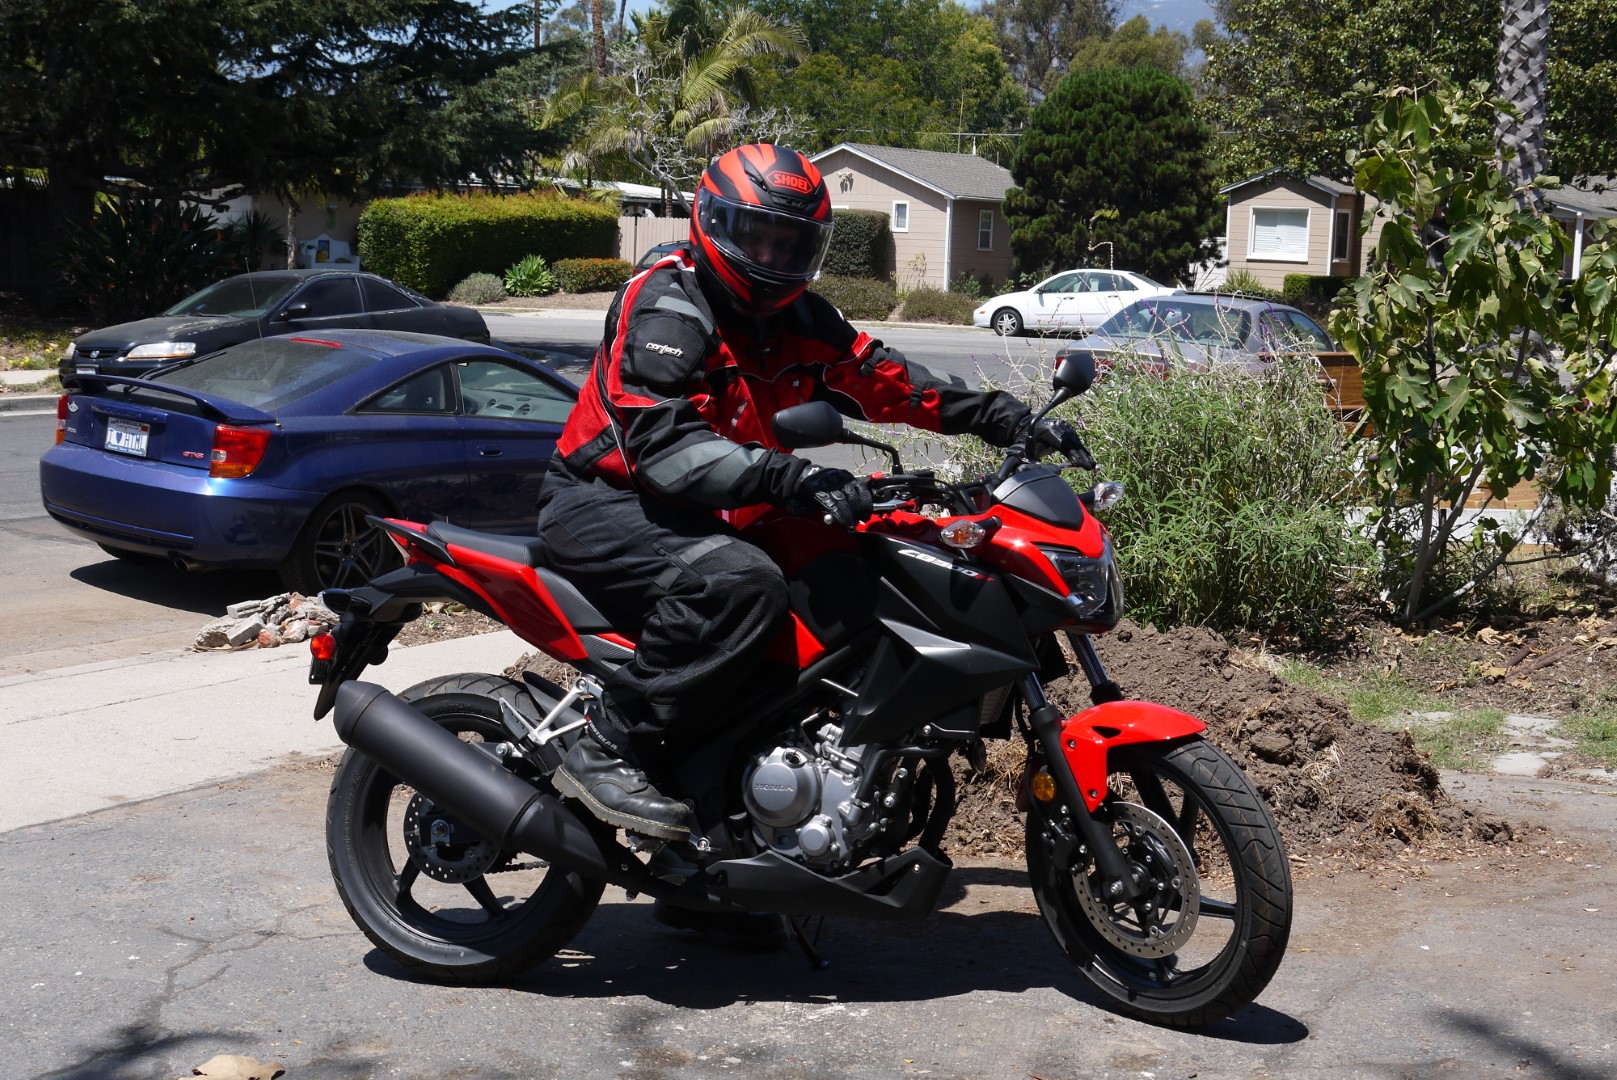
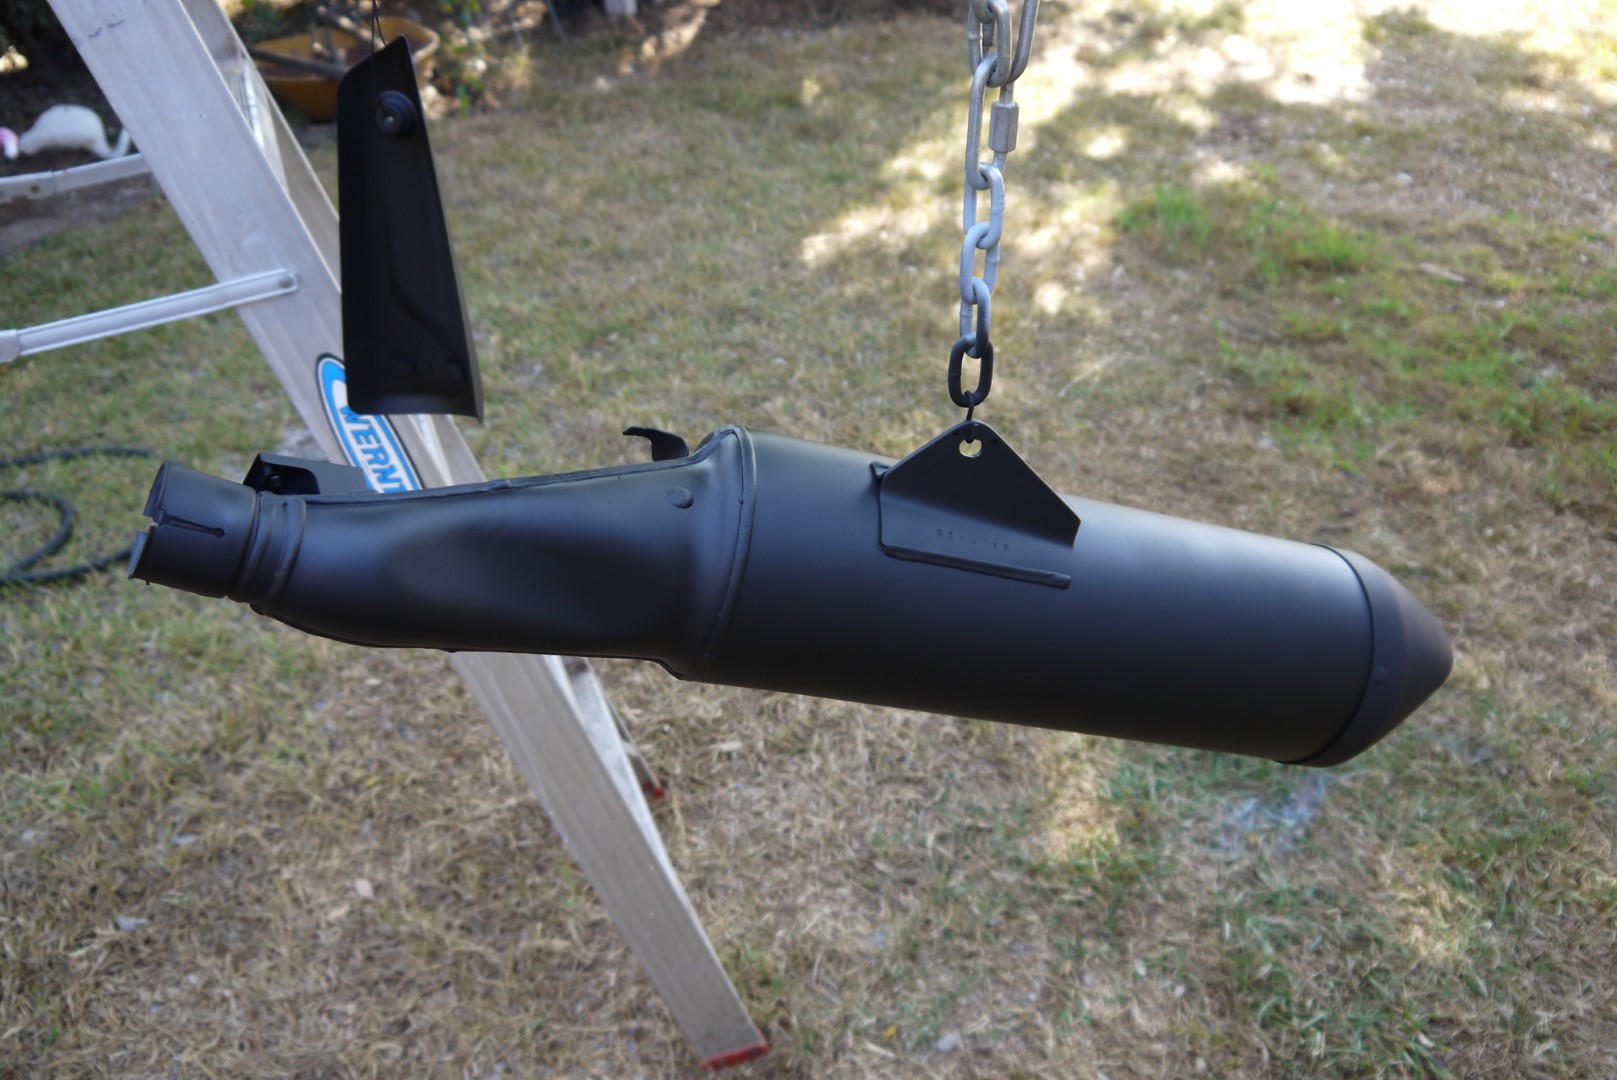
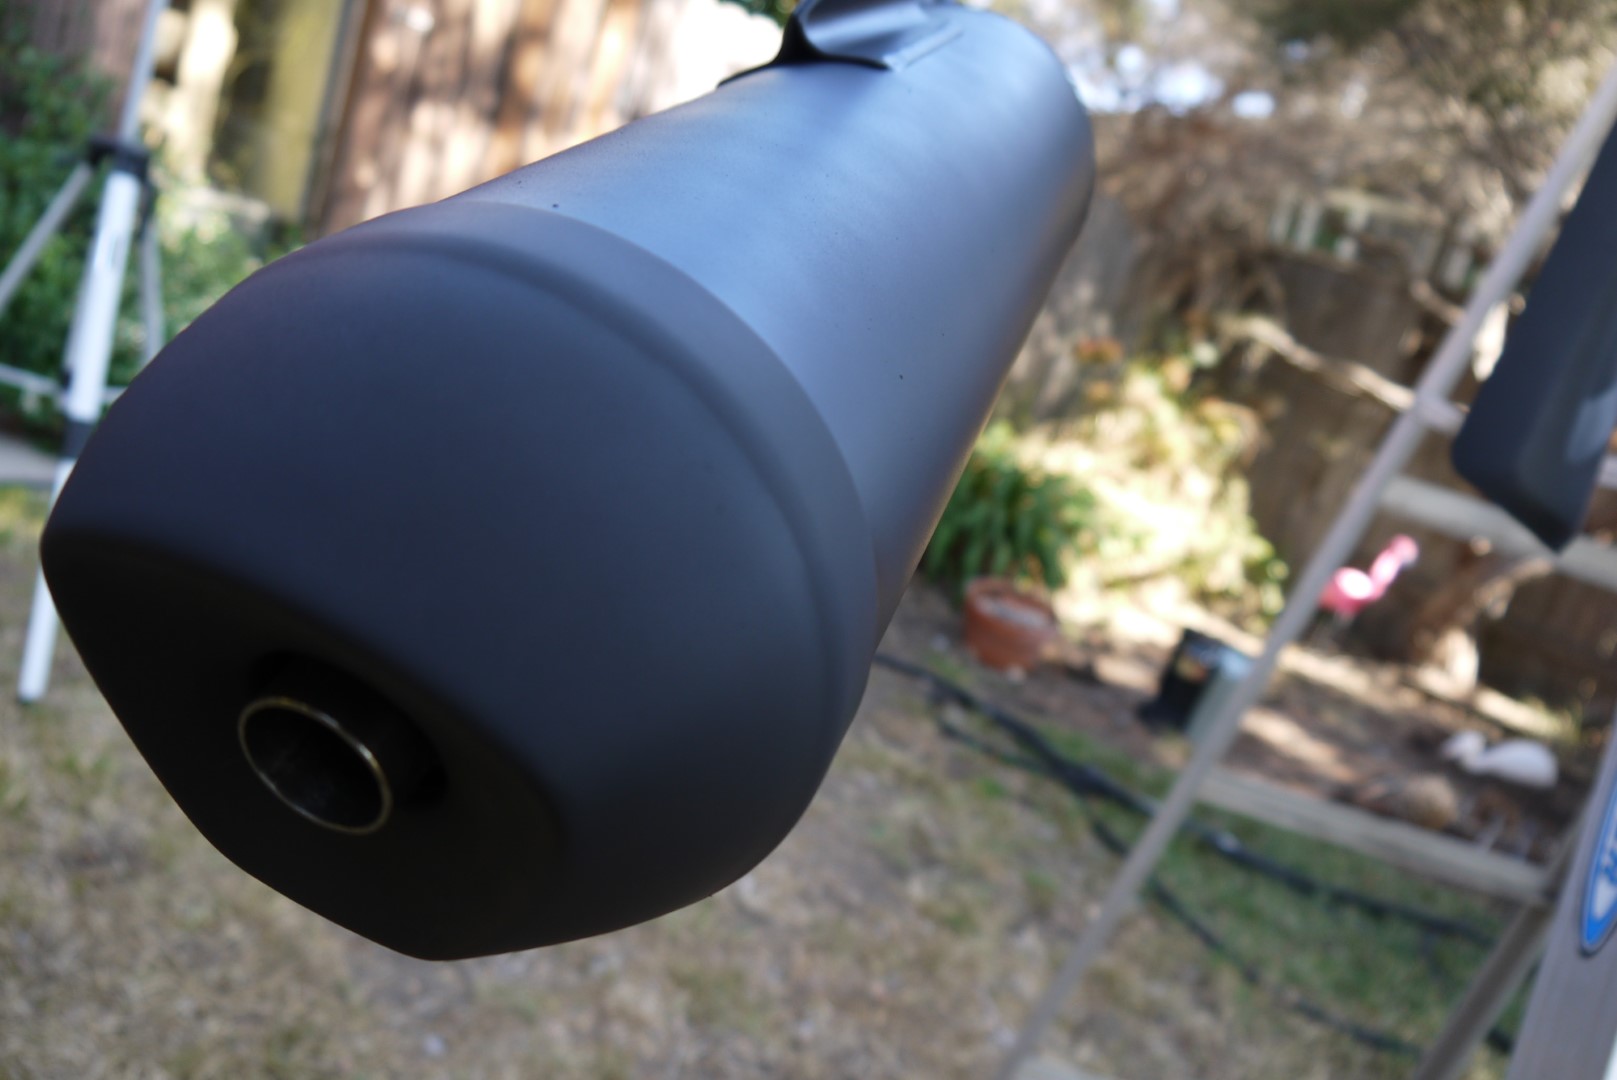
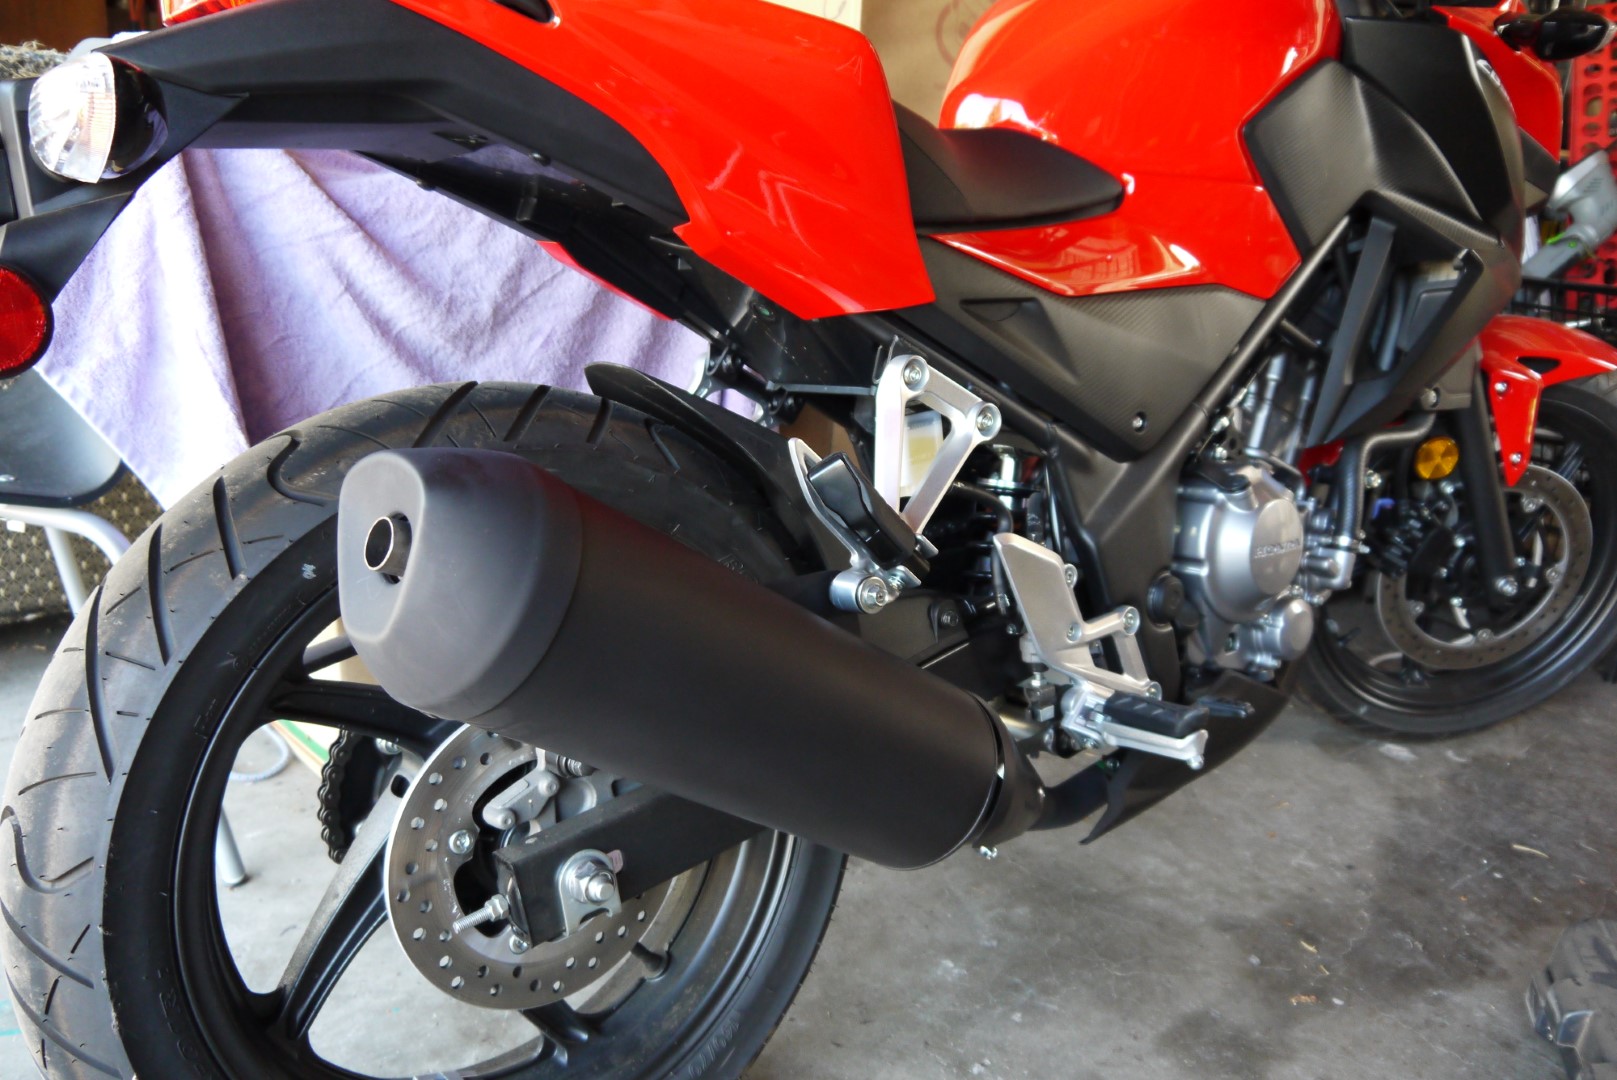
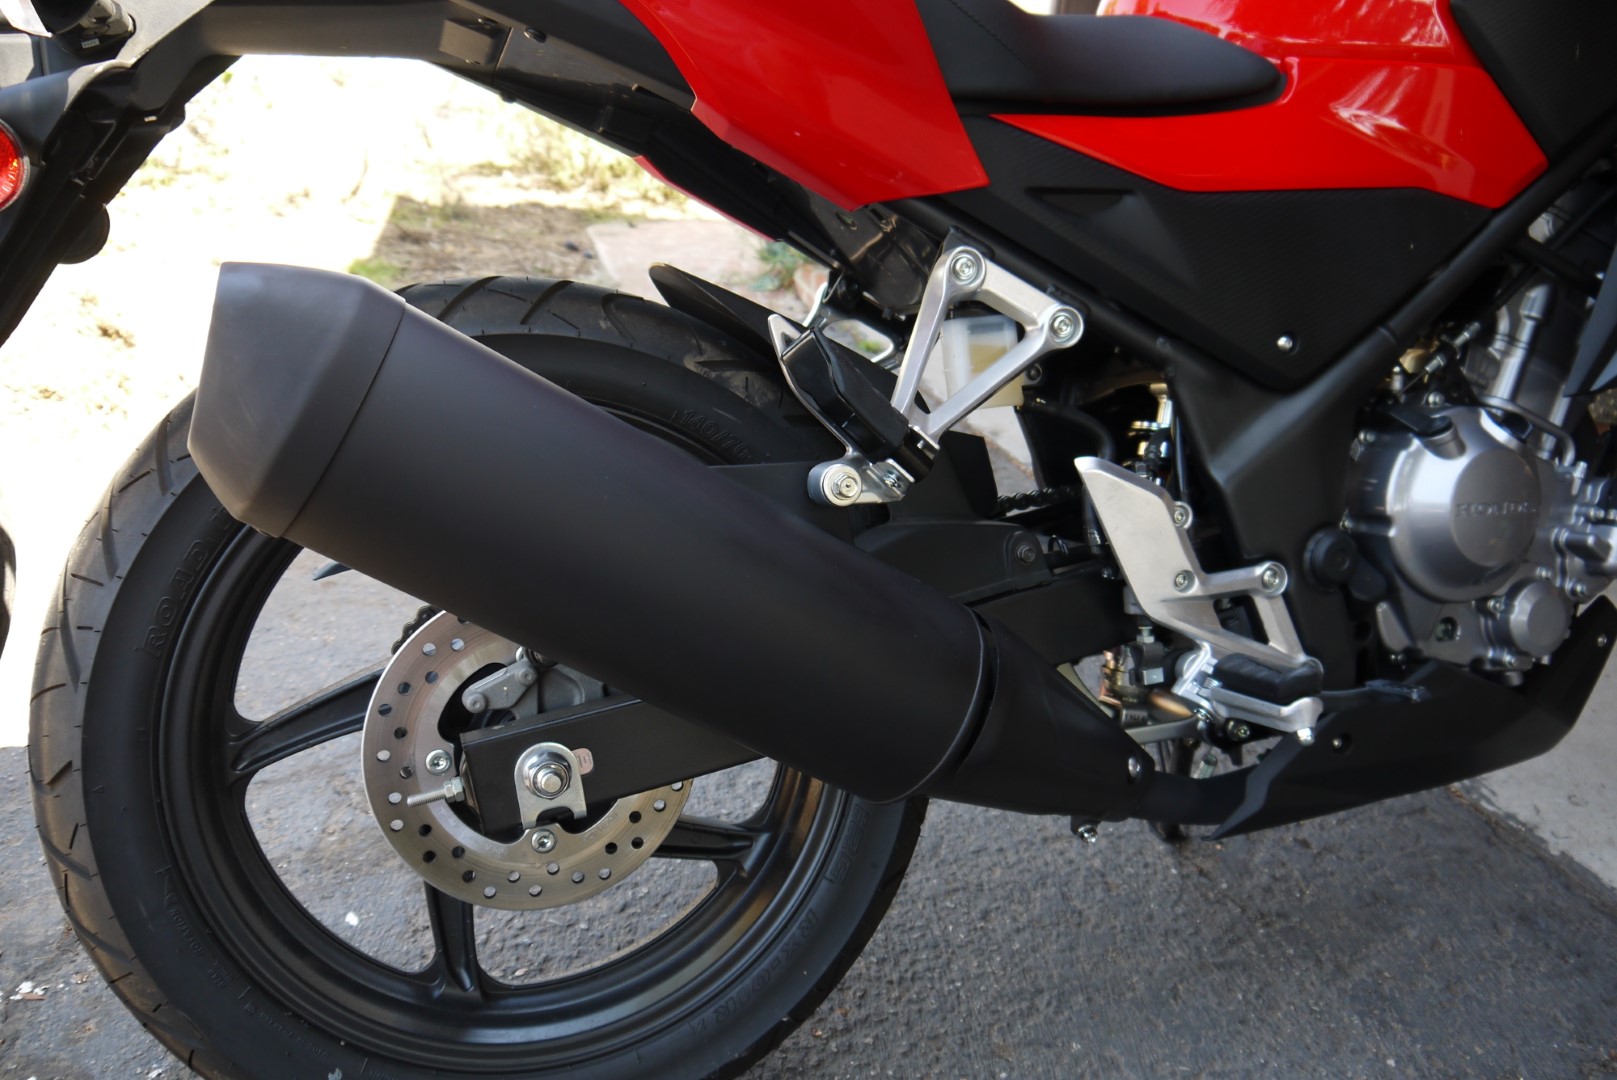
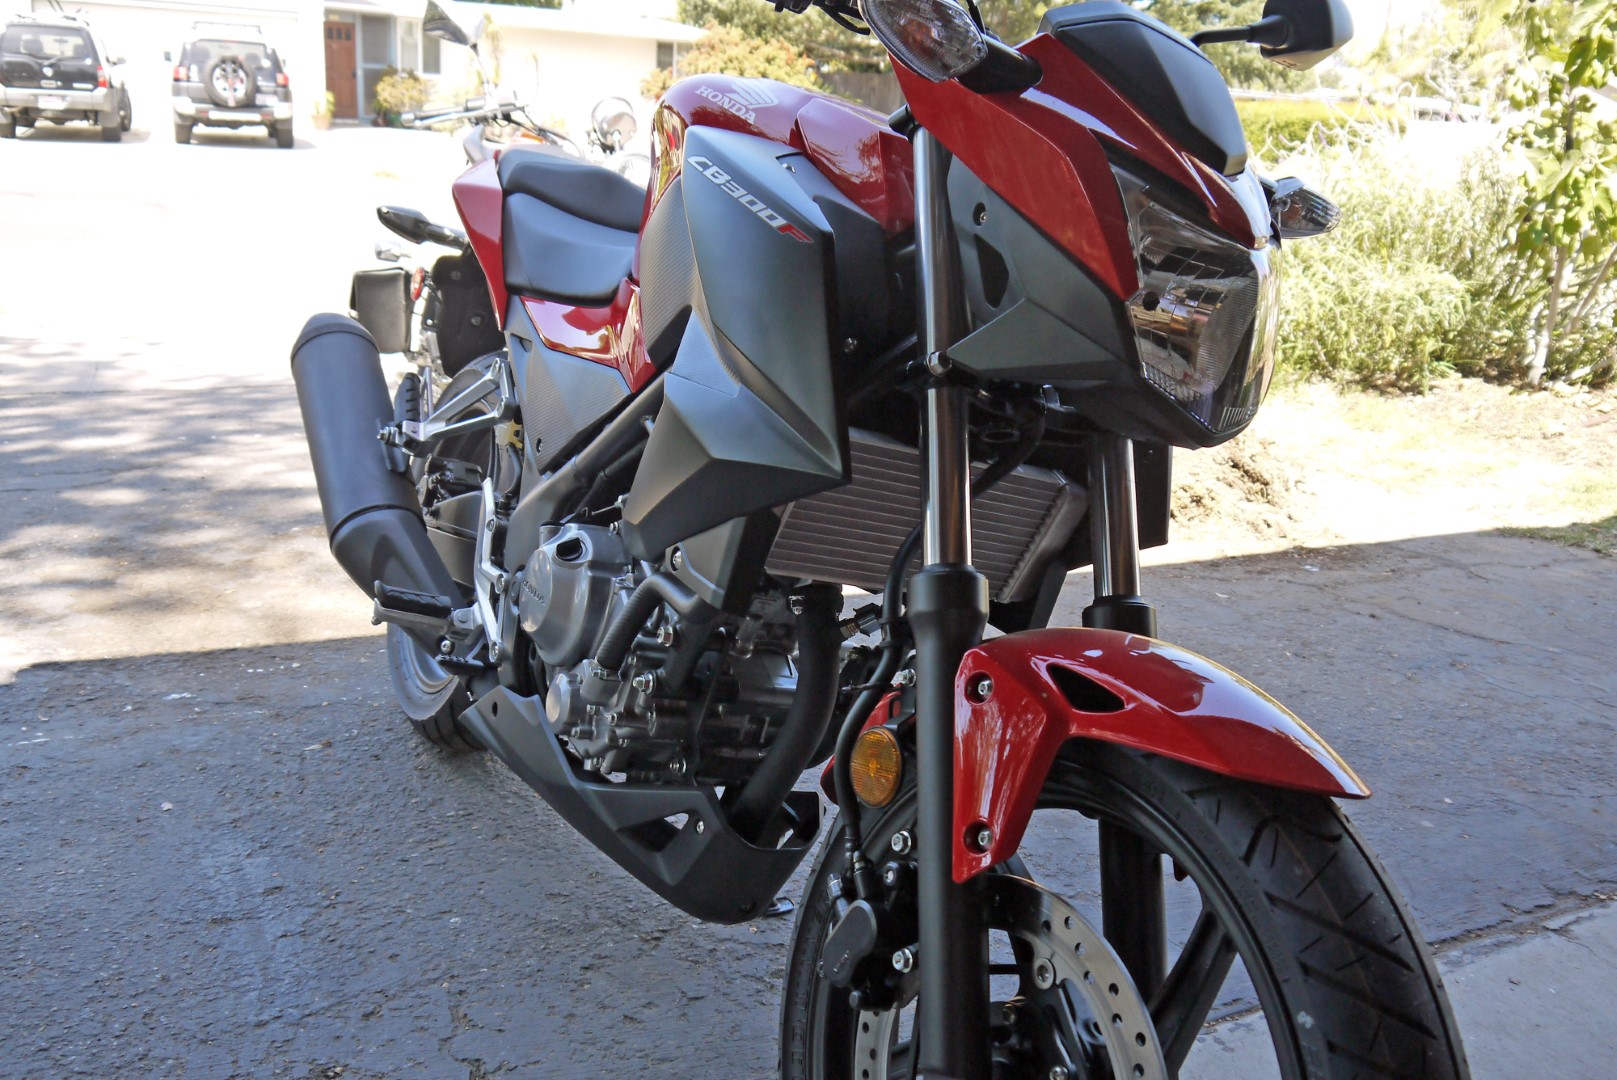
I am not a fan of chrome, especially on cars and motorcycles. I like a blacked out look, either glossy or matte. A matte black muffler is just what I want on my bike. I decided to paint the muffler on my new Honda CB300F, and share my experience with you. The process should be the same for the Honda CBR300R and similar for any motorcycle.
YouTube Video Tutorial
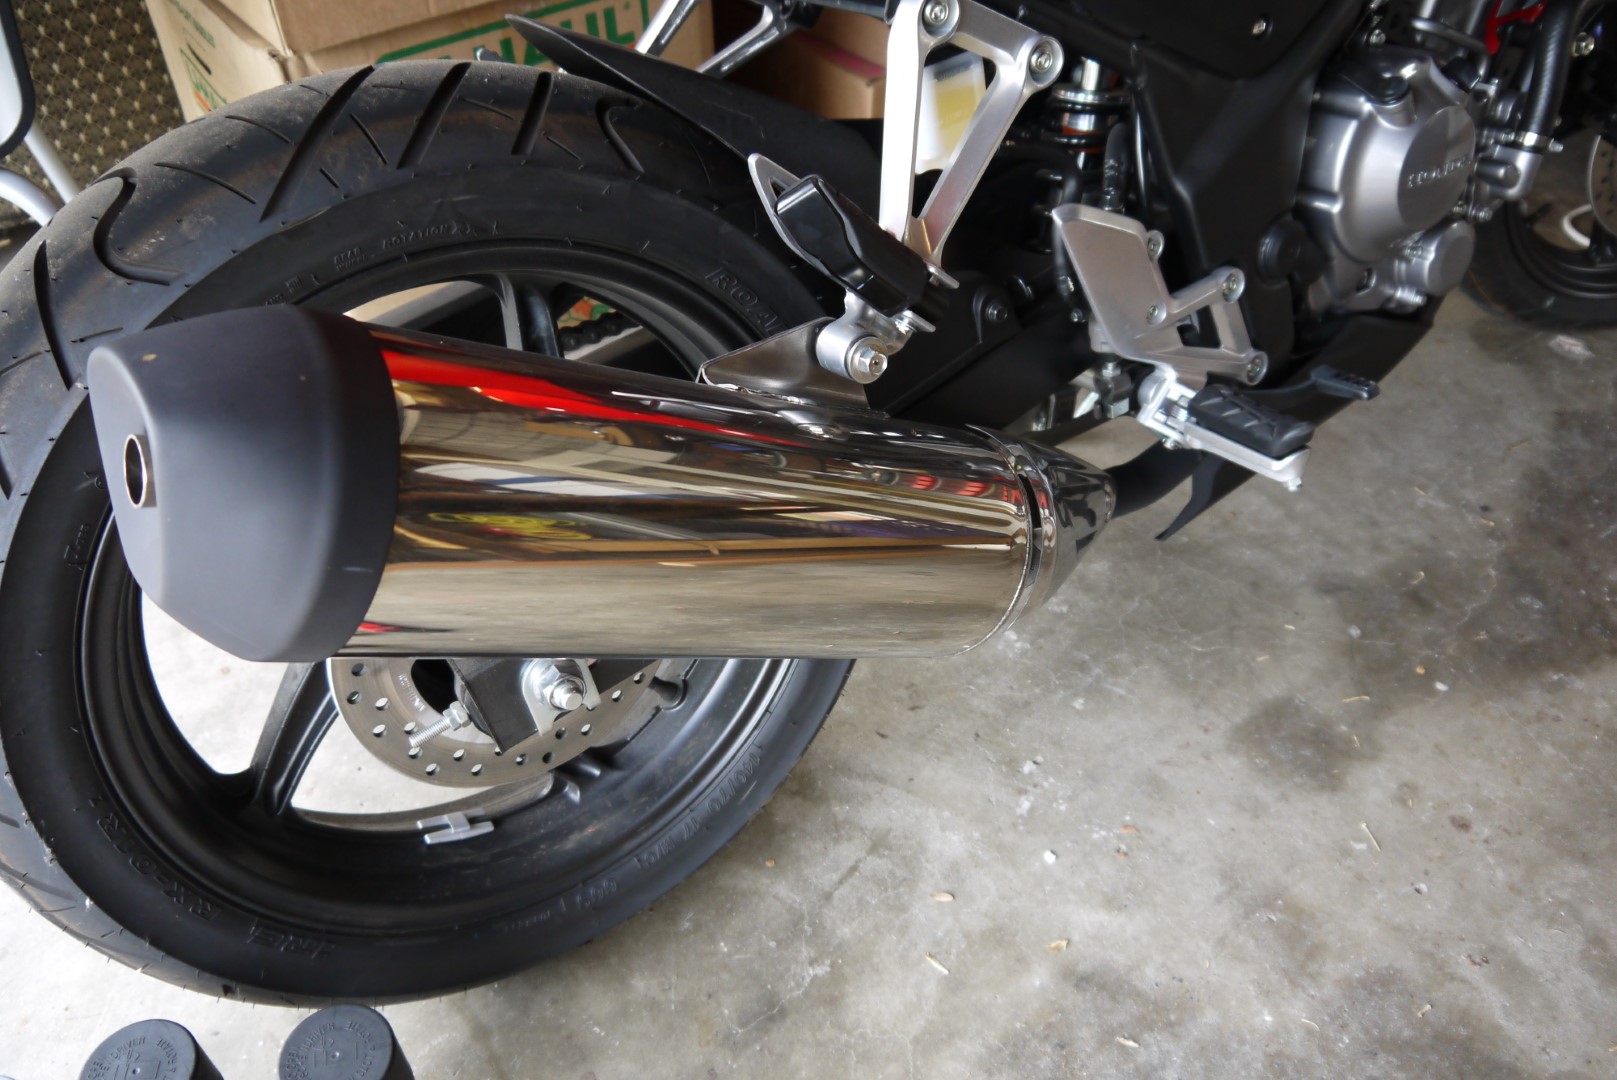
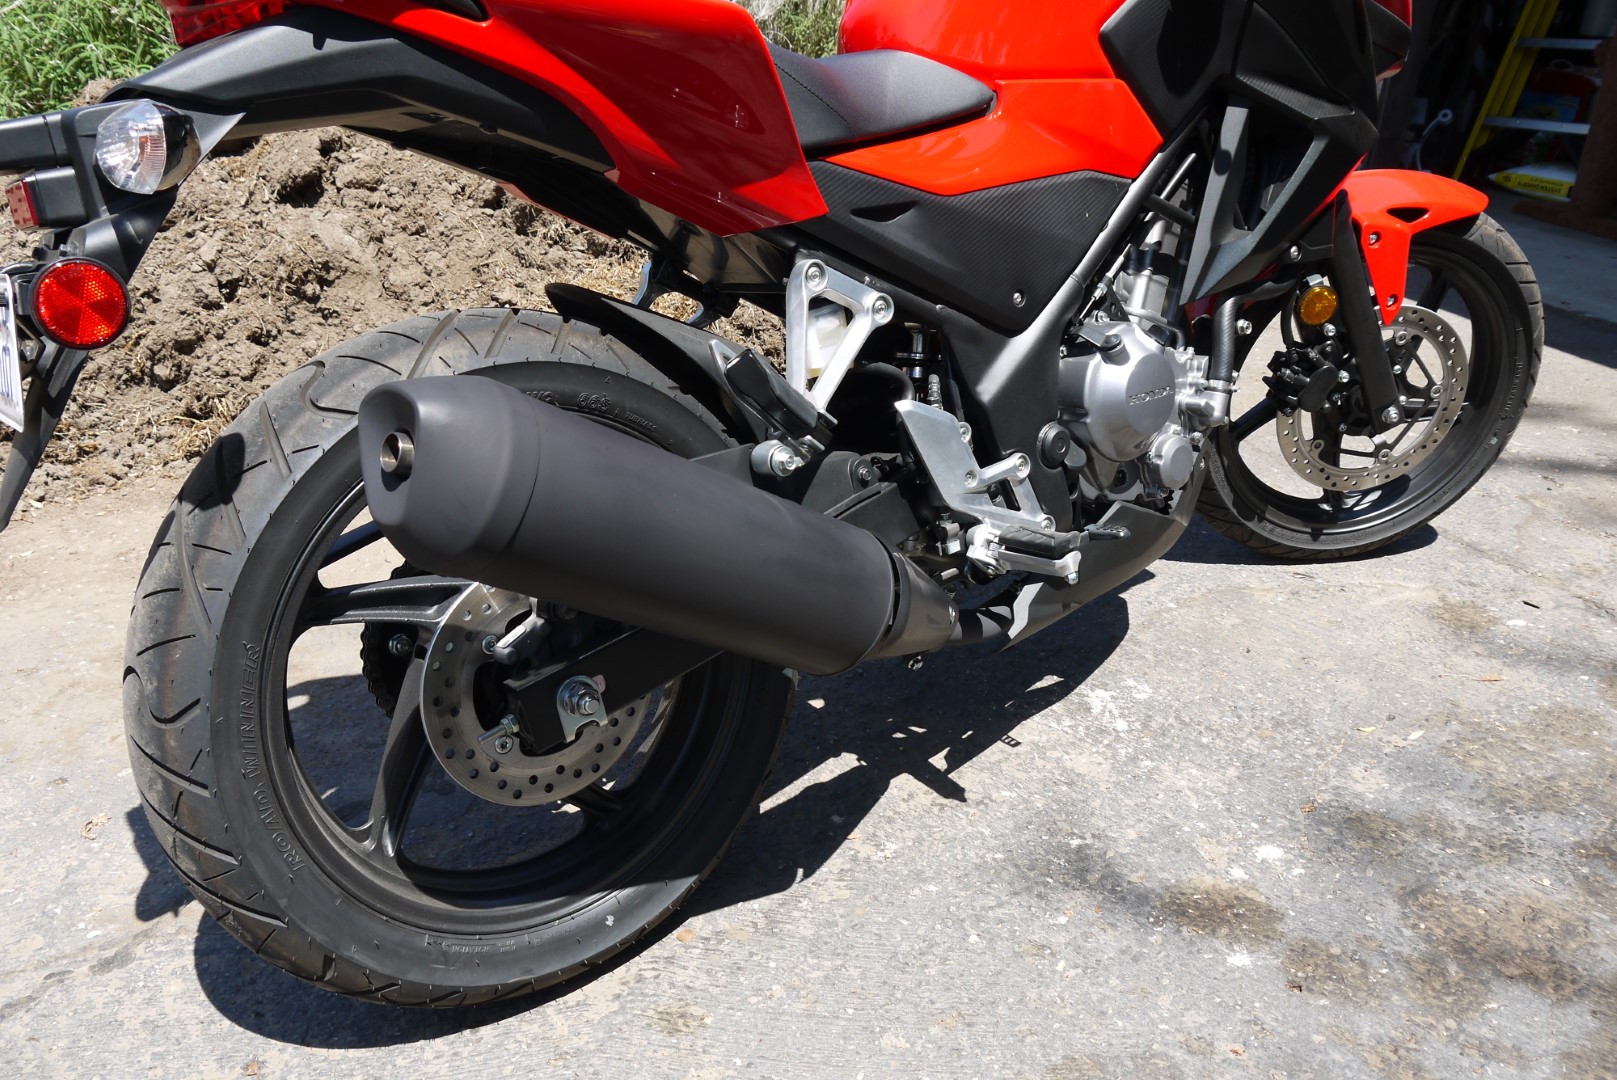
Before and After
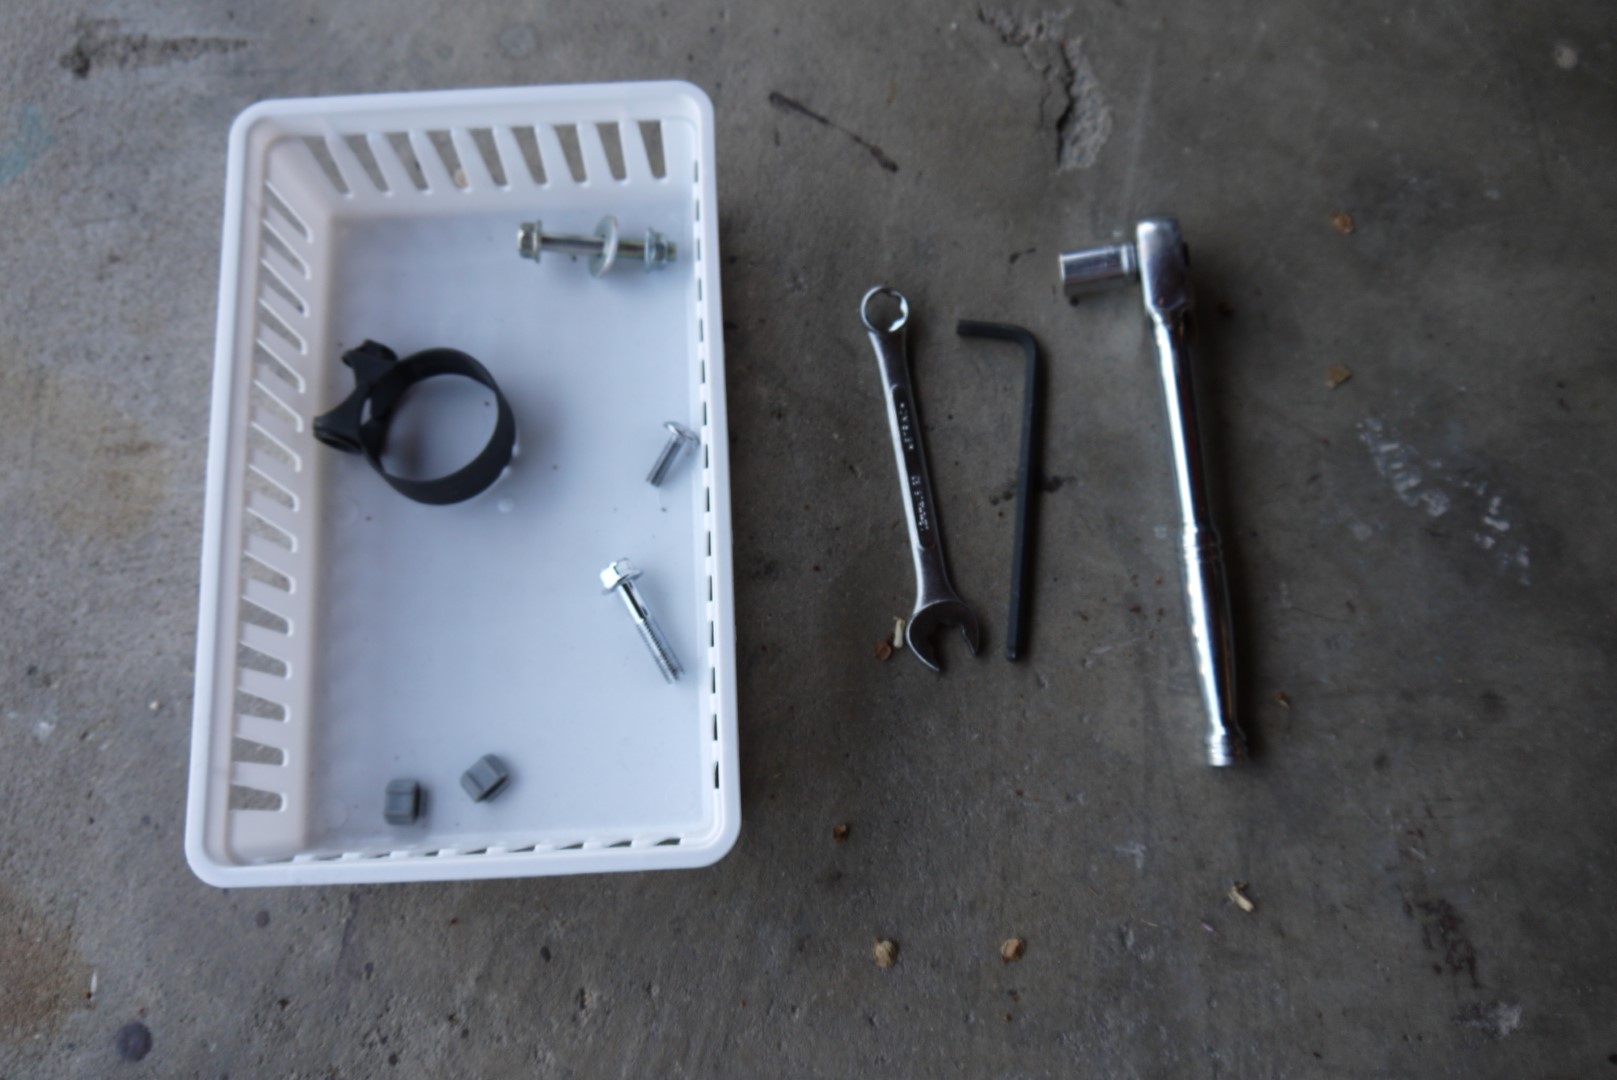
Tools and Materials
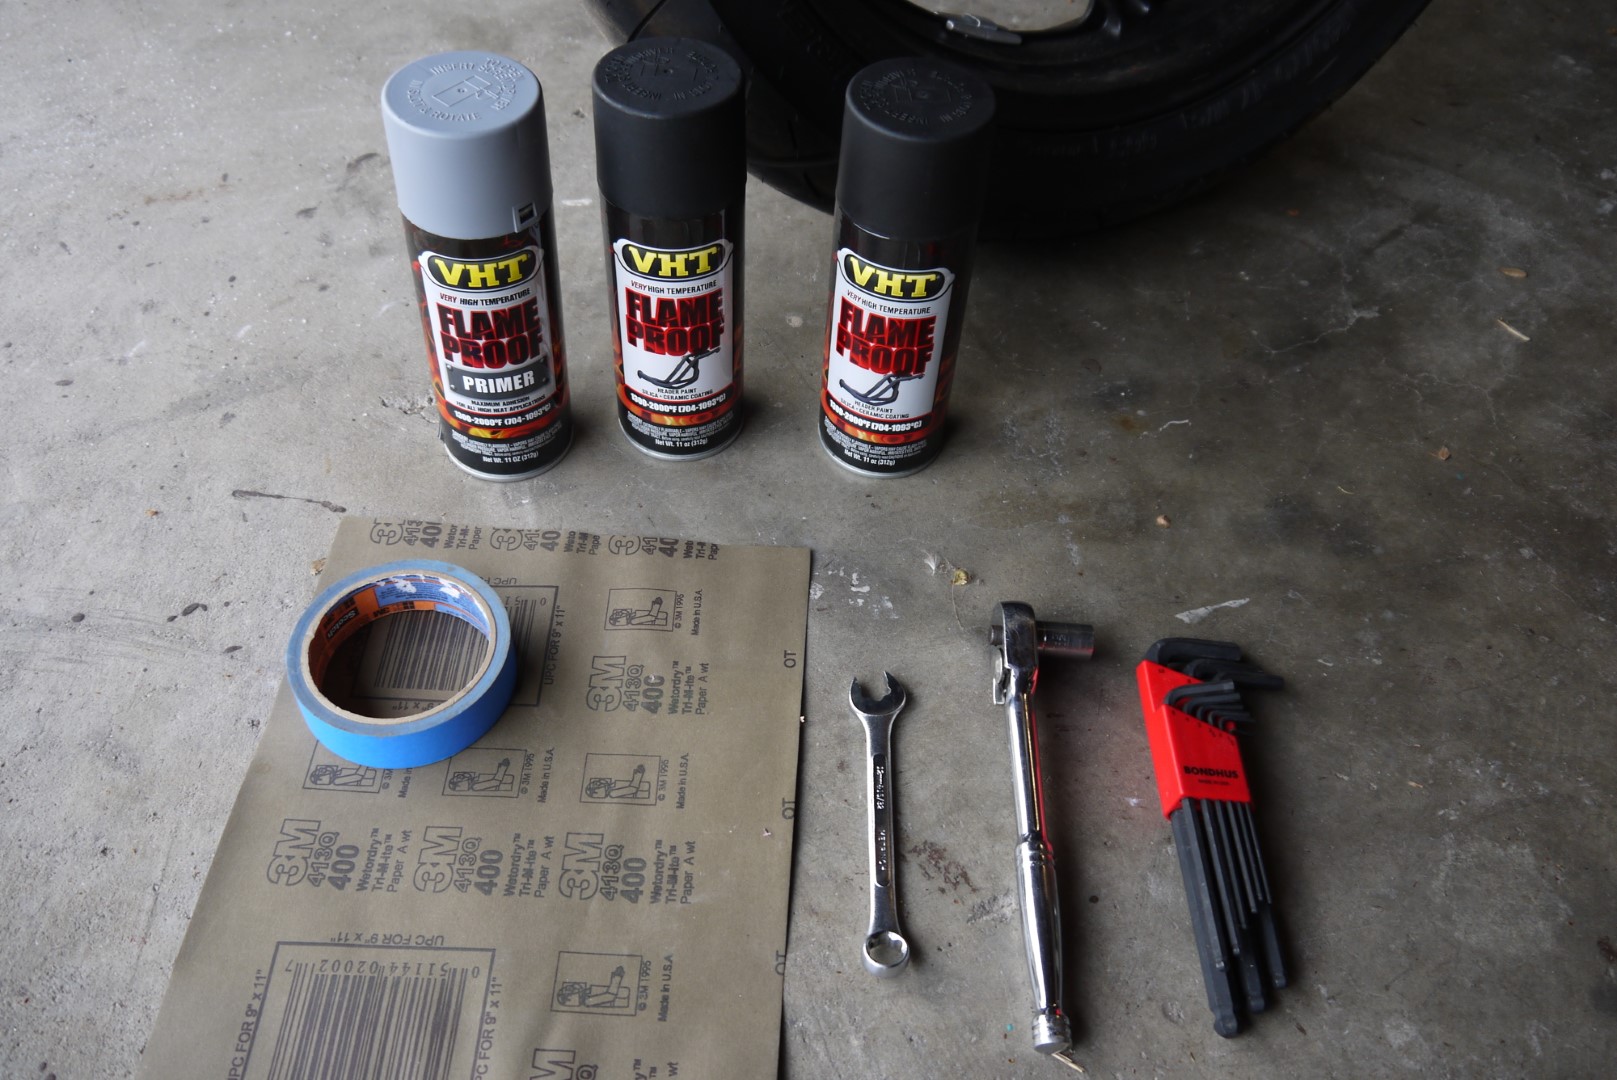
- 12mm socket and wrench.
- 5mm Hex wrench.
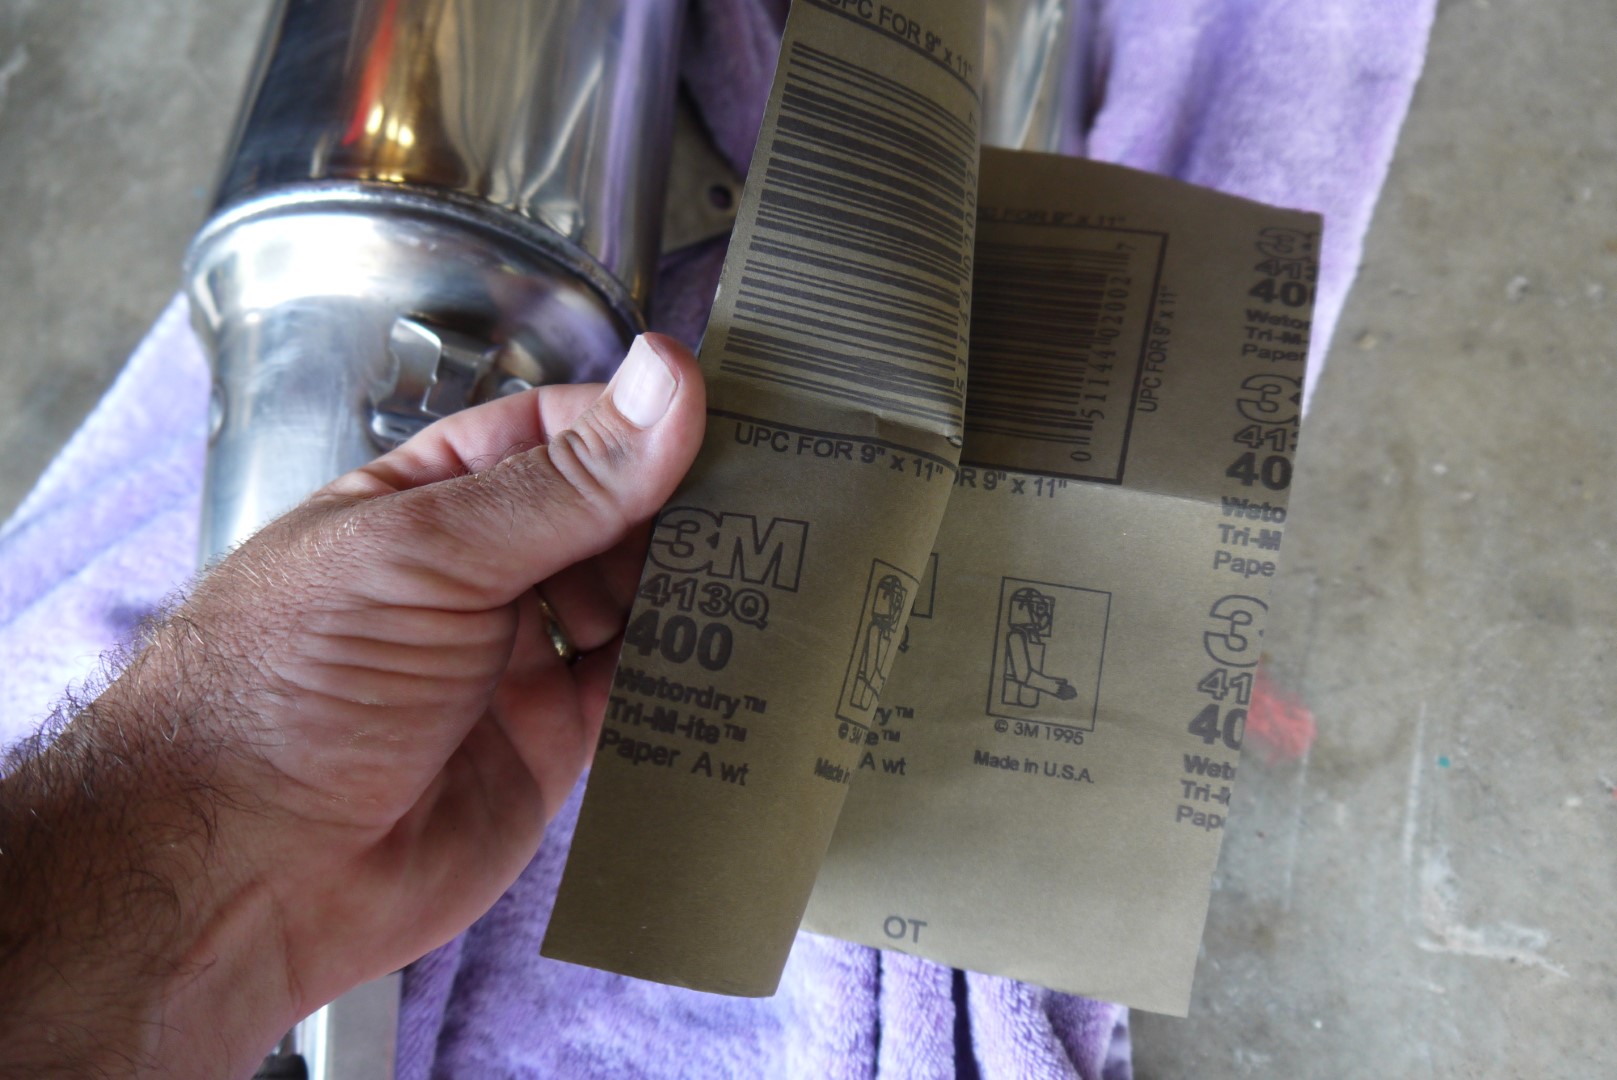
- High grit sandpaper. I used 400.
- Towels, soap, bucket, water, and washcloth.
- Wire, chain, rope, something to hang the muffler while painting. I used a chain and an S hook.
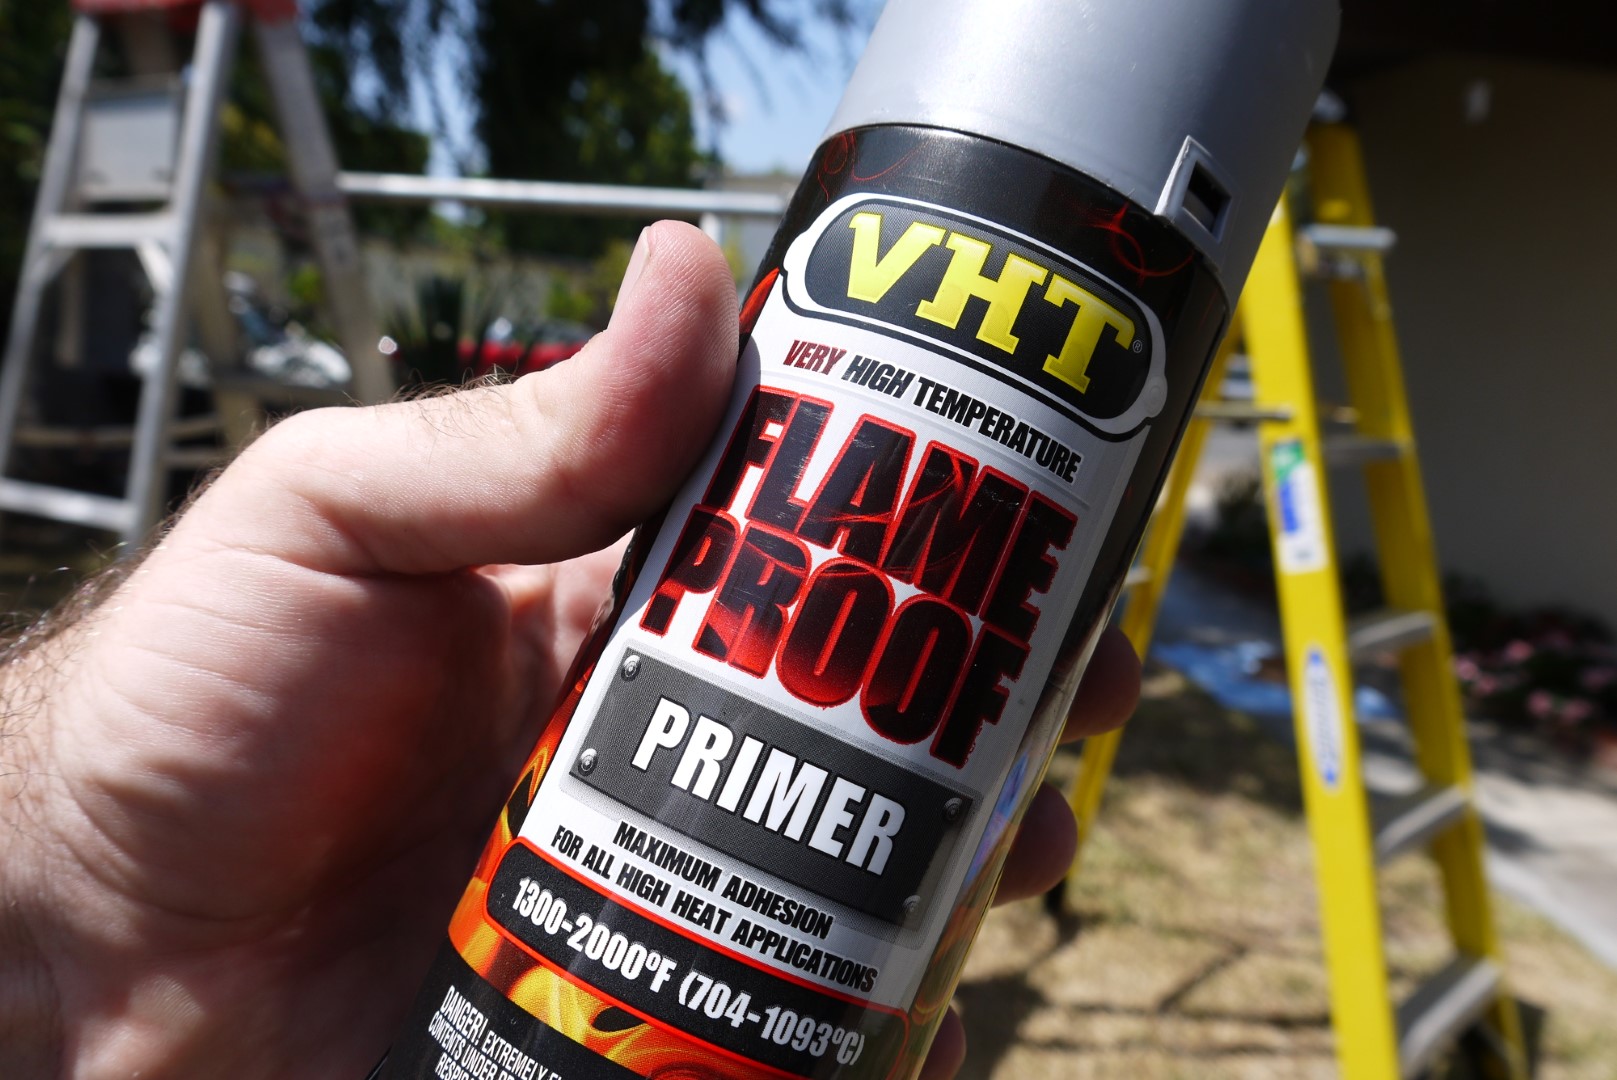
- 1 spray can of high temperature primer.
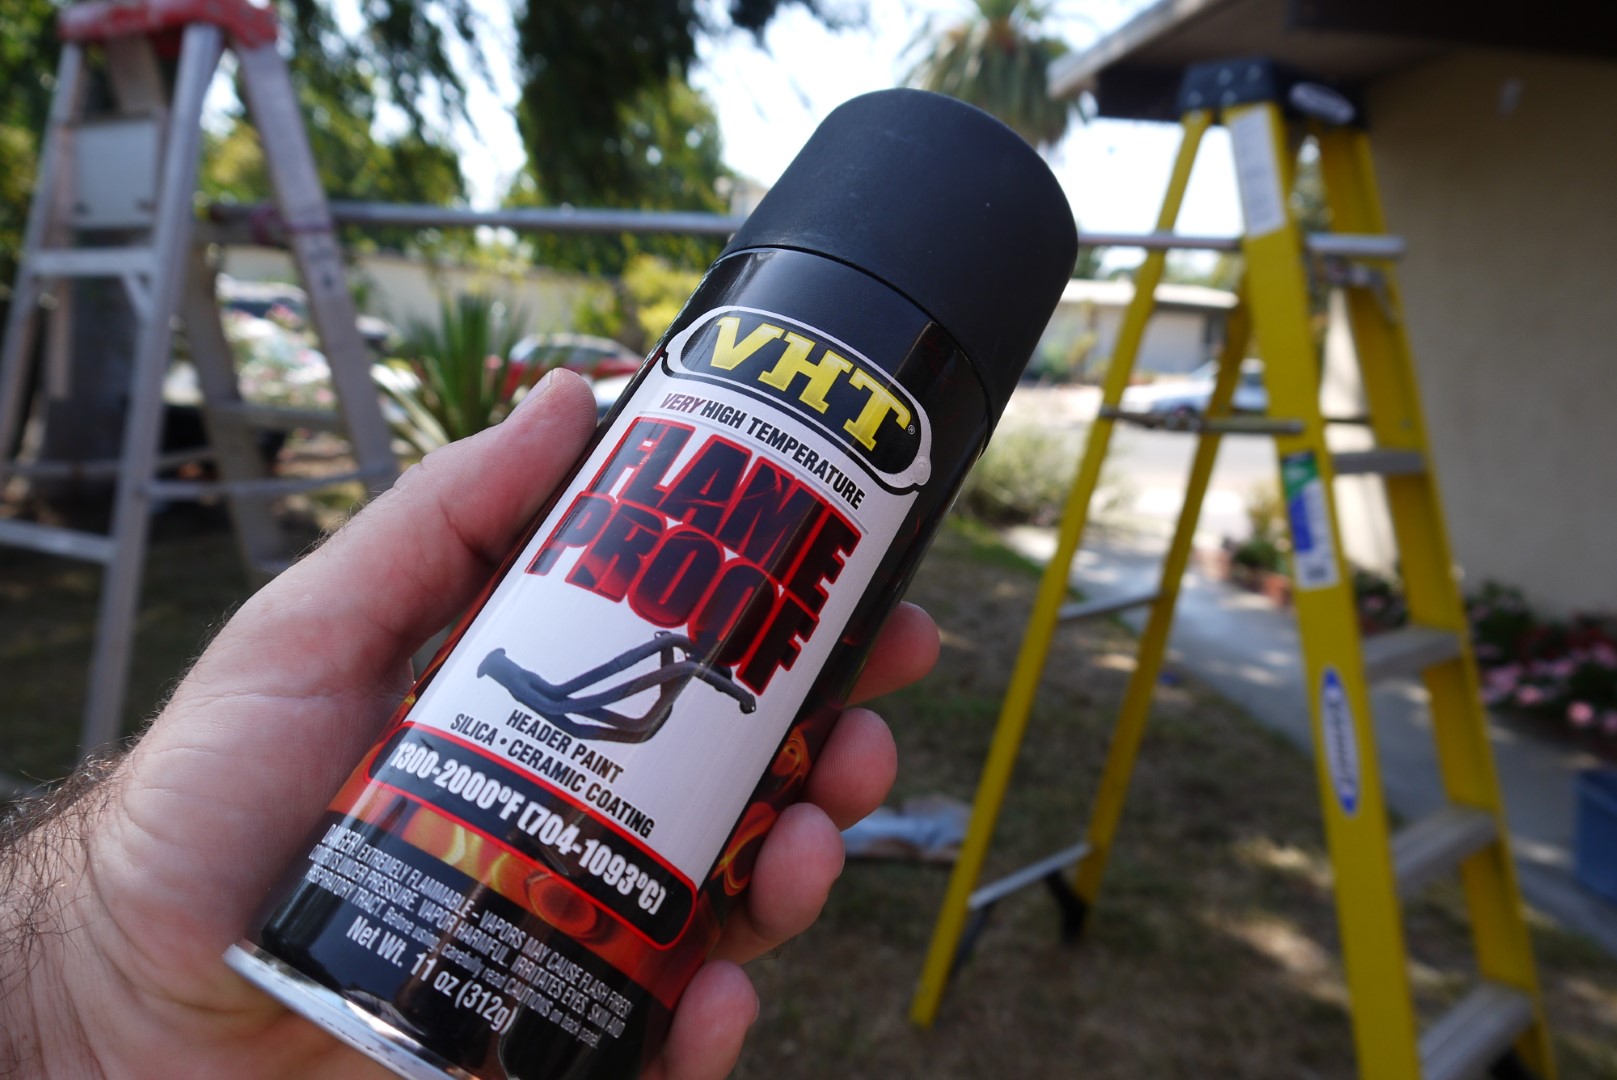
- 1 spray can of high temperature paint.
- Masking tape, cardboard, paper bag or other material to protect from paint overspray.
- Time.
You need plenty of time. You really need to allow for the drying times between coats. Projects always takes twice as long as you think. My suggestion is to start early in the day and give yourself a full weekend. I started early on Saturday and finished up on Sunday.
Tips
The overall steps are: Removal, sanding, washing, drying, masking, hanging, priming, painting, drying, installing, curing.
Find a time when you will not need the motorcycle for a few days. I started my project on Saturday morning so I had two full days to work on it. I worked on other chores around the house during the dry times. The painting and curing times, are very time sensitive. You must complete them in an orderly fashion for best results.
Get a container to hold removed parts. I have learned the hard way that it is not good to just toss the parts on the floor or workbench somewhere.
Take your time, stay relaxed. Plan everything out. Things might go wrong, don’t make them worse by freaking out. I took several weeks to research and plan this project, and found the exact right time to do it.
Clean up as you go. When you are done with a tool, put it away, get it out of your way. That way you can focus on the task at hand. Bonus, when you are done, you don’t have a pile of junk to deal with.
Remove Muffler
Make sure your motorcycle is cool. I last drove mine on Friday evening, so it was stone cold by Saturday morning.
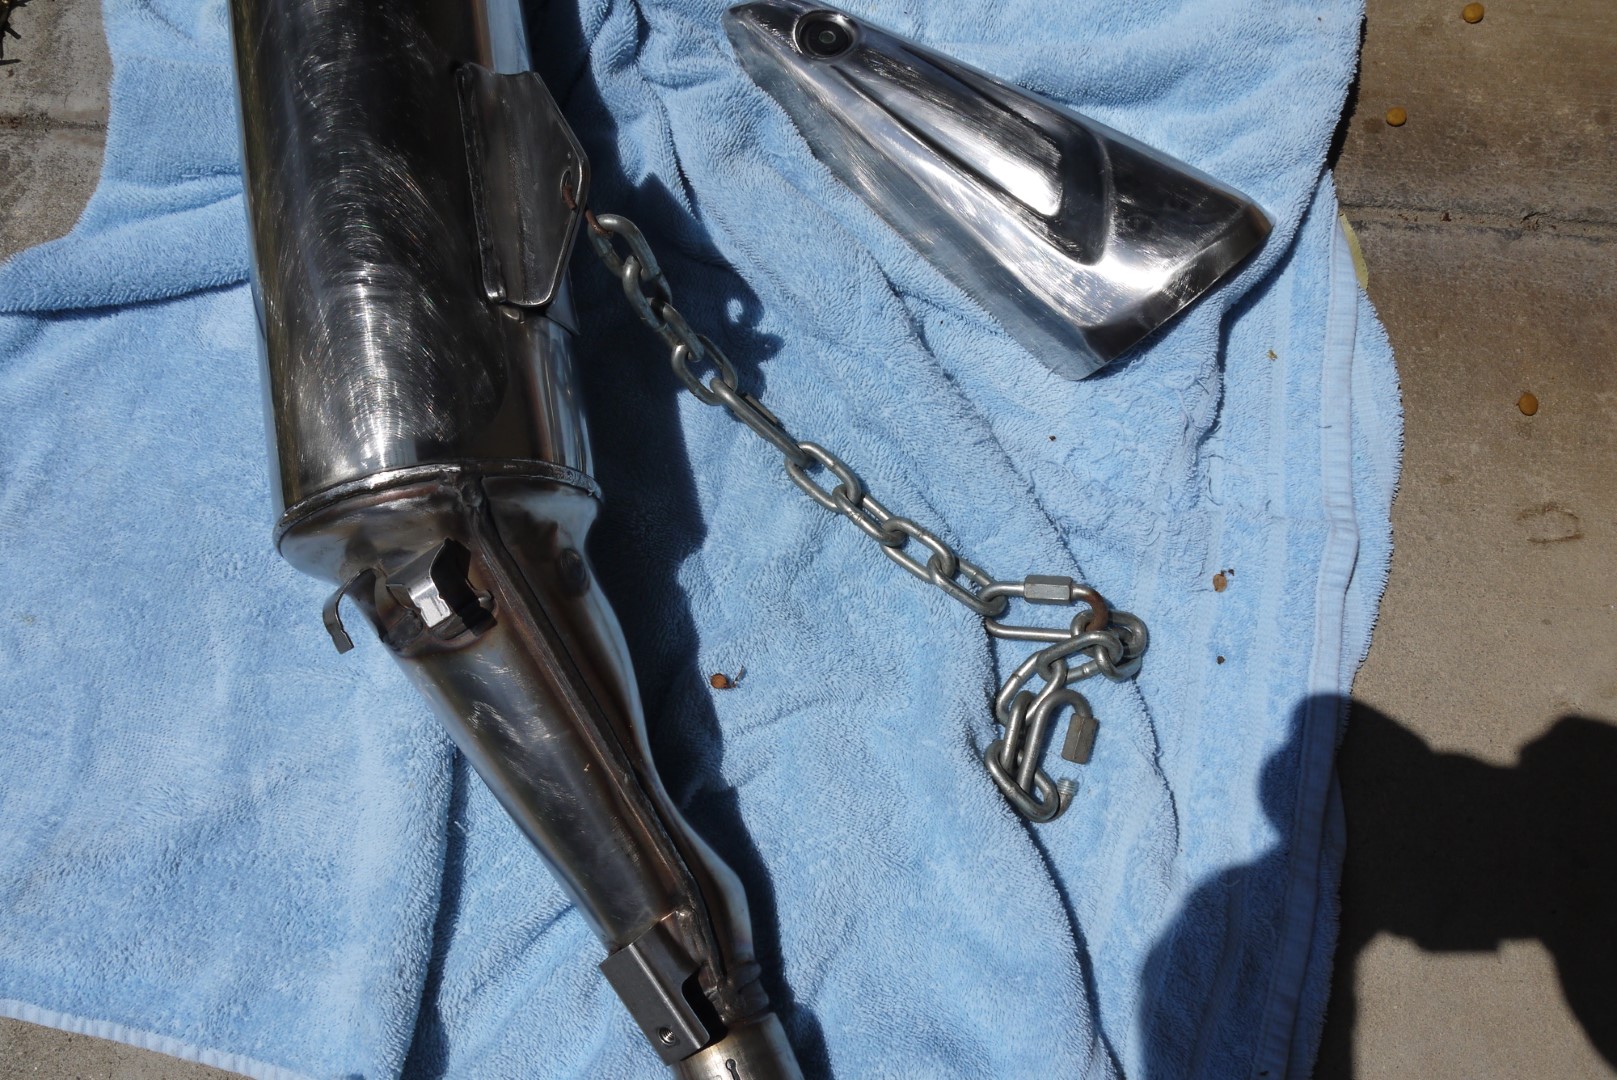
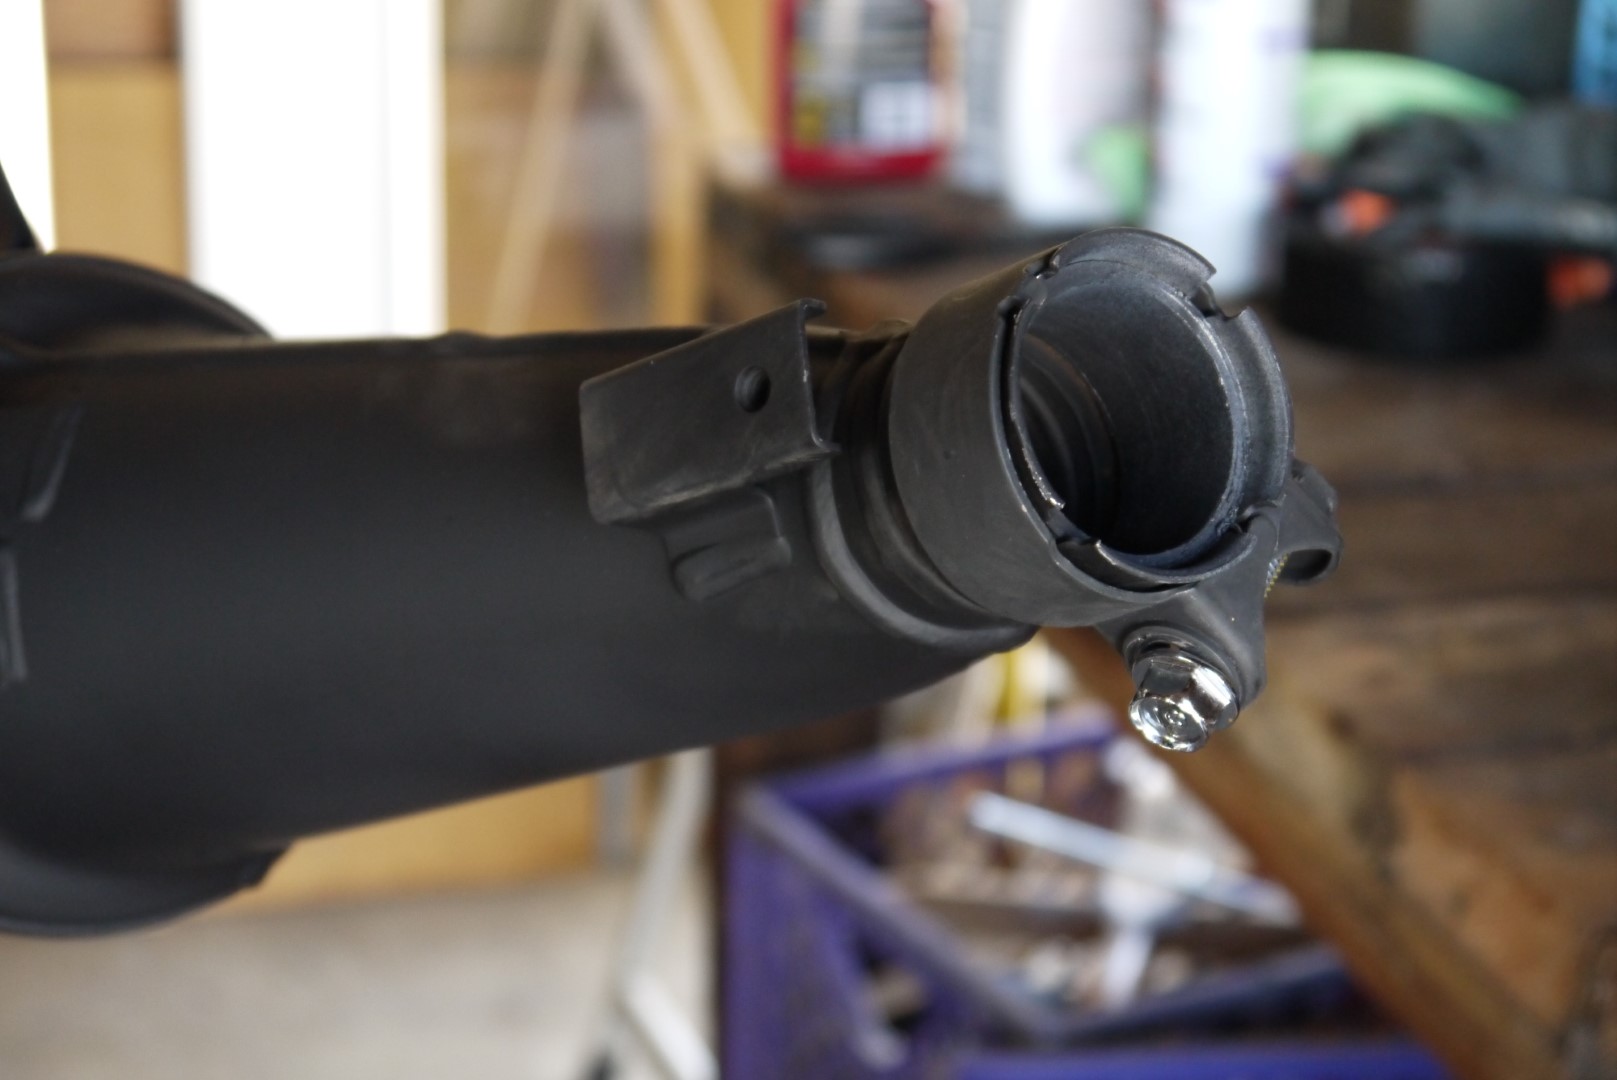
There is a 12mm bolt and nut on top of muffler. Remove this and keep in a safe place. keep track of the washer too.
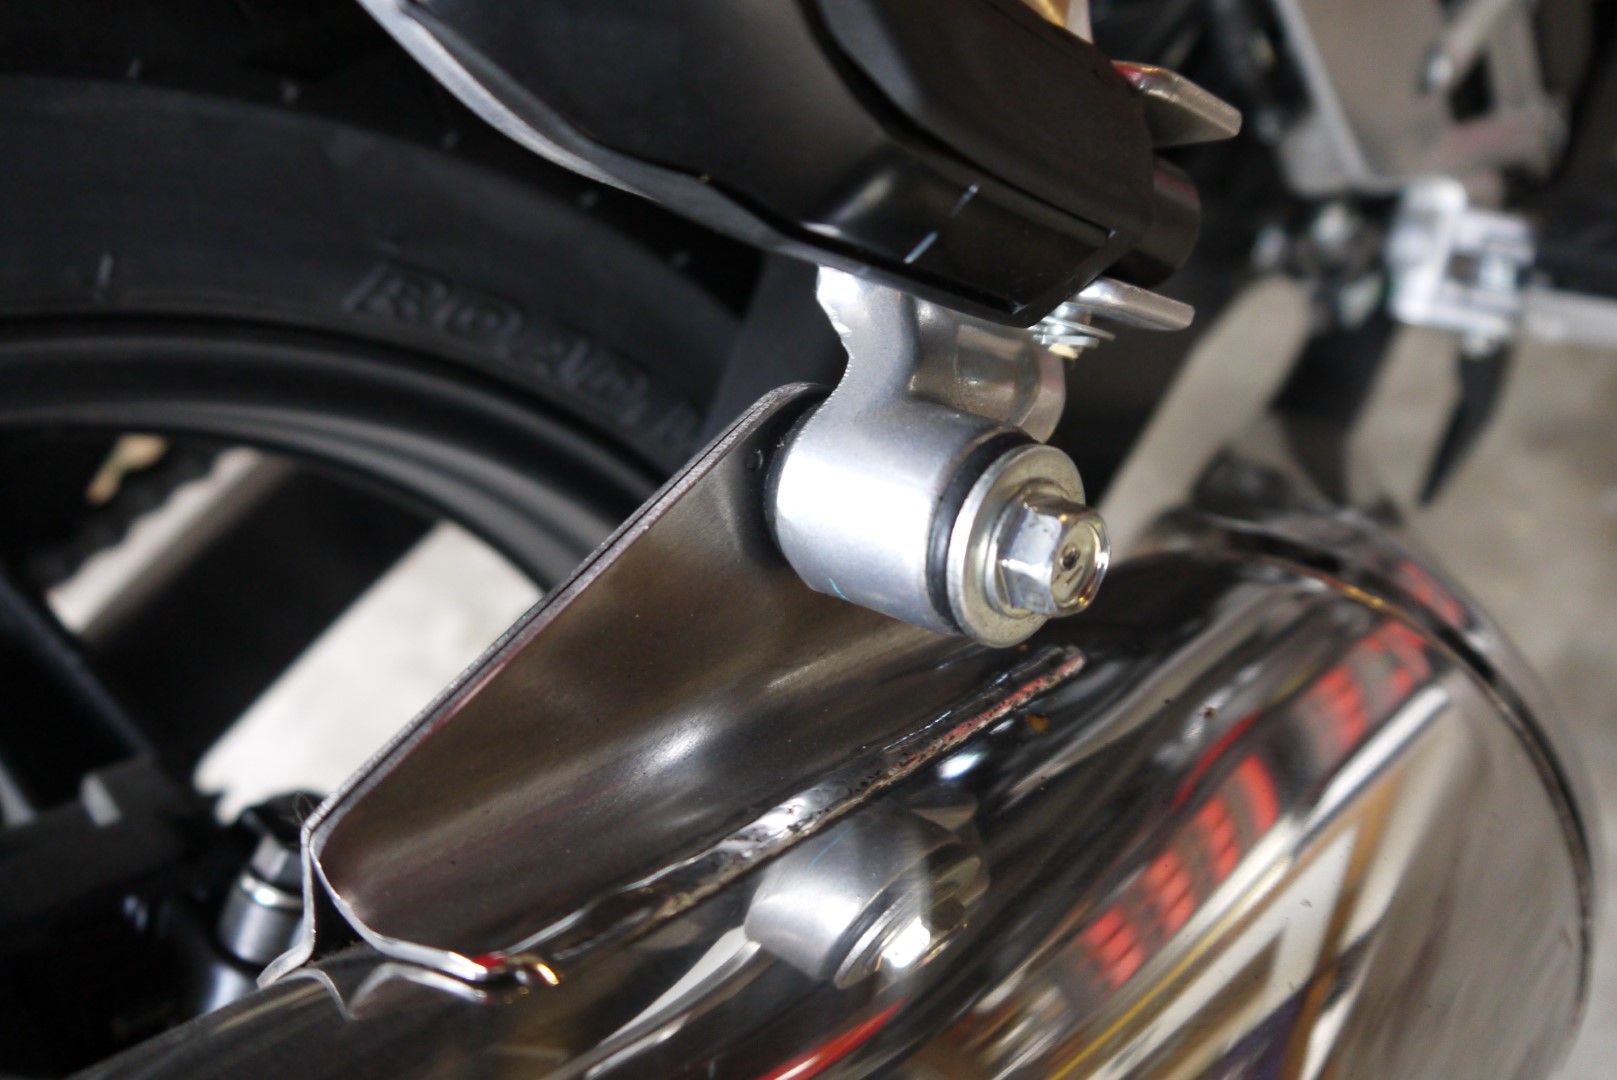
There is a 12mm bolt where muffler attaches to exhaust pipe. This is a compression ring with the nut built in. Just loosen it, the ring will stay on for now.
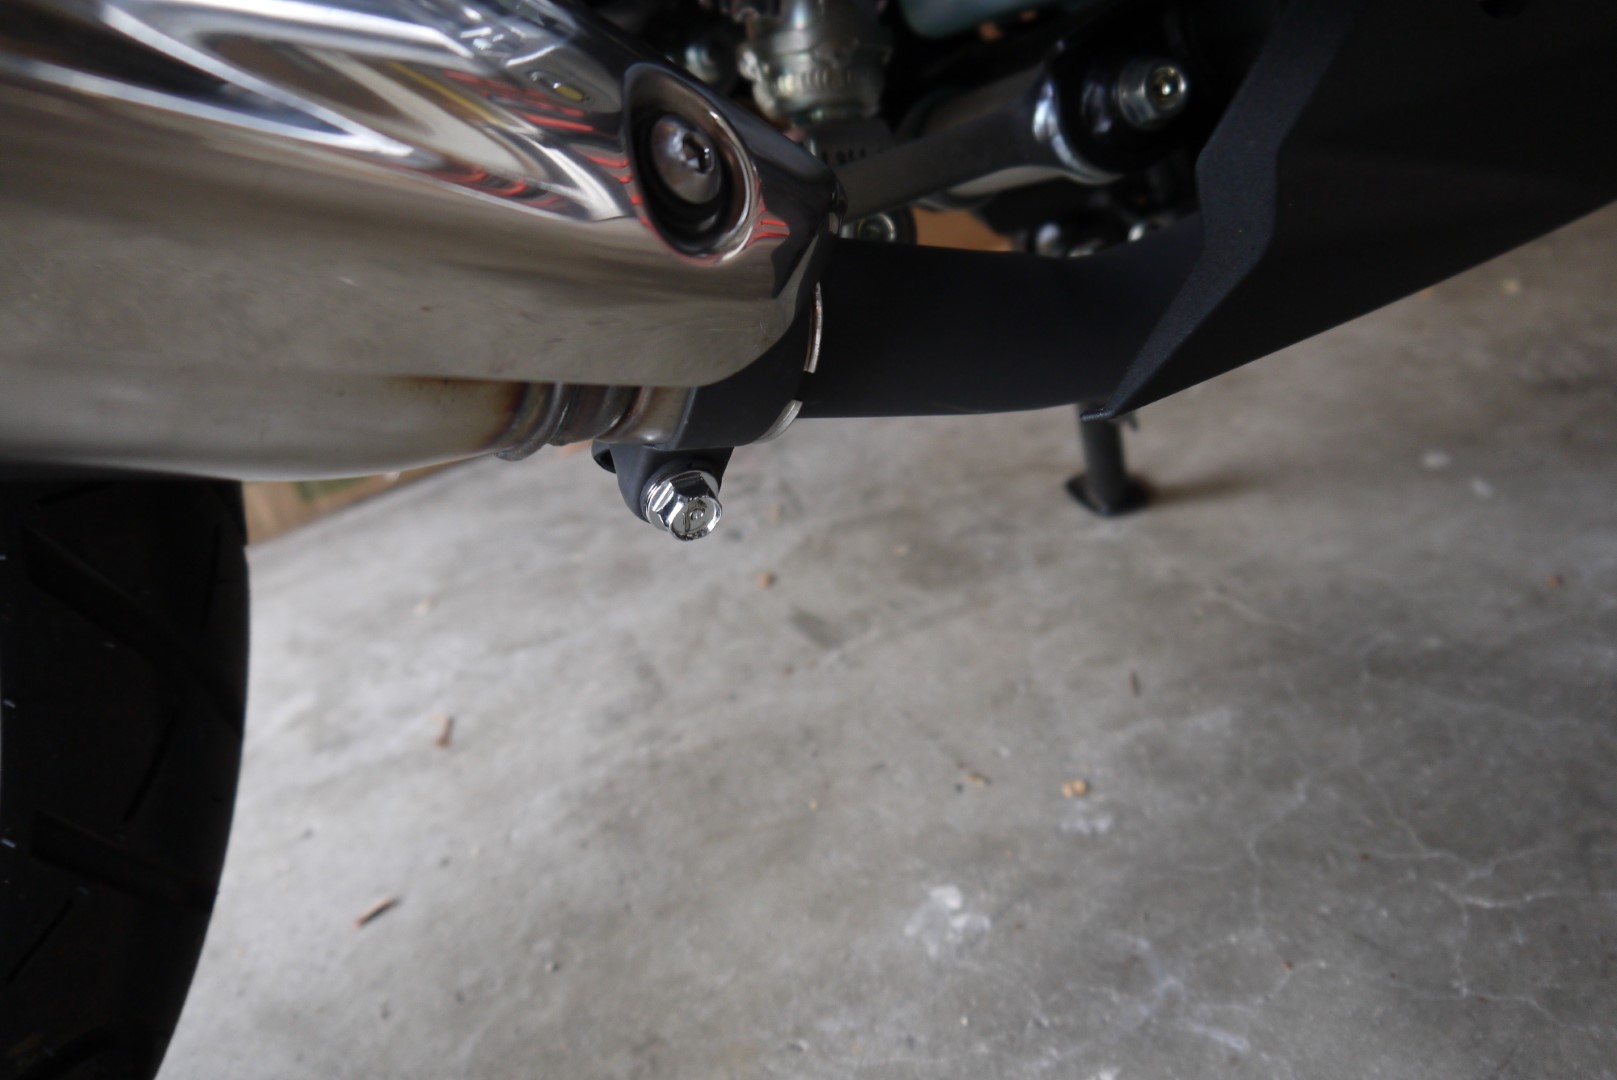
Now grab the muffler in two places and twist back and forth and gently pulling off the exhaust pipe. Back and forth an inch or two and it will come off in a few seconds.
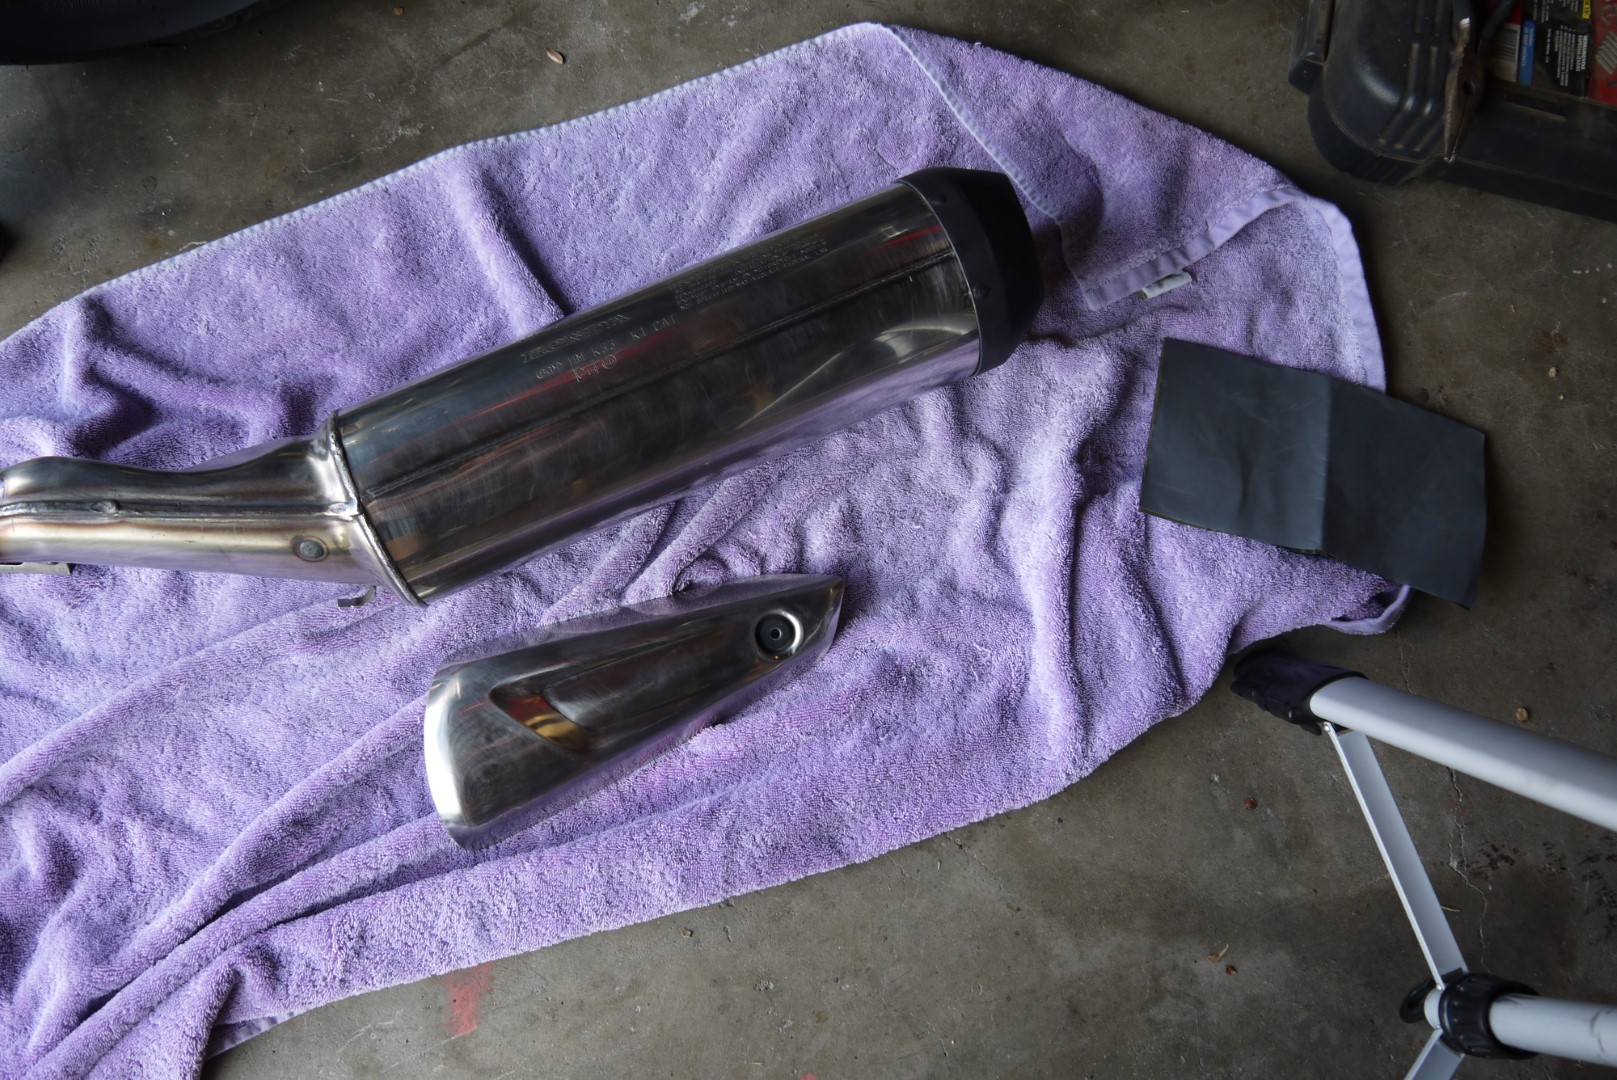
Place the muffler on the ground, maybe on a old towel or something.
I then removed the bolt from the compression ring and removed the ring from the muffler. I put both these parts in a safe place.
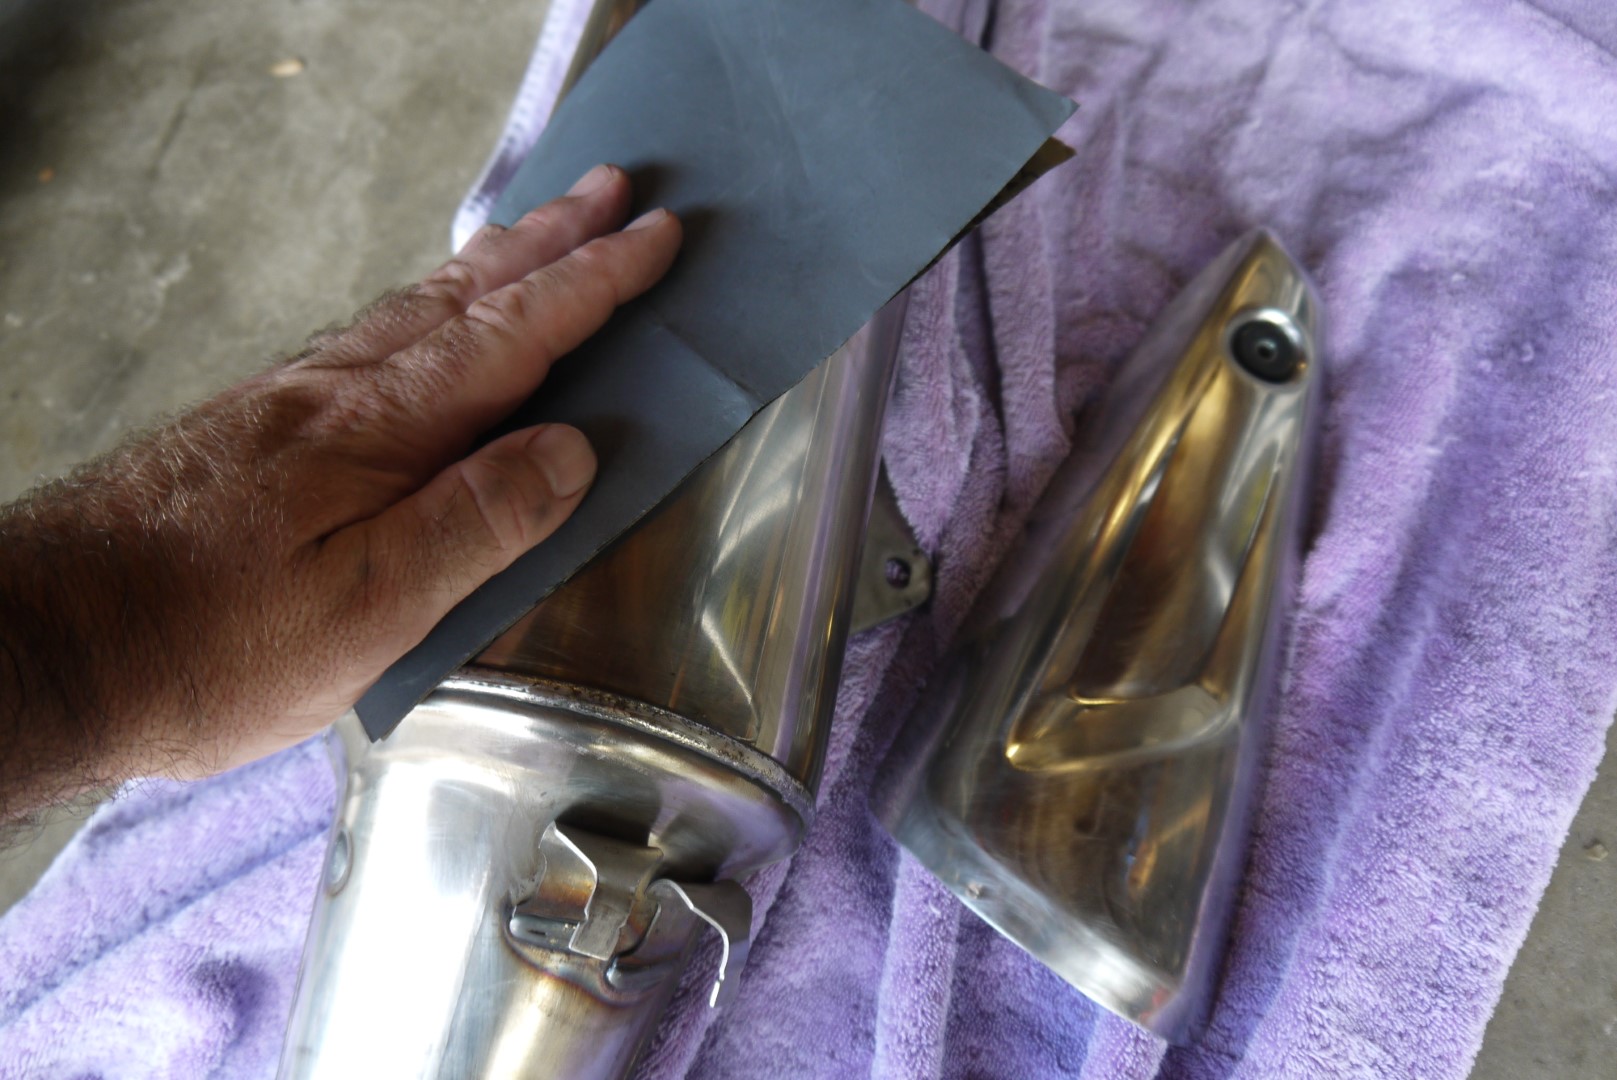
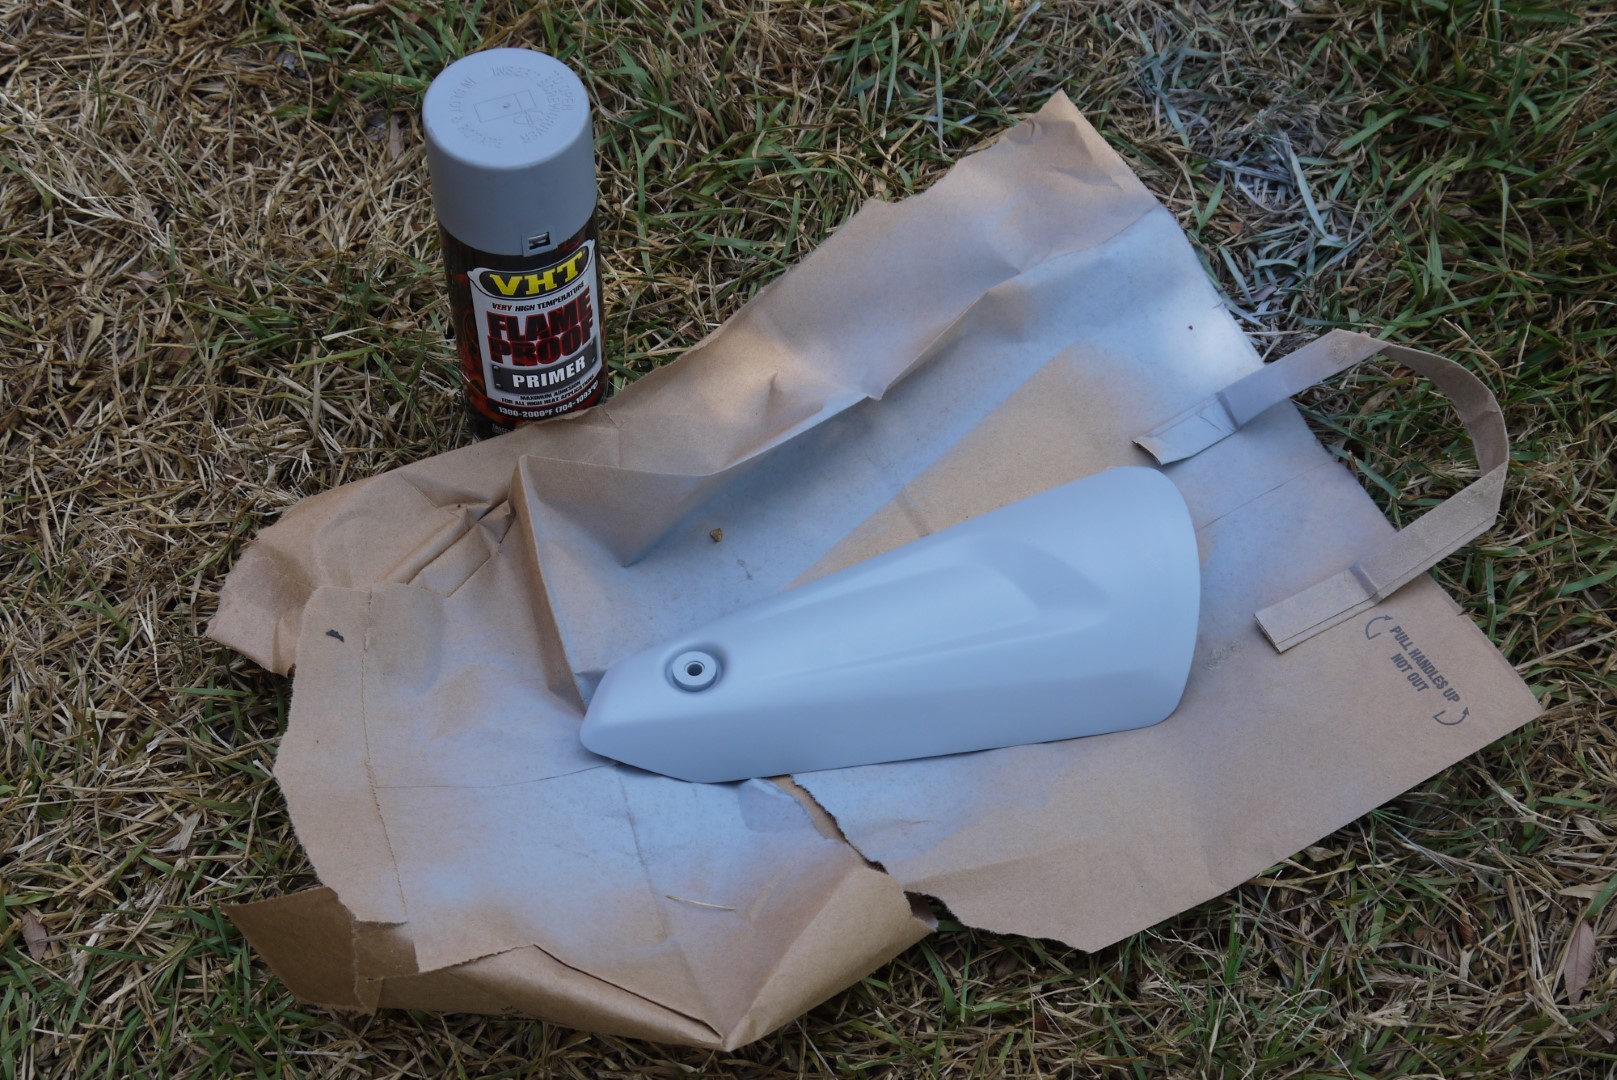
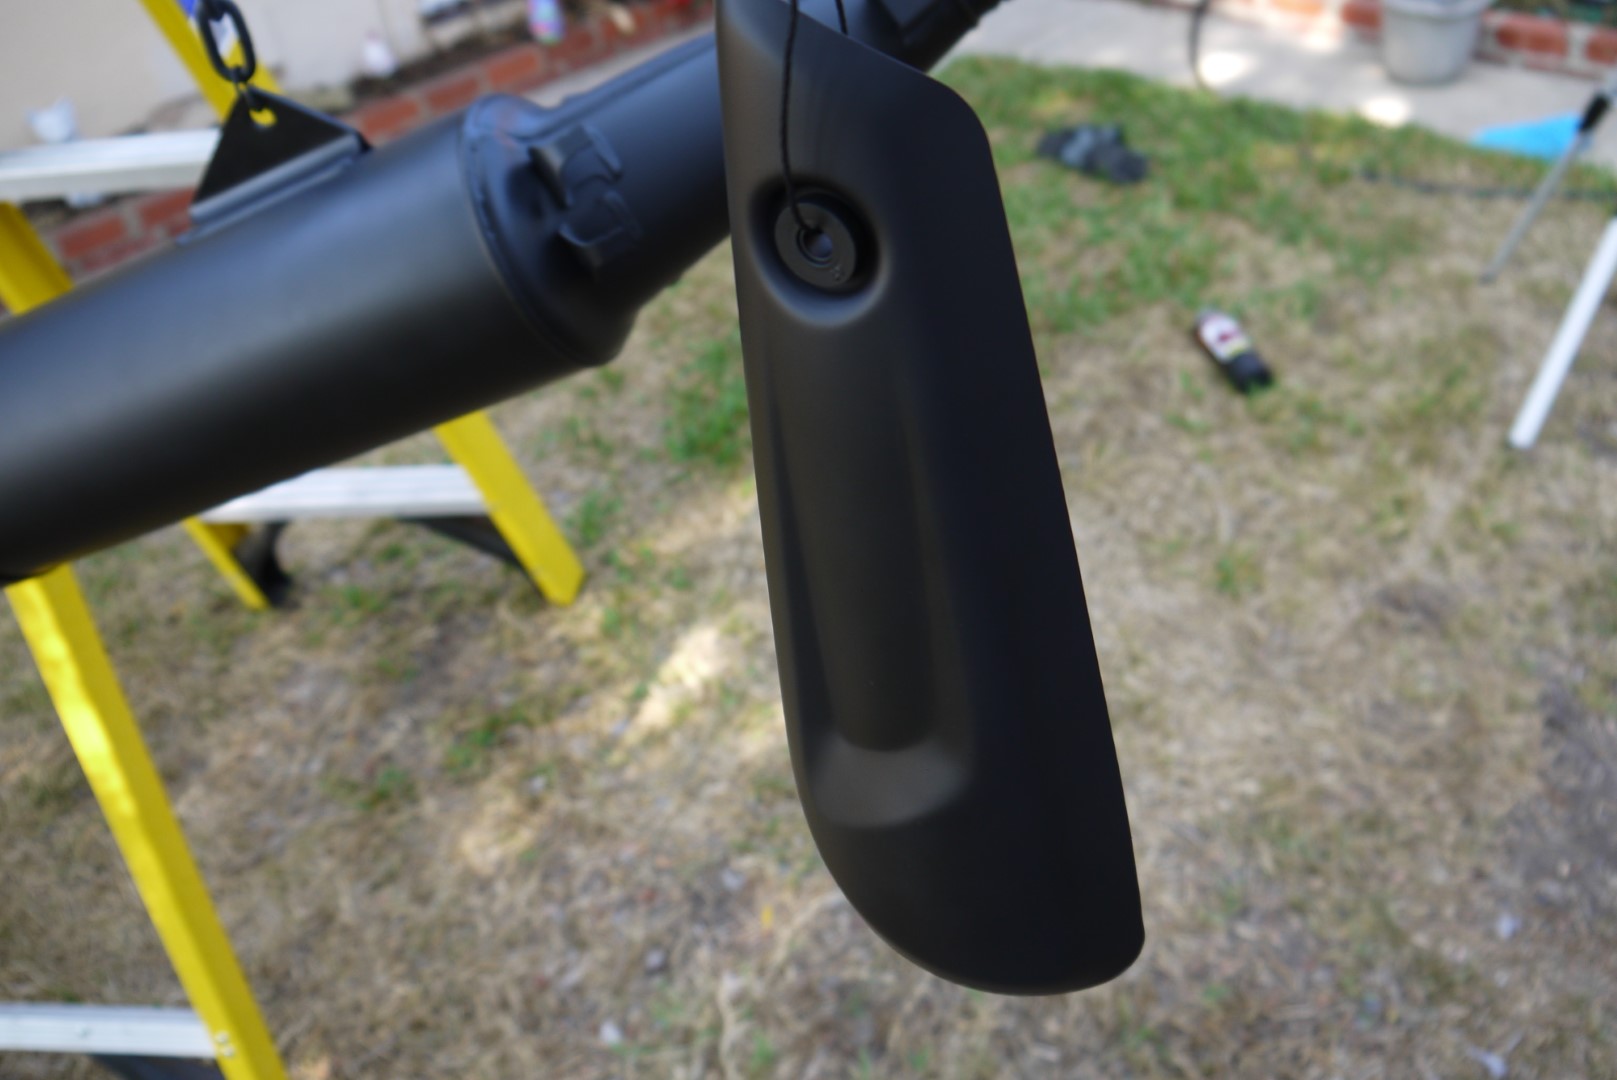
Remove Heat Shield
Remove the 5mm hex bolt from the heat shield Keep in a safe place.
You can’t see them, but on the wider side away from where you removed the bolt is two prongs inserted into silicon sleeves. Do not bend the plate up away from the muffler. Slide and wiggle parallel to the muffler then towards the front to slip the prongs out of the sleeves.
Remove the two silicon sleeves and keep in a safe place. I left the rubber washer where the bold was, It seems to be pretty well embedded and I’ll just paint over it.
Sand
Use a high grit sandpaper. I used 400 grit and lightly scuff up the chrome surfaces. Be careful not to make any deep scratches as they may show up in the final product. Get all the cracks and crevices, especially near the back where the matte black end cap overlaps the chrome.
I spent about 10 minutes sanding. I just sat on the floor with it and rubbed it all over with the sandpaper. Do the heat shield too, get in around the washer. Your hands will be dirty after this. Go wash them.
Wash and Dry
I used dish soap and water in a bucket on the lawn. This should remove any oil, grease, metal dust, etc.
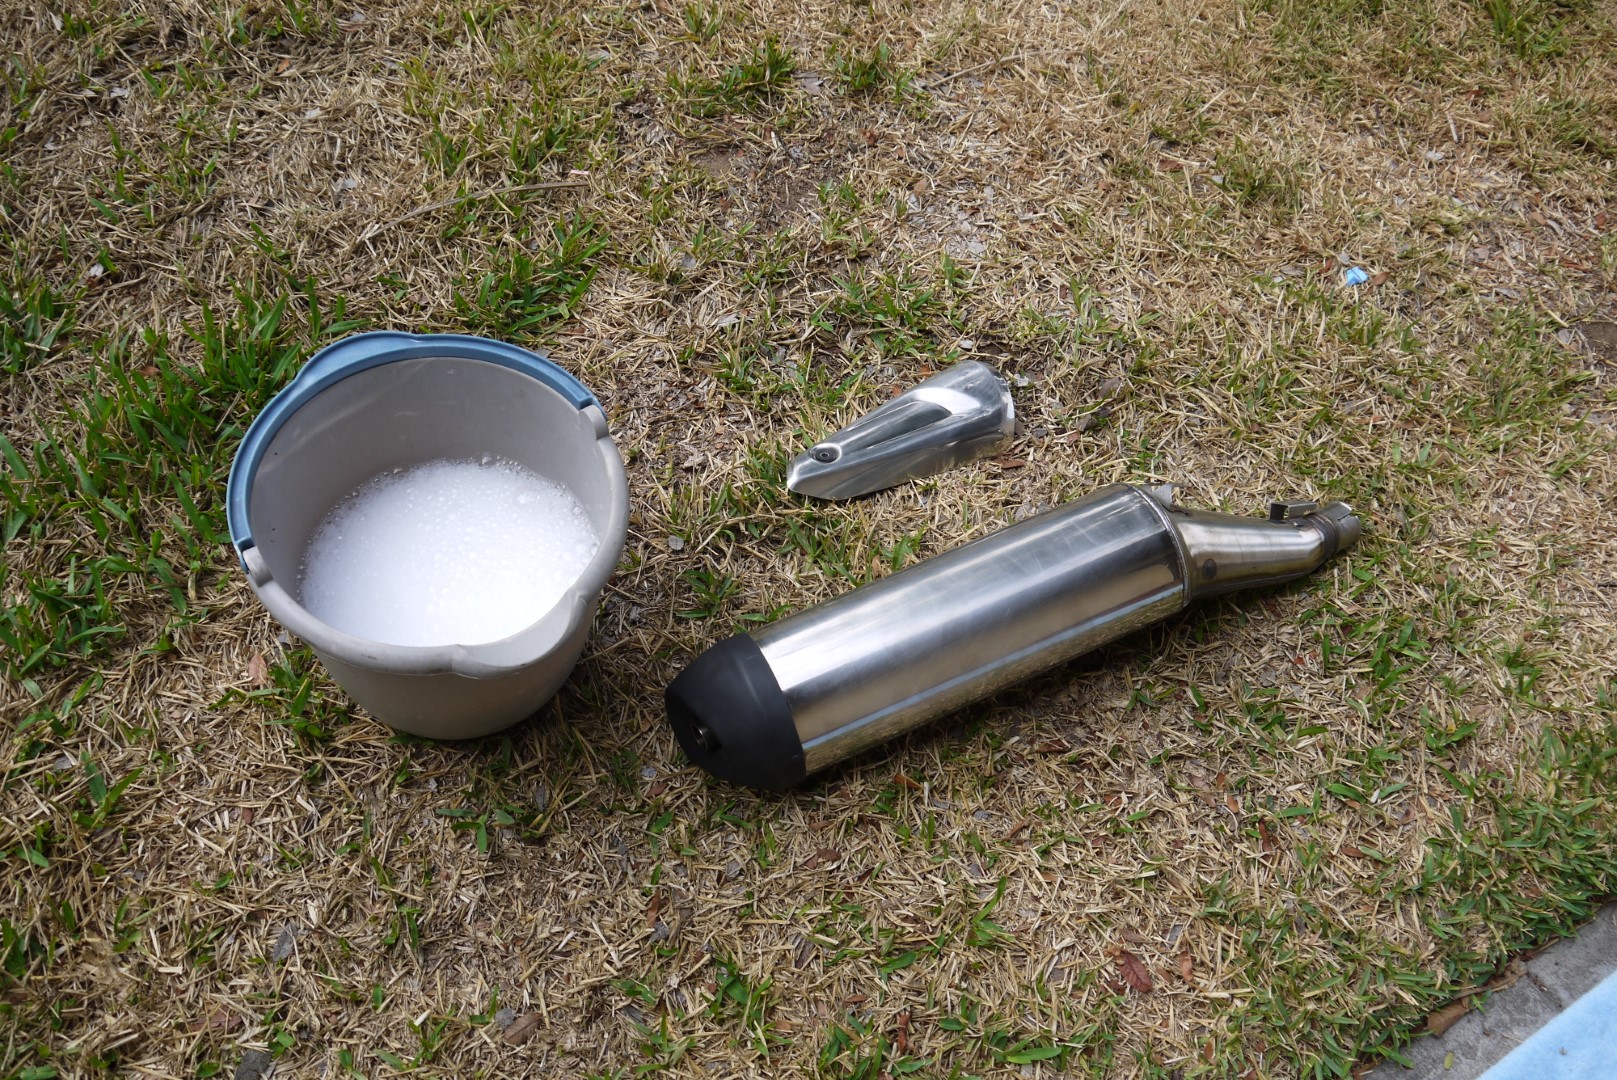
Rinse well, then rinse again. Water gets inside the end cap, rinse that out well.
Shake all the water out, dry with towel then leave to dry in sun. I also used an air compressor to blow out as much water as I could. You want it really, really dry. Any water drips will mess up the painting step.
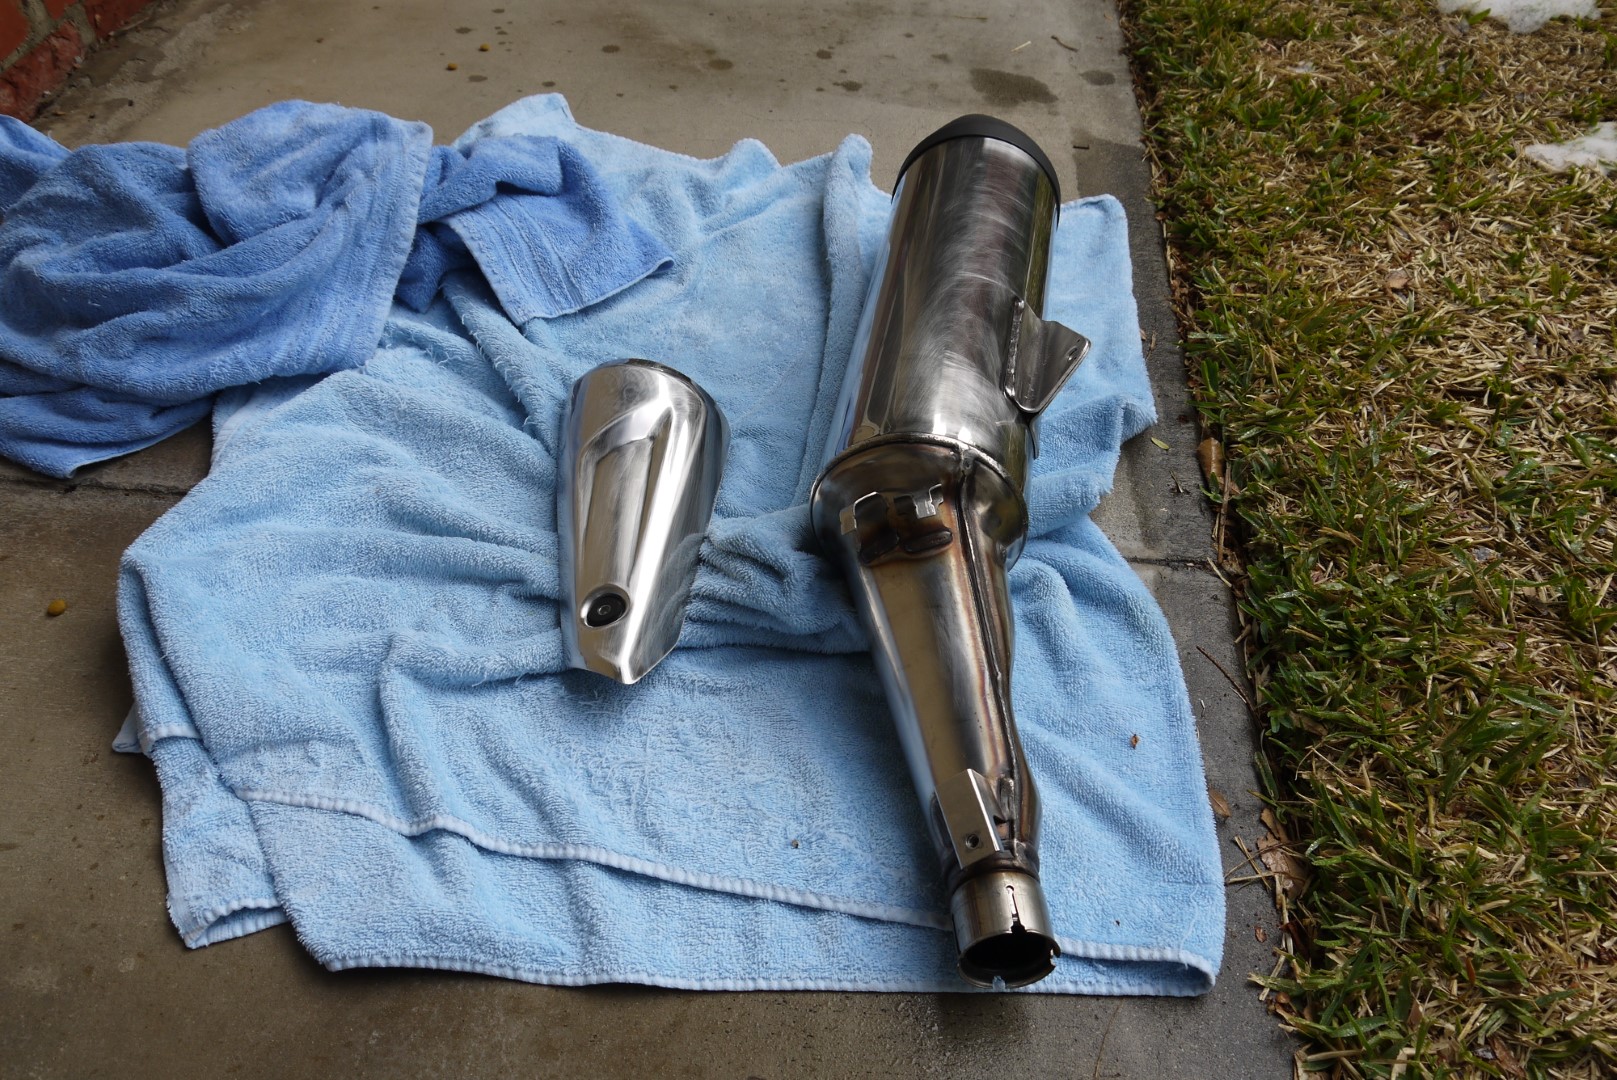
After this I will try to wear gloves when I touch the muffler to keep the oils from my hands off of it.
Prepare to Paint
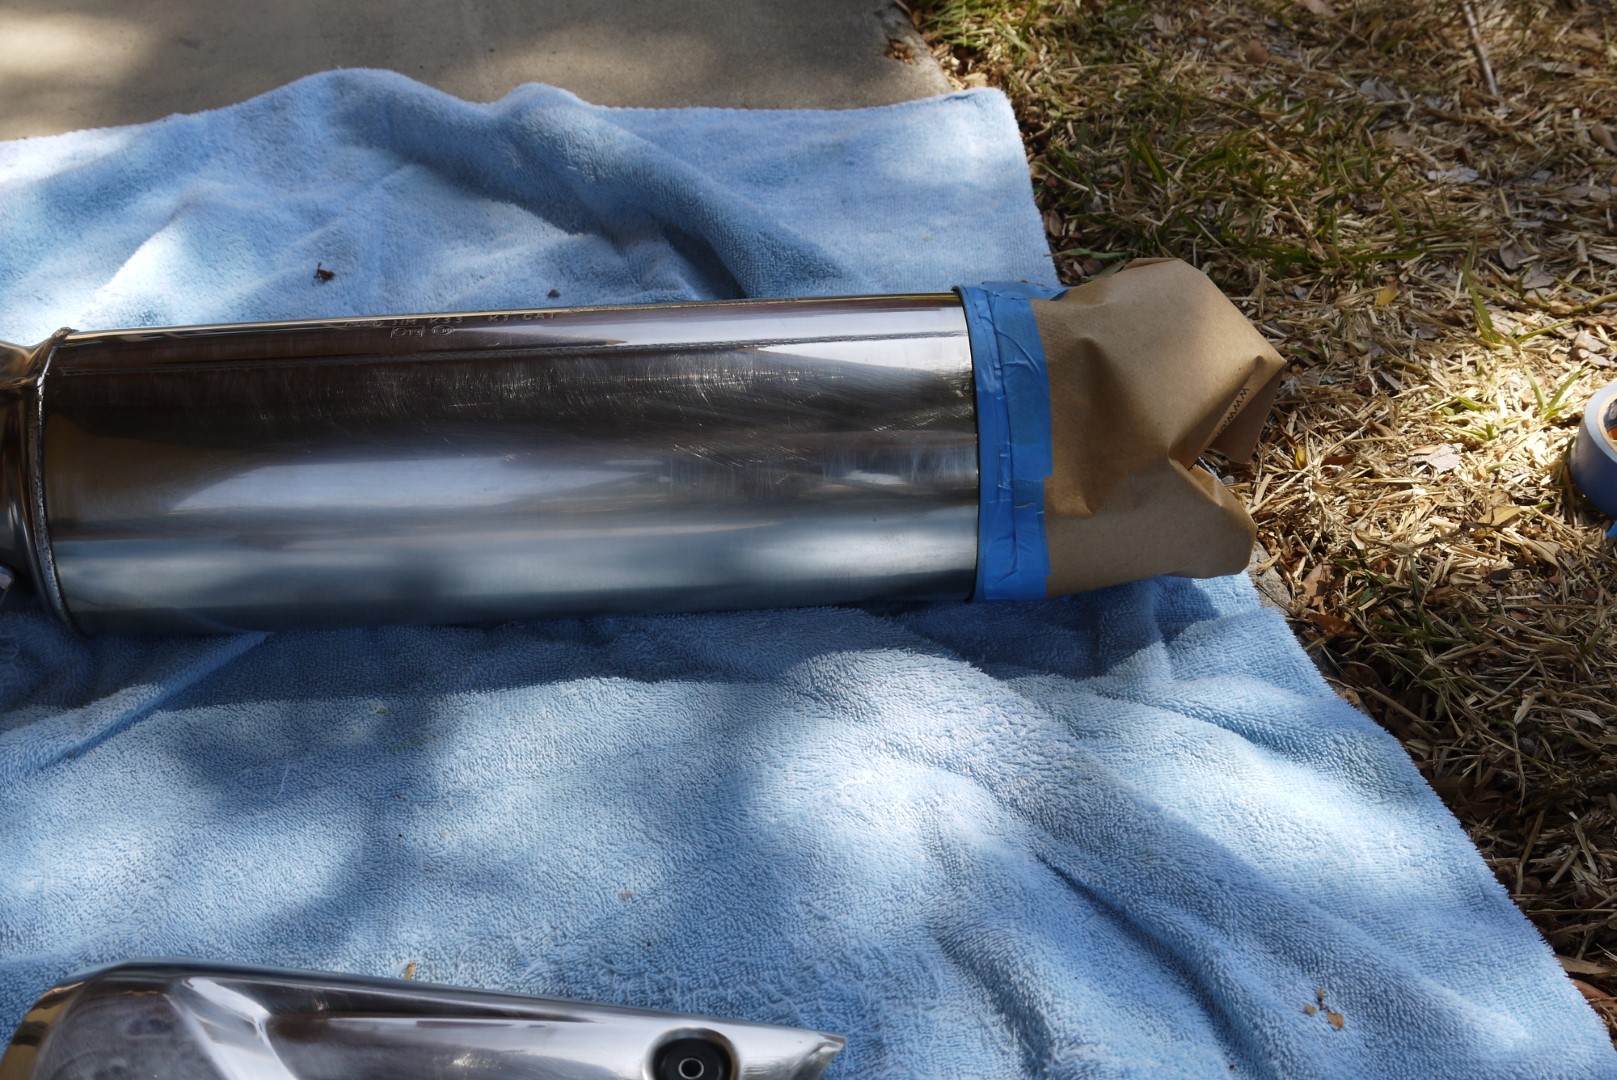
Use blue painters tape and paper to mask off the matte black area on the end of the muffler, or not, up to you. I did it for the primer and the first coats of paint, then took it off. That area is already matte black so overspray will look ok.
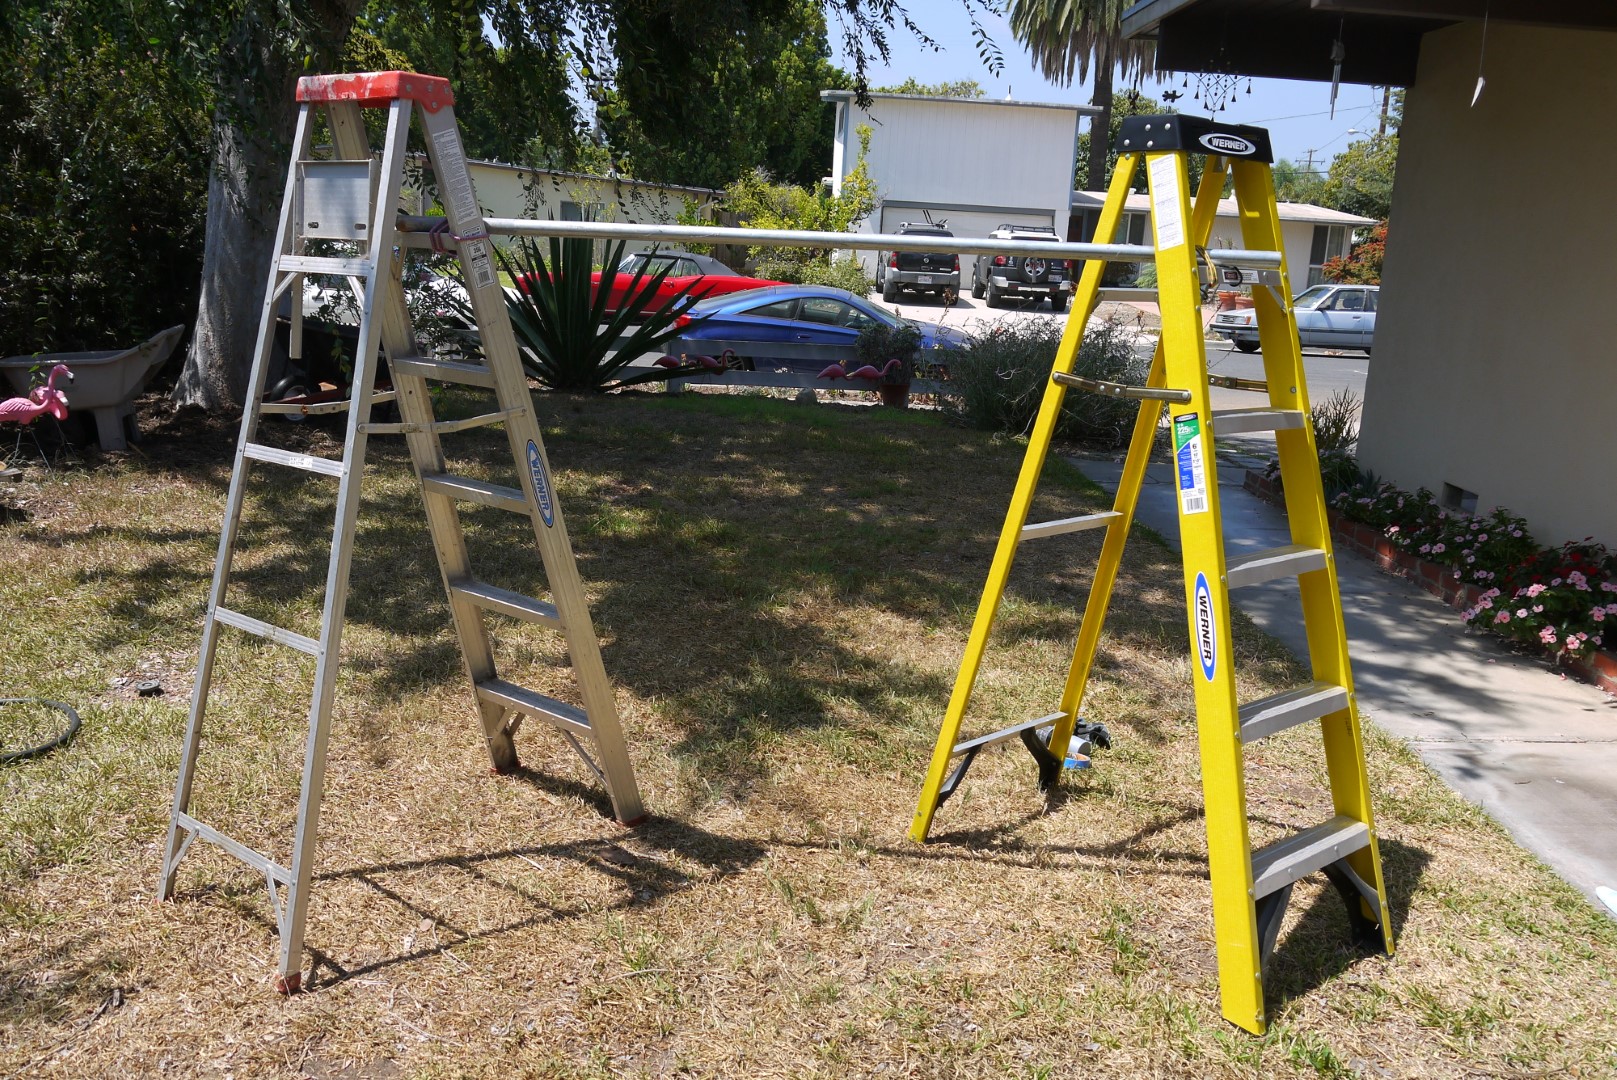
Find a location where you will not get any leaves or other debris falling on your work. Keep away from cars or anything else you don’t want to hit with overspray. Work in an area where you can leave it all day. Don’t do it over your fancy brick driveway, next to you fancy car, when your loved ones are going to come home from work in a few hours and need to park in the space your setup your painting project.
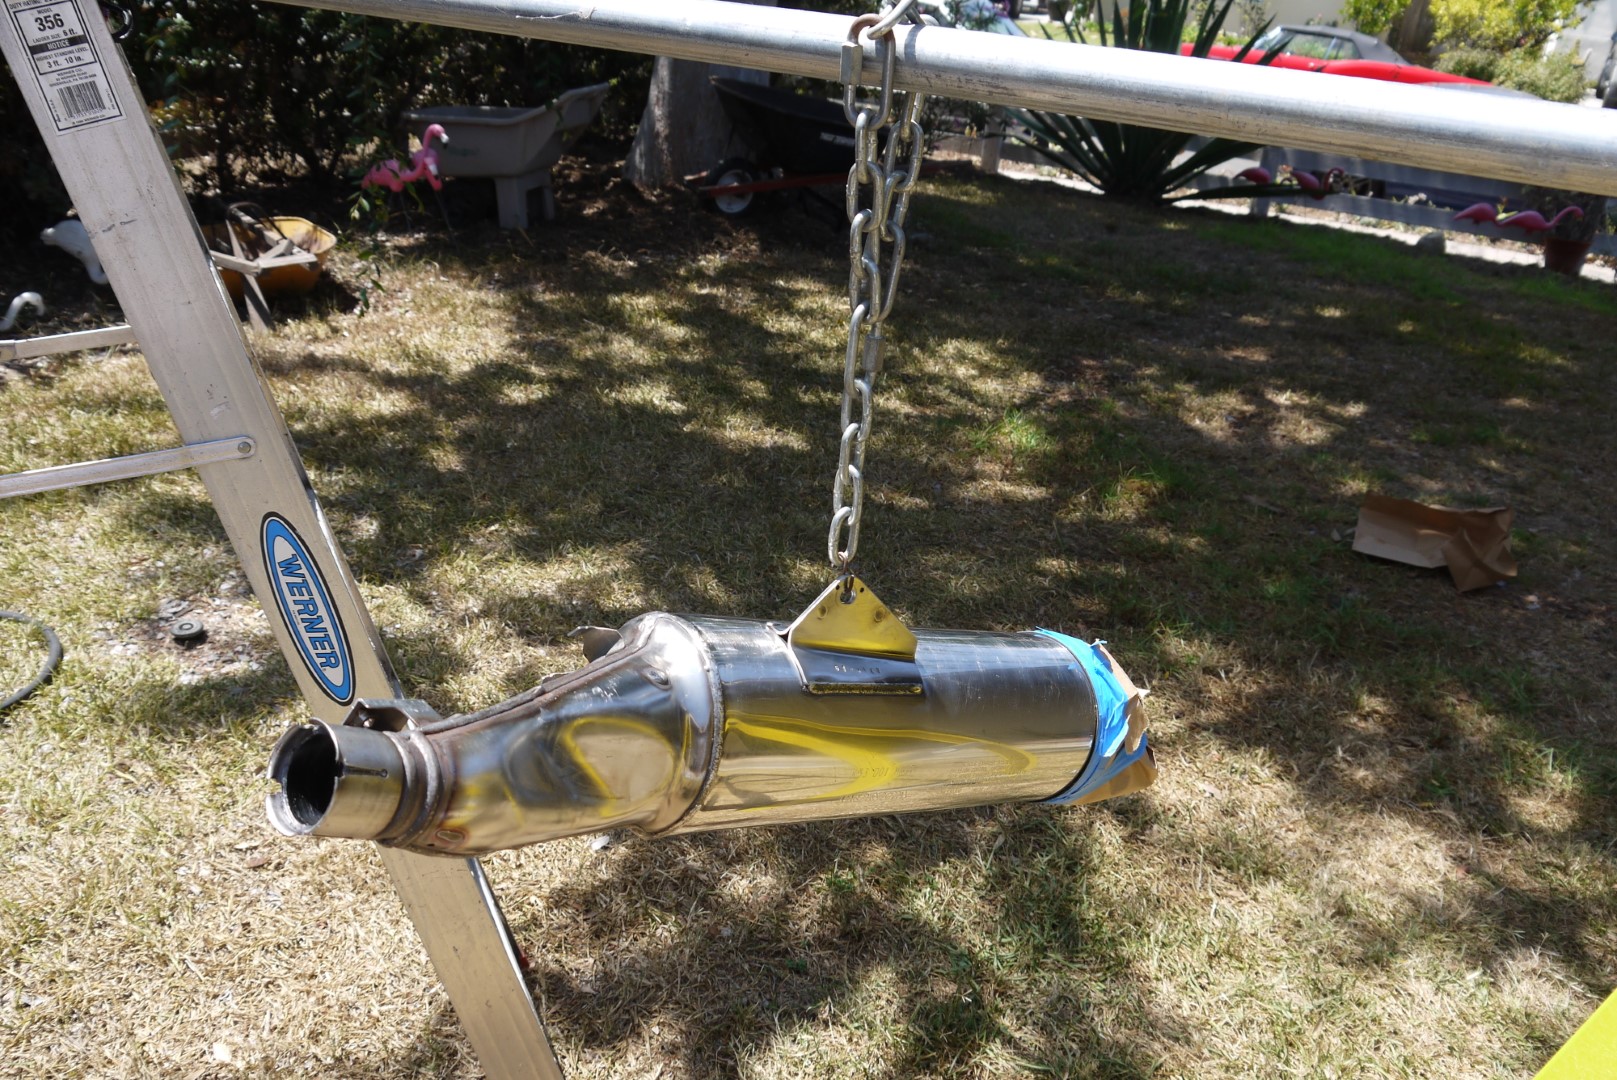
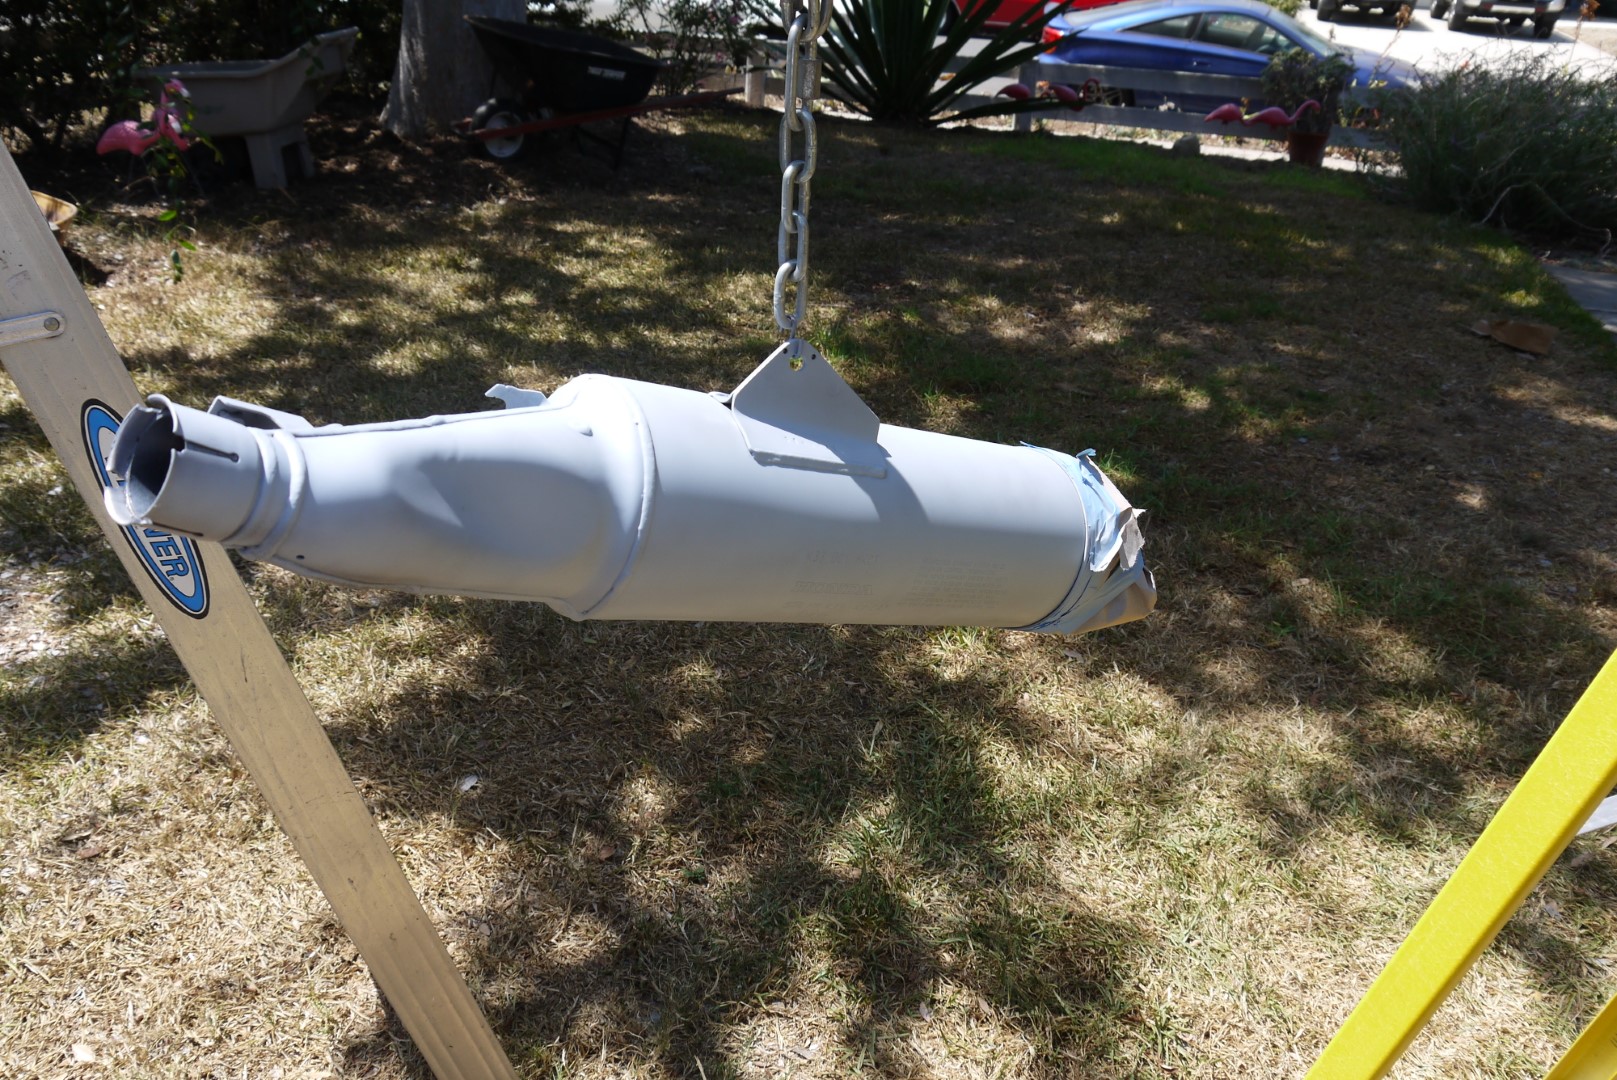
I set up two ladders with a pole in between on an area of my lawn that is not under my tree. I bungee strapped the pole to the ladders so it was secure. I used a chain and an S hook to hang the muffler. I put the plate on a paper bag, but later hung it with some rope and wire.
Primer
Shake the can for at least a minute. Spray a thin coat of primer. Take long strokes and prevent drip by keeping it light. It’s ok not to fully cover it on the first coat. Let it dry for 10 minutes then do another coat, maybe three.
I did a total of three coats, allowing at least 10 minutes in between. Clear out the nozzle each time you stop painting by holding the can upside down then spraying until it runs clear. I removed any bits a debris that fell on muffler before each coat.
Allow to dry 30 minutes before painting, that’s what the instructions said. Read the cans!
Paint
Same procedure as the primer. Thin coats, 10 minutes between coats. Do at least three coats. The instructions said to complete all the coats within an hour.
Let dry for many hours, hopefully overnight. I was done by 5pm, so I moved my muffler into the garage and hung it from a rafter so it could dry overnight, protected from the morning dew.
I put away all my ladders, paint, bucket, etc.
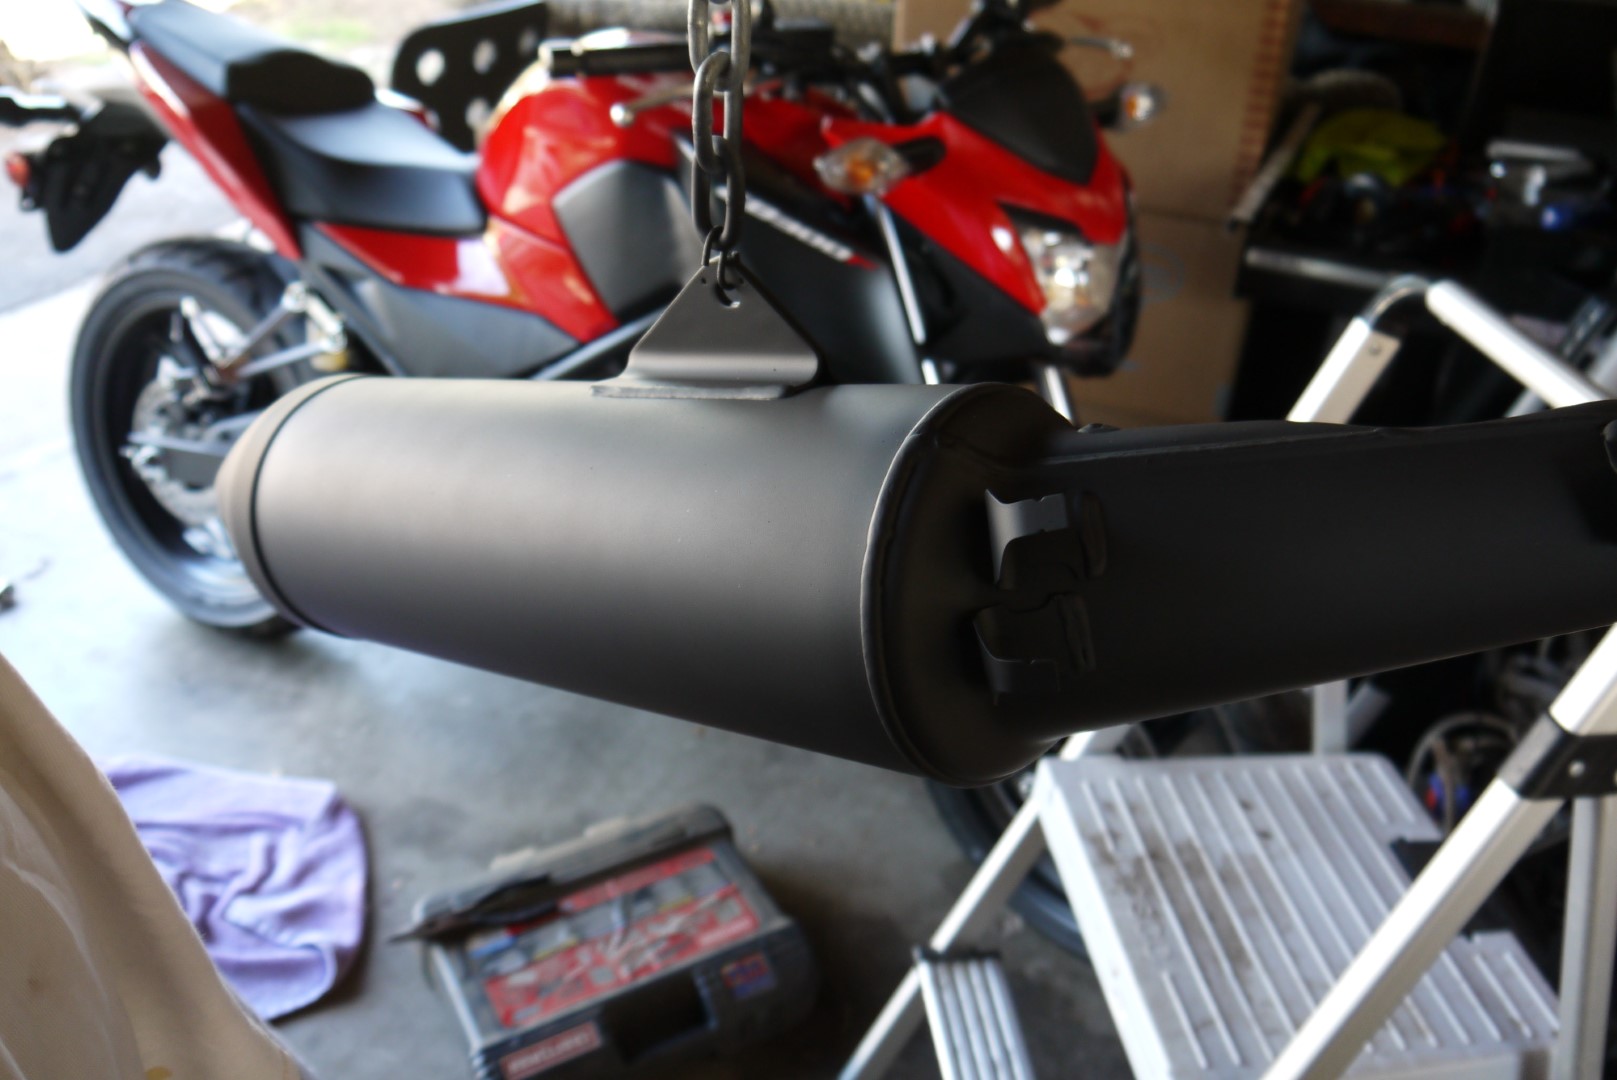
Reinstall
Use gloves so you don’t get any fingerprints on your muffler. Be careful because if you ding the muffler you will scrape off the paint.
Reattach the compression ring, making sure to but the tab in the correct notch closest to the heat shield screw hole. This will position the bolt head so you can reach it under the motorcycle. Screw in the bolt a little bit, but leave it loose of course.
Reinstall silicon bits, wiggle on shield, screw in with the 5mm hex wrench. I had some trouble here and actually scraped some paint off the muffler. I just hit the area with a quick shot of paint before I put it back on the motorcycle and it was all good.
Bring the muffler into position, making sure to have the top bracket between the wheel and the bike bracket. Wiggle the muffler back onto the exhaust pipe, just like when you removed it. Make sure it goes all the way on. I had to fiddle with it, up, down, and around and it finally slide on. It seems to slip on too far as the flange was inside the collar. I wiggled it back a bit, I don’t know what I’m doing or if it’s right, I’m just painting a muffler here, the biggest waste of time known to man.
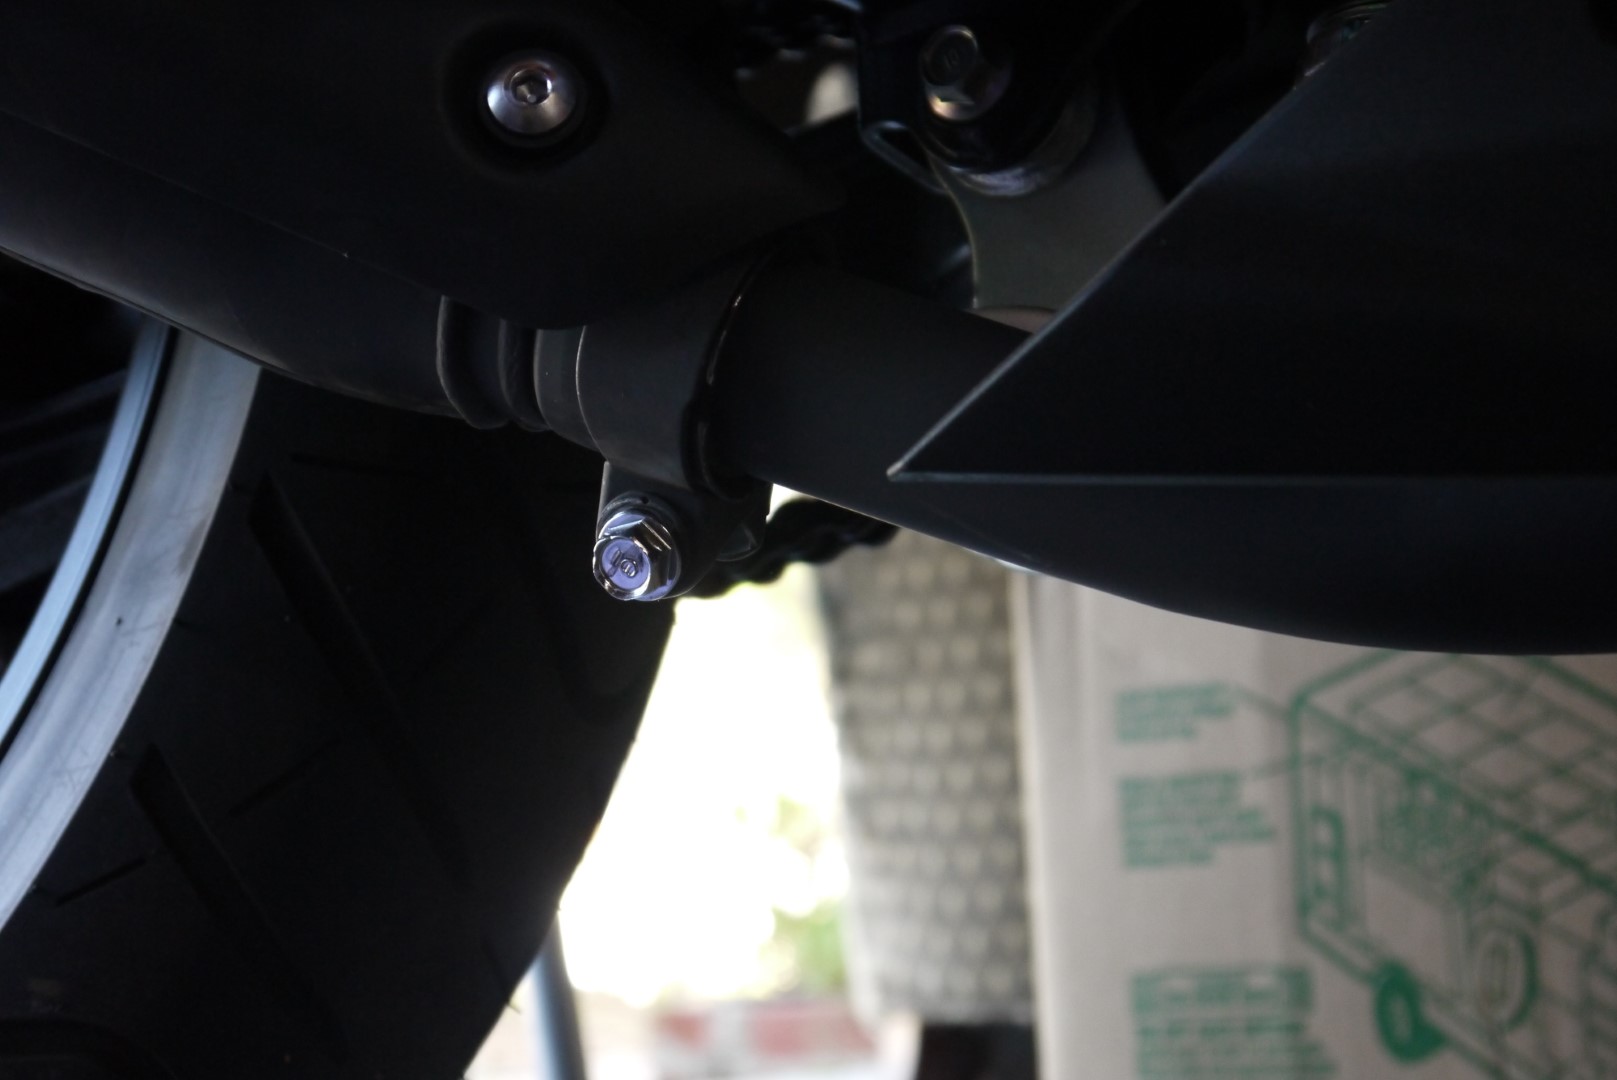
Attached the top bolt, washer and nut. Tighten slightly. Now tighten the bolt down at the bottom on the exhaust pipe. Back up on top, tighten the top bracket bolt and nut. Check the exhaust bolt again. All good.
Cure the Paint
Turn on the ignition and put it into neutral. The big green N will light up. Now start it up and idle the motorcycle for 10 minutes. Stop and let cool for 20 minutes.
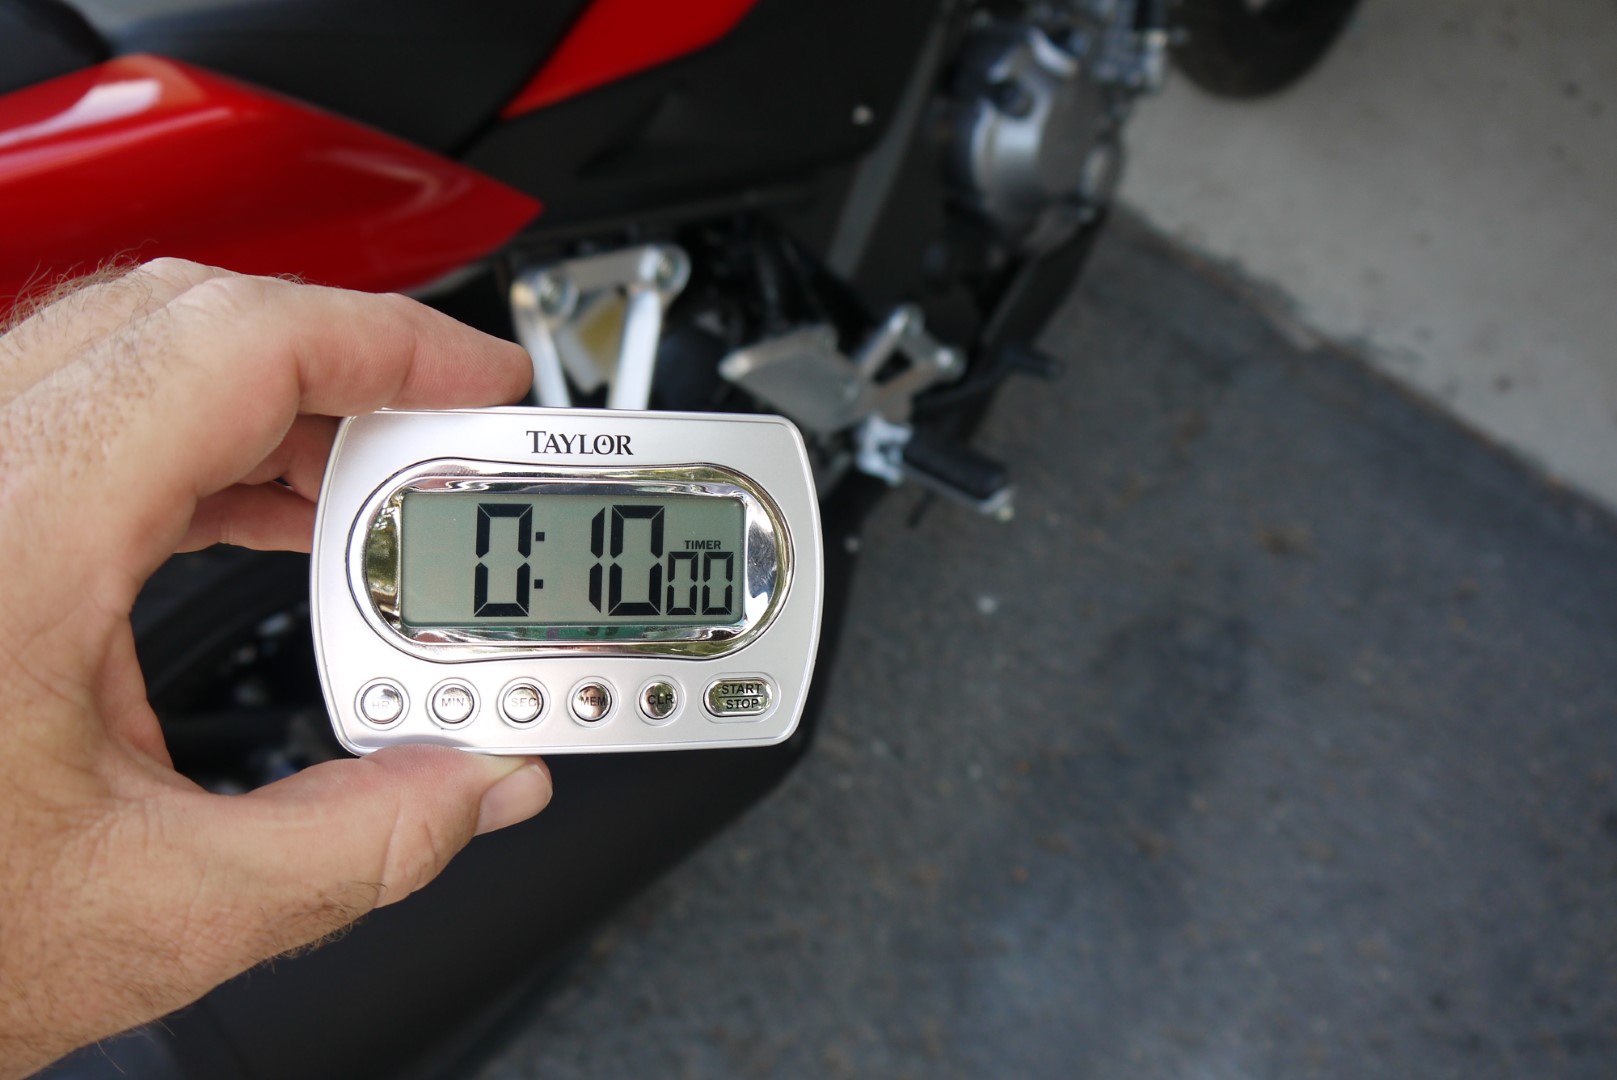
Idle it again for 20 minutes this time. Stop, let cool for 20 minutes.
Get on your gear and drive your motorcycle around normally for 30 minutes. Stop, let cool for 20 minutes.
Done!
That’s it. Enjoy! It looks great!