When using Visual Studio 2012 and also in previous versions you can use Entity Framework to create a database for you, either from “Design first” or “Code first”. The problem is you do not know where that database is located or how to connect to it. I saw this example in a video and thought I would lay it out into an easily searchable web page.
I am using Visual Studio 2012 and creating a ASP.NET MVC 4 project but I think this should work for any project that uses Entity Framework with a “Code first” approach.
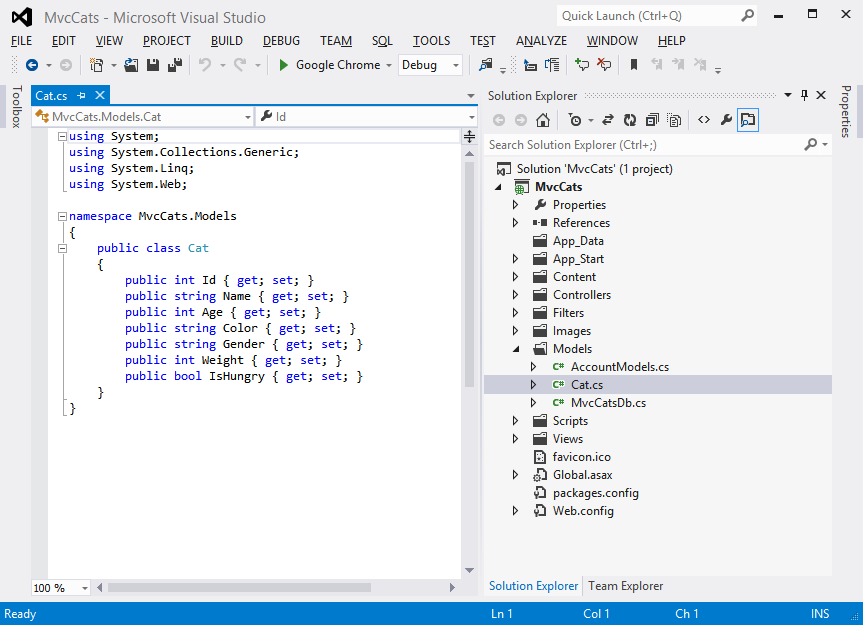
I created a class with simple properties. This will become the entity.
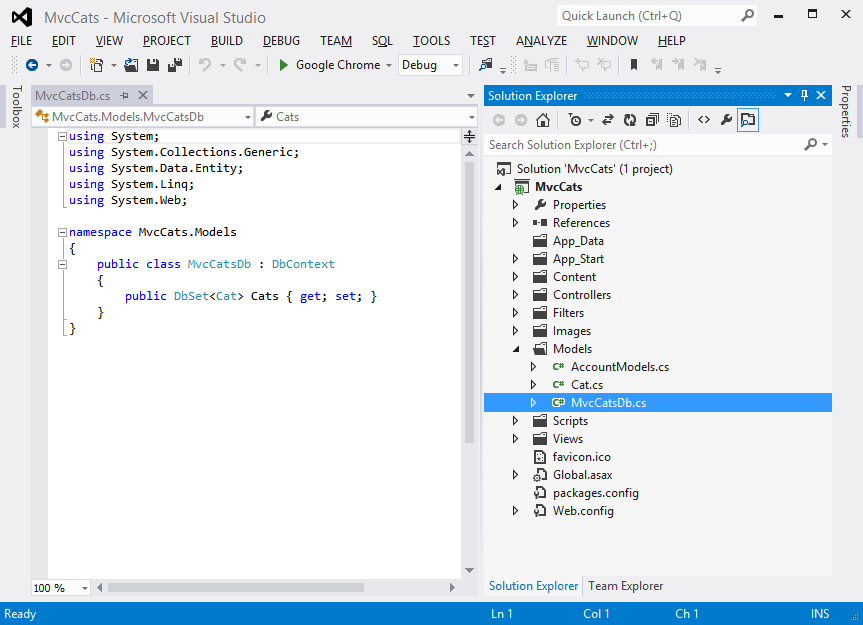
I have a model class that extends DbContext and has a simple DbSet of the type of my entity class.
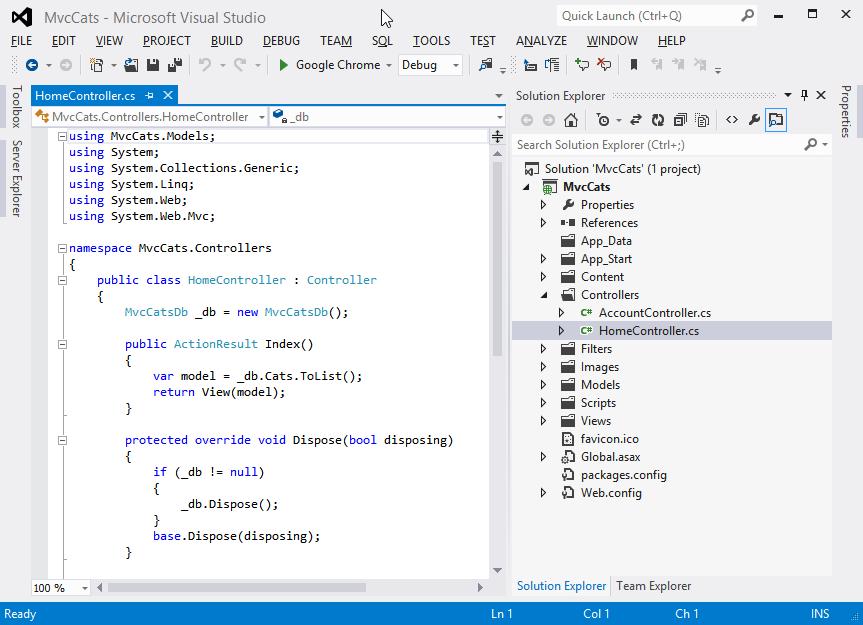
I have a controller class that queries the entity and passes it to the view.
Here is the razor view file that does a for each loop through the data collection and displays the values of the entity.

I now run the application. In the background this will create the database.
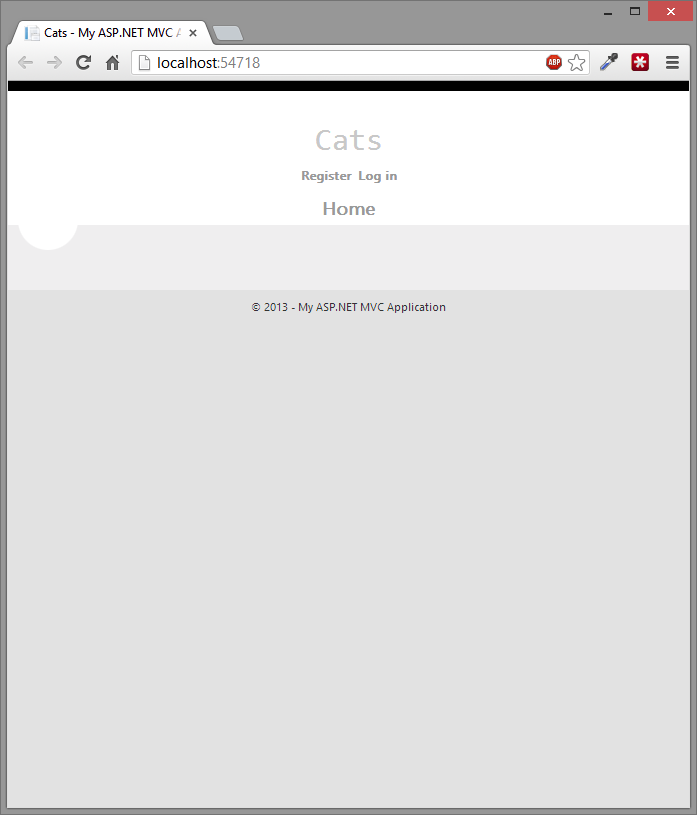
The page will be blank because there is no data in our database, but no errors means a good thing.
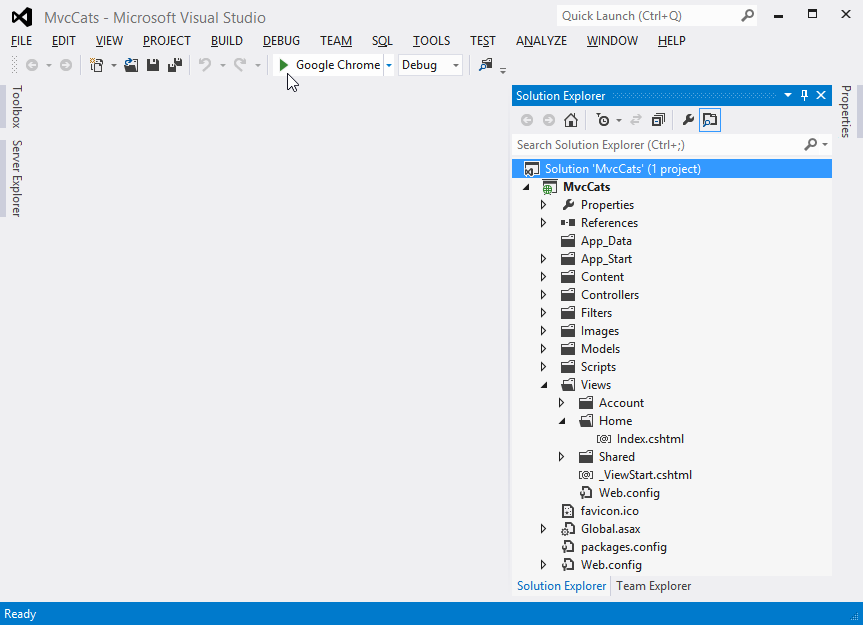
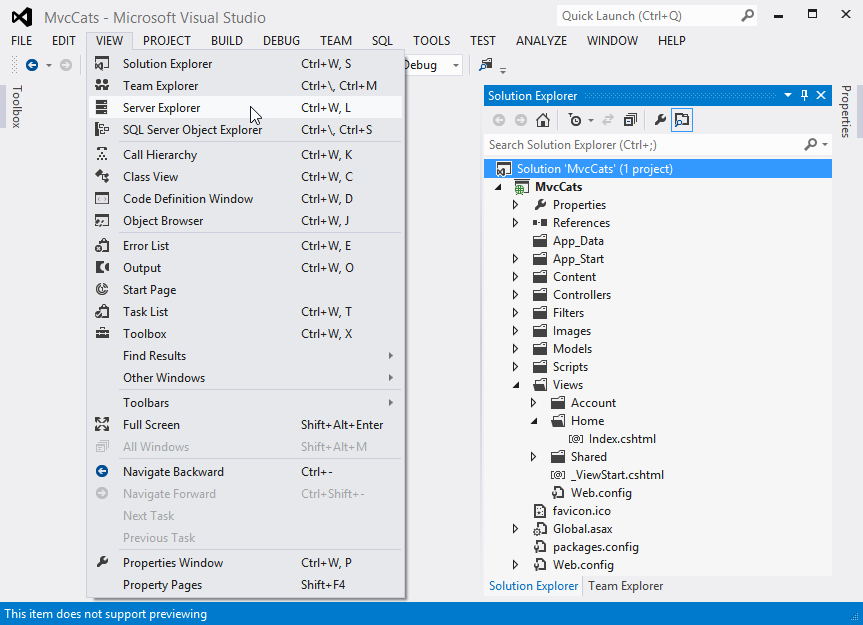
To connect to the database first I need to show “Server Explorer”. Click the “View” menu then select “Server Explorer”.
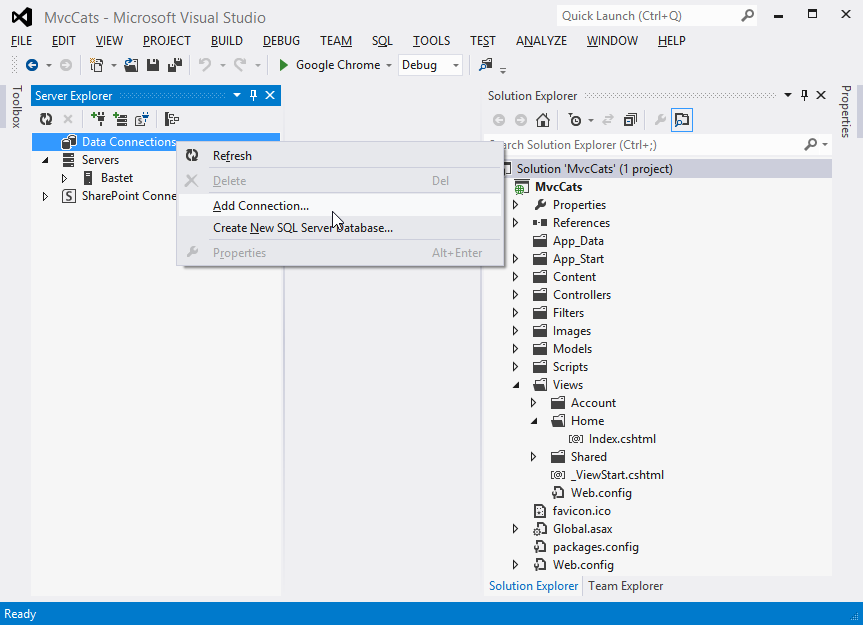
In the “Server Explorer” pane, right click on “Data Connections” and choose “Add Connection”.
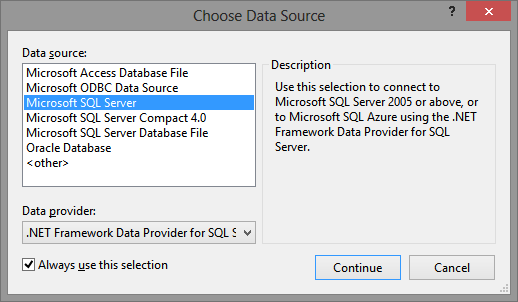
Select “Microsoft SQL Server” and click Continue.
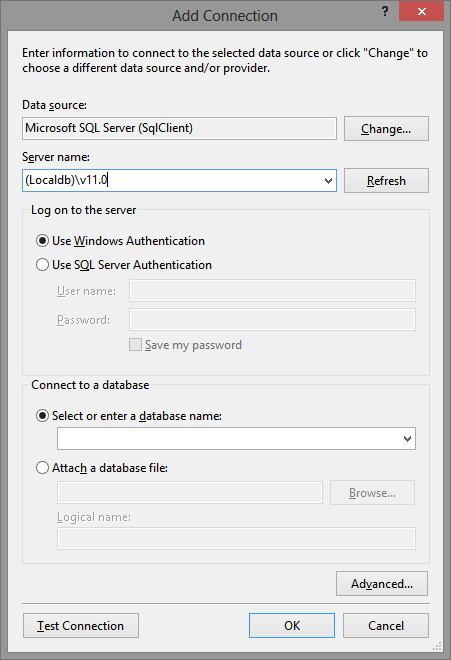
In the “Server name” field enter (Localdb)\v11.0.
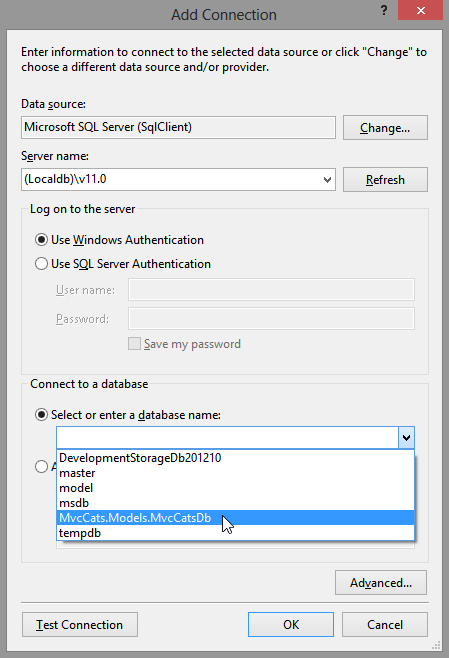
Now select the “Select or enter a database name” drop down menu. It will take a second to populate the databases. Select the database that matches the namespace of your DbContext class.
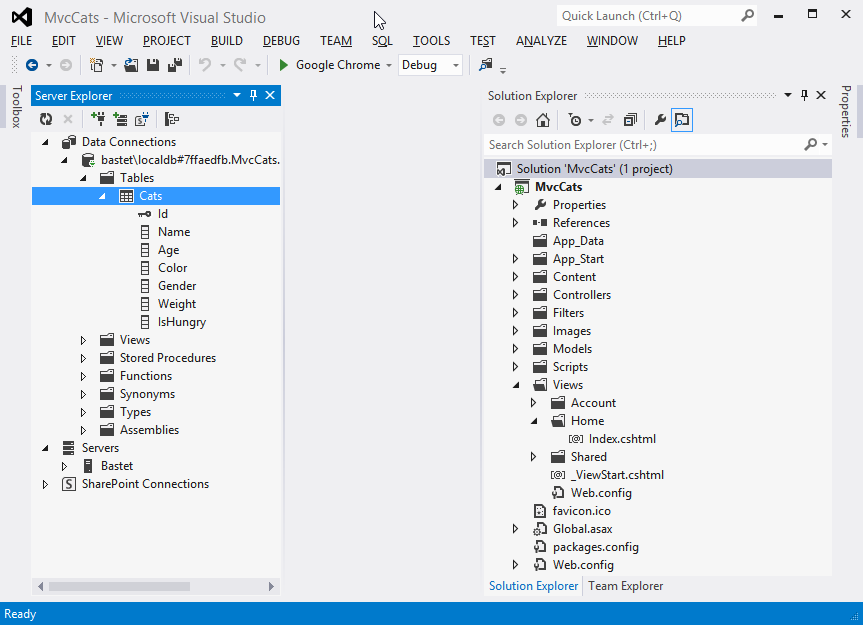
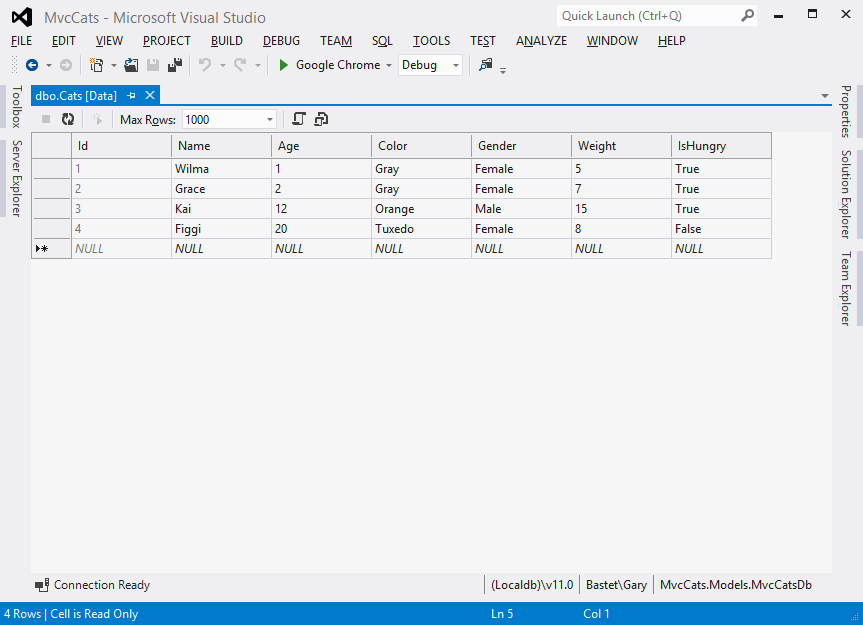
The Database will show in “Data Connections” now. Expand the server, then “Tables”, then the table with the name of your entity class. See all the fields that match the class.
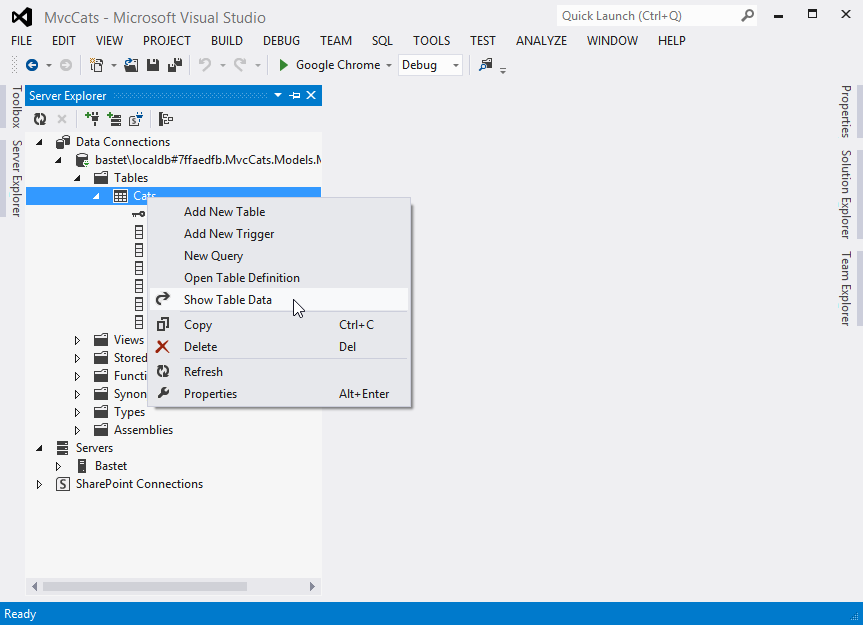
Right click on the table name and choose “Show Table Data”.
Enter data in the rows as you see fit. Use Tab between columns and press Enter to save the row.
Run the app to see your data.

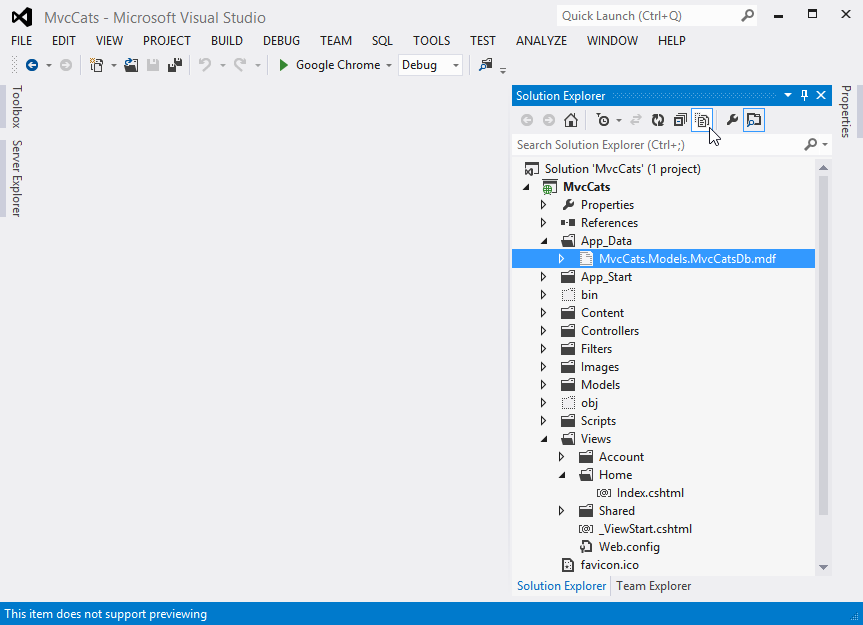
The database file lives in the “App_Data” folder but it is hidden.
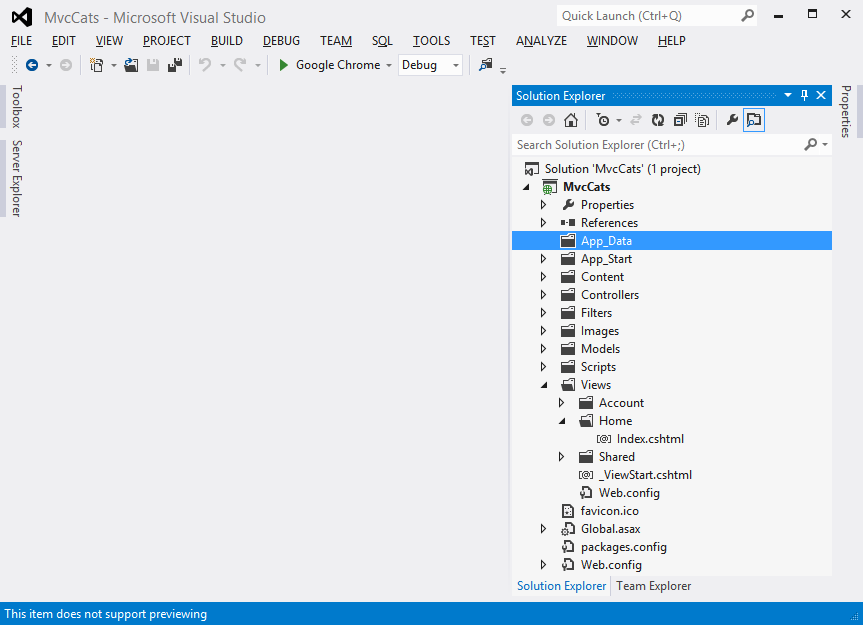
Click the “Show all files” button in Solution Explorer. It is the one that looks like two stacked papers with a dashed line around the top. Now you will see the database file in the App_Data folder.
Enjoy!