Windows XP is the first version of Windows that can synchronize its clock with Time (NTP) Servers. NTP stands for Network Time Protocol. There are many NTP server that are links to Atomic Clocks so they have perfect time. I know Windows 2000 could synchronize time, but only with a Windows Domain Controller which does little good to most of us. Out of the box Windows XP is set to synchronize time with time.windows.com and we can switch it to time.nist.gov. But what if you want to synchronize with another time server? Maybe one closer to you or one in your company. Well you need to dive into the registry to add or delete them and I will show you how.
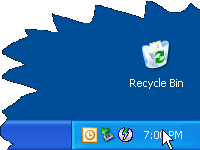
1. First I will show you where the Internet Time setting are. Double-click on the clock in the system tray.
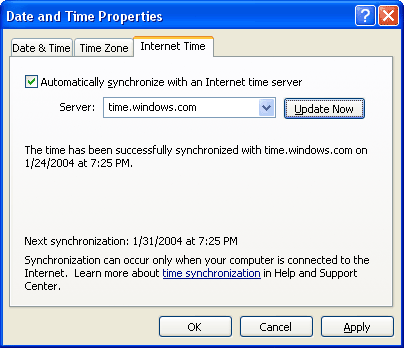
2. Now click on the Internet Time tab. See the Server list. We have time.windows.com and if you pull-down the menu you will see time.nist.gov. If anything switch it to time.nist.gov, no need to give Microsoft your IP address. Click OK.
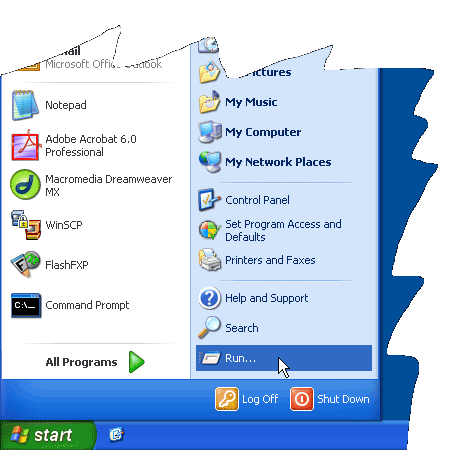
3. Now lets go add a new NTP server. Click Start, then Run.
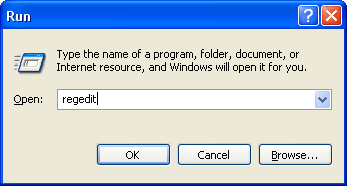
4. In the Run dialog type regedit then click OK.
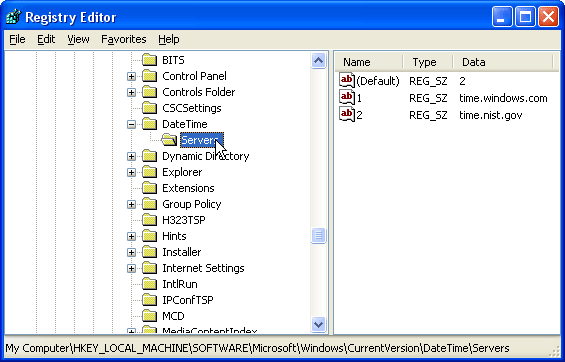
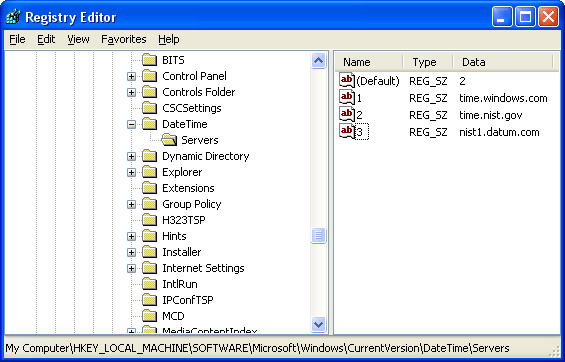
5. Now in the Registry Editor, navigate to the HKEY_LOCAL_MACHINE \ SOFTWARE \ Microsoft \ Windows \ CurrentVersion \ DateTime \ Servers key.
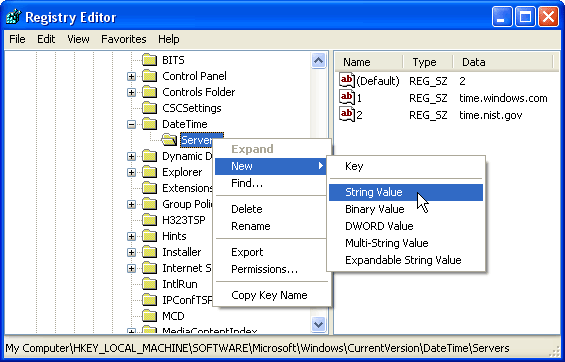
6. Now right-click on Servers, go to New then String Value.
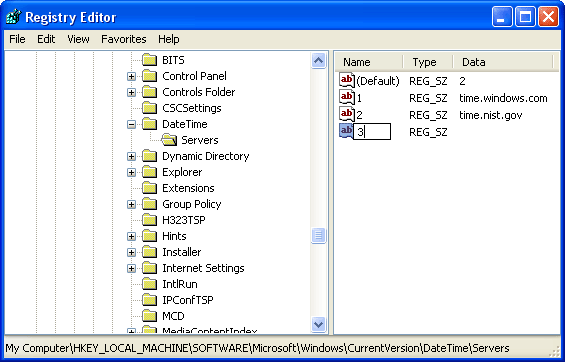
7. This will create a new String Value. Name it 3 or what ever number is next. There cannot be two of the same value. if you add another make it 4 and so on.
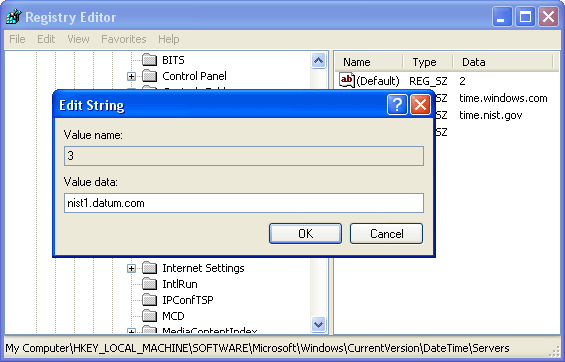
8. Now double-click the String Value we just created. Enter your new time server. I went to NIST Internet Time Servers and picked one close to me. Click OK.
9. Now you see our new NTP server. Add as many as you like, even delete the ones you don’t. Just make sure they are numbered correctly, 1, 2, 3, etc. Close Registry Editor by clicking the red X.
10. Now go back and double-click on the clock to open the Date and Time Properties.
11. Pull-down the Server list and your should see the new Time servers you just added. Select the new Time server.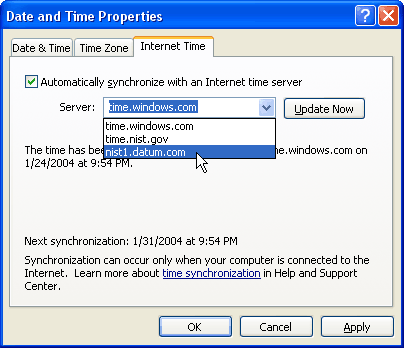
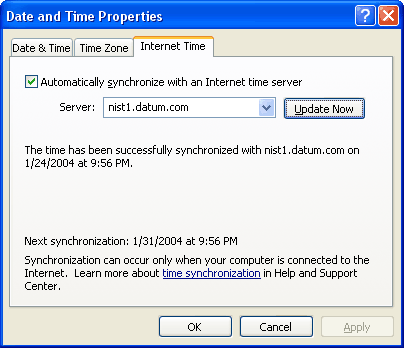
12. Now test the new Time Server by clicking Update Now. After a few seconds it will tell you the time has been successfully synchronized. If you get an error message try again. If that does not resolve it check your Time server and go back and change it.
From now on your computer will have the correct time. Note that if the date is wrong it will not synchronize time. Visit www.time.gov to manually set the date and time.
Enjoy!