Amazon Web Services (AWS) is Amazon’s cloud computing platform. It has been around for quite a while and has a few competitors such as Google Compute Engine and Microsoft Azure among others. There are many products under the AWS umbrella. Some are easily recognizable as standard stuff; EC2 is servers, S3 is storage, Rount53 is DNS. Other services like MapReduce, ElastiCache, and Beanstalk seem to be for specialized usage.
If you buy stuff from Amazon (I love Amazon Prime) then you can use that account to login to AWS. Just visit aws.amazon.com and click “Sign Up”.
I am going to go through the steps to setup a basic Linux web server.
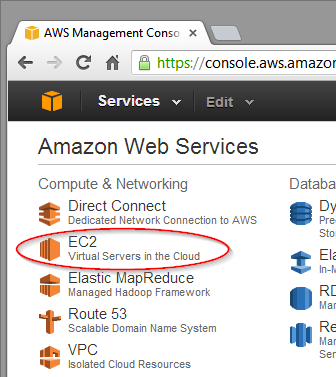
Login to AWS, click on EC2.
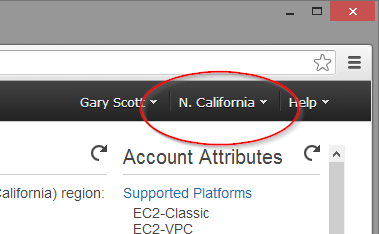
Amazon has many regions around the world. When you set up stuff in AWS, it is in a certain region. Select a region that you like, I like “US West (N. California)” as it is close to me. Before you set anything up always check your current region as you cannot move things between regions later.
Click on the region drop down and select a new region if you do not like the current region.
Elastic IP
First setup an IP address for our server and our DNS settings since that will take some time to propagate out to the Internet.
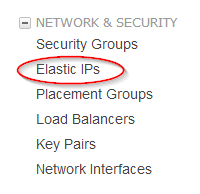
In the EC2 Dashboard under “Network & Security” click “Elastic IPs”.
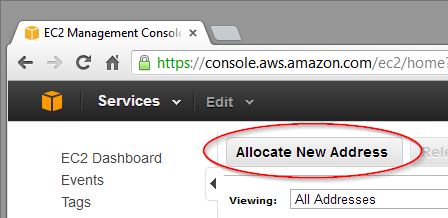
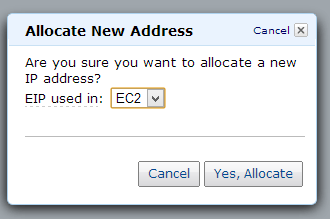
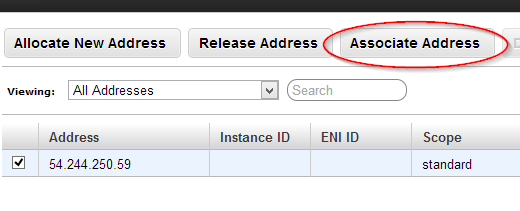
Click “Allocate New Address”.
EIP used in “EC2”, which is the default. Click “Yes, Allocate”.
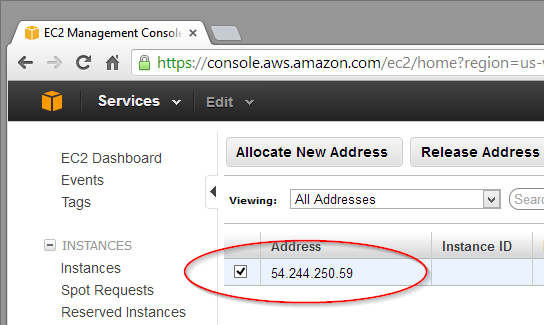
The new IP Address will appear in the list. I have multiple here but you will probably only have one.
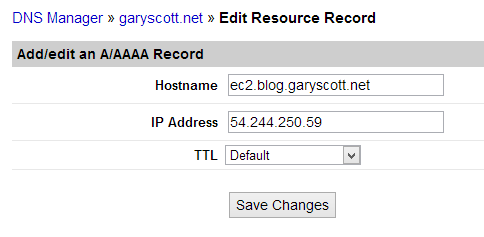
Now I am going to setup DNS to point to this IP address. I do not use AWS Route53, but another DNS management tool through my regular hosting provider, Linode. I will not cover how to set this up as it is outside of the scope of this tutorial. But what I will do is create a new A Record for a domain name and point it to this IP.
Later we will come back into “Elastic IPs” to associate this IP with our Instance once we have that up and running.
Security Group
Now let’s set up a Security Group. This is really just a simple firewall to block all incoming traffic except for what you want to allow through.
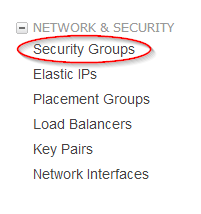
In the EC2 Dashboard under “Network & Security” click “Security Groups”.
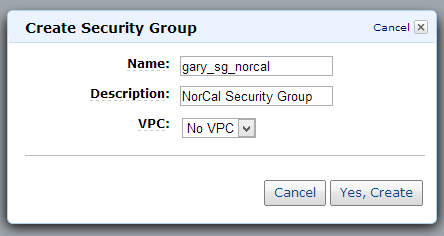
Click “Create Security Group”.

Give it a Name and Description. Amazon recommends a naming convention of {user}sg{region} so I am doing “gary_sg_norcal” in this example. Click “Yes, Create”.
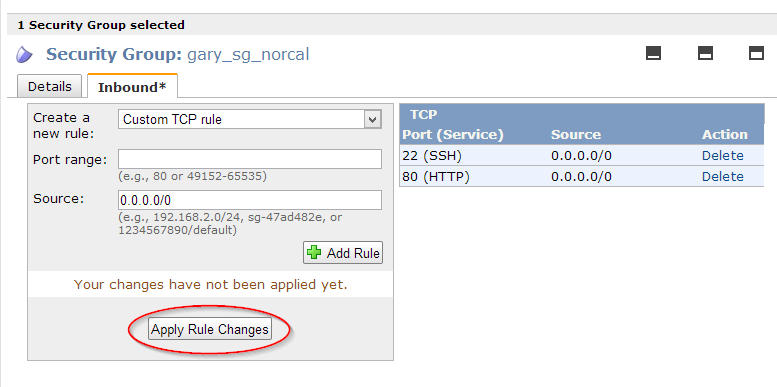
Now your new security group will appear in the list. Make sure it is selected and click the “Inbound” tab.

In the “Create a new rule” drop down menu, select “SSH” then “Add Rule”. It will be added to the right and a warning “Your changes have not been applied yet” will appear. Don’t worry we will add some more rules then apply all the changes at once. Select “HTTP” from the drop down menu and click “Add Rule”.
That is all the rules we are going to add for this example you might want others like HTTPS if you are going to have a secure site or SMTP/POP3/IMAP if you are going to do email.
Click “Apply Rule Changes”.
Key Pair
Key Pairs are all about access. You use this key pair to be able to login to your server. If you lose it, you cannot download it again and you can never log into your server again. Well maybe you can if you create users, but I have not tried that yet.
The “pair” is the public key and the private key. The private key needs to be more guarded then a password. It is a file that will act as a password that cannot be changed. You need to keep this in a secure location, I recommend in a VeraCrypt container.
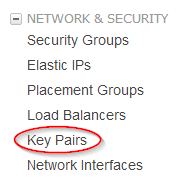
In the EC2 Dashboard under “Network & Security” click “Key Pairs”.
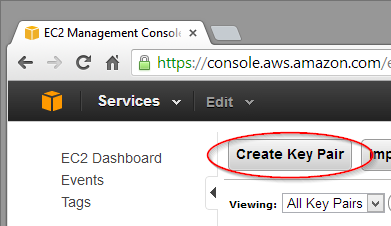
Click “Create Key Pair”.
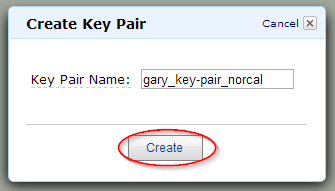
Enter a name in the “Key Pair Name” textbox. Amazon recommends {user}key-pair{region} so I am doing “gary_key-pair_norcal” in this example. Click “Create”.
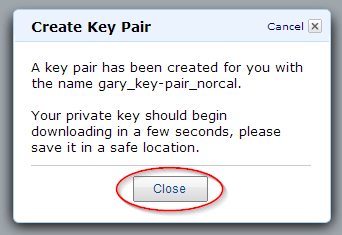
After a few seconds your key pair will be created and you will get this message. Click “Close”.
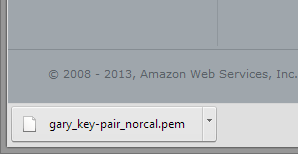
Your private key will automatically download, depending on what web browser you are using this will happen differently, but in Chrome it appears in a list at the bottom of the web browser window and the file is saved in my “Downloads” folder. Keep this file safe, don’t email it anywhere or put it in Dropbox. I put mine in a VeraCrypt container, and I put that encrypted container in Dropbox. Keeping yourself safe is outside the scope of this tutorial but it should be a concern of yours.
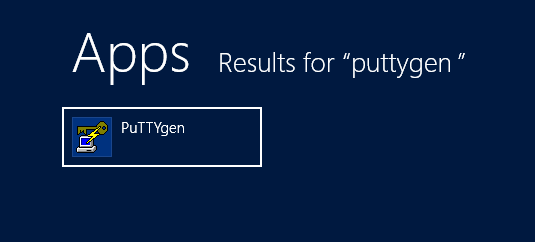
So I am using Windows, and I use PuTTY as my SSH client since it is free. It sucks but it is free so I use it. PuTTY cannot use the downloaded PEM file. You will need to convert it to a PPK file.
PuTTY comes with a program to do the conversion called PuTTYgen. Launch it.
In the PuTTYgen program, click “Load”. A File dialog will open. Next to the “File name” text box change the “PuTTY Private Key Files (*.ppk)” to “All Files”. Browse to where you downloaded the private key PEM file. Mine is still in “Downloads”. Select the file and click “Open”.
You will get a notice that the key was successfully imported. Click “OK”.

Now you need to save this private key into a format that PuTTY can use. Click the “Save private key” button.
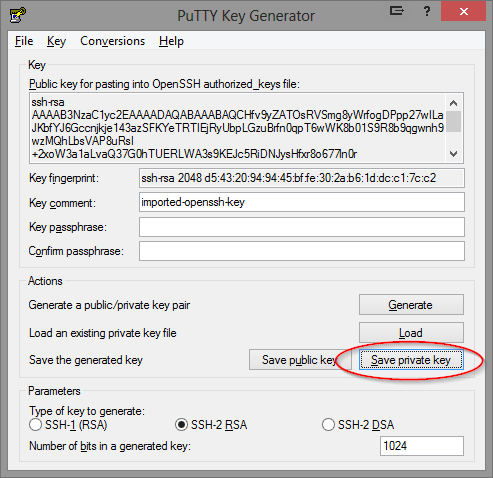
You will be asked if you want to save it without a password, click “Yes”. now choose a file name and location. I used the same naming convention of gary_key-pair_norcal so it will create a file called “gary_key-pair_norcal.ppk”. Click “Save”.
You can now close the PuTTYgen program. Again save both the PEM and PPK file in a save location and do not transport in an insecure medium like email. You will used these key pairs later to connect to our server.
Instance
Amazon calls a server an Instance. This is very much taken from the programming world where we define a blueprint for something then we can easily create an instance of that blueprint. I think the idea is that you can “spin up” a server in a few clicks. I think in some application you might have some need to fire up and bring servers online to share the load. The apps have to be created to take advantage of running on multiple servers. We will focus on a simple single web server which services most of our needs.
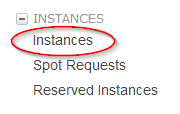
In the EC2 Dashboard under “Instances” click “Instances”.
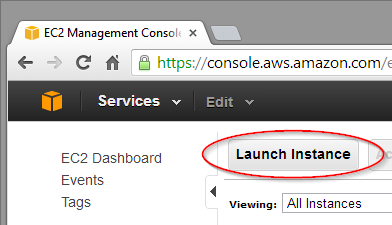
Click “Launch Instance”.
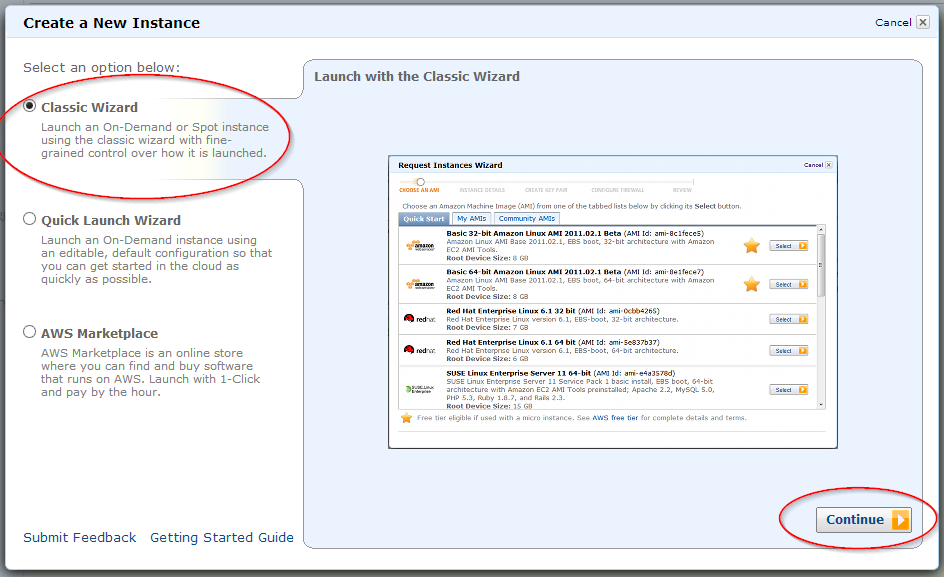
The “Create a New Instance” wizard will launch. In this example I will use the Classic Wizard to launch an Amazon Linux AMI. Make sure “Classic Wizard” is selected and click “Continue”.
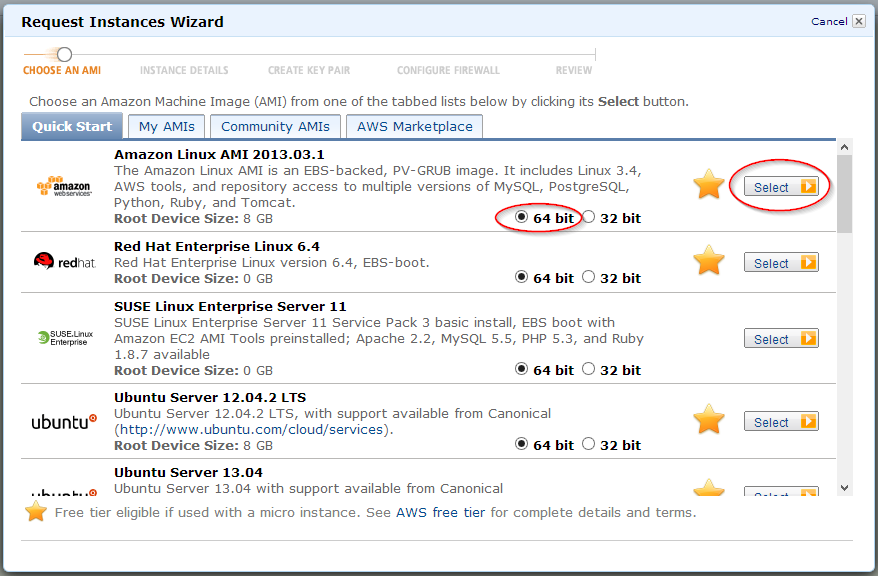
On the Quick Start tab is Amazon Linux AMI. In this example we have version 2013.03.1 and will probably be different for you as they will release newer versions over time. This is a striped down version of Linux that Amazon supports. Basically it is an Amazon distro! It seems to be based on Redhat from what I have read and what I have experienced using it. I think this is perfect for a simple easy to use web server. You can host many different operating systems here, just browse thru the tabs and see. I like Ubuntu, but since we are using AWS I figure I will use the Amazon AMI. Later I will walk though getting a Windows Server up so you can run ASP.NET apps too.
The big stars mean that this OS can be run in the free Micro tier. For now you want that. On the Amazon Linux AMI choose “64-bit” if it is not already selected, and click “Select”.
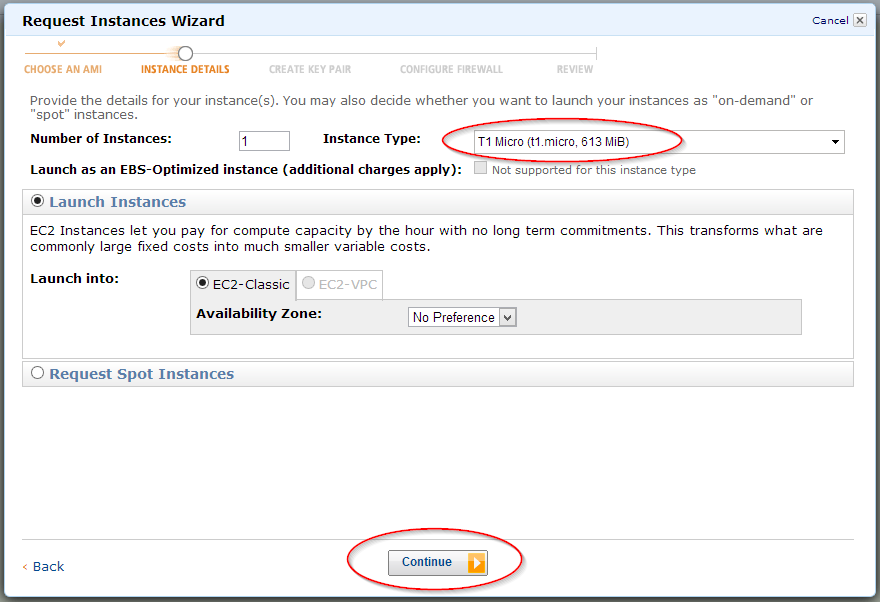
Next is the Instance Details screen. Make sure that the Instance Type is “T1 Micro”, the free version. I leave everything else as defaults and click “Continue”.
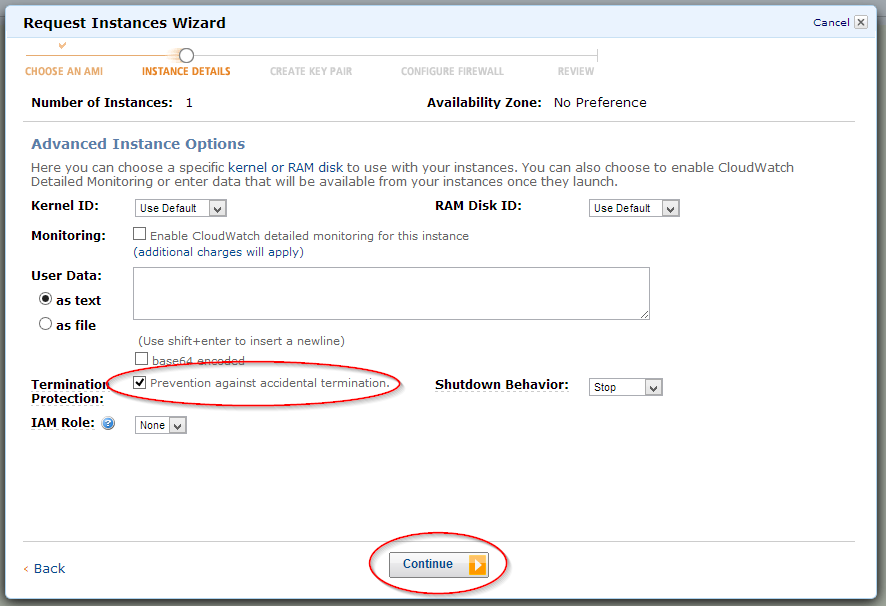
The next screen will take some time to load the Kernel ID and RAM Disk ID. Wait for the spinner to stop. I leave everything here on the defaults except for “Prevention against accidental termination”. If you “terminate” an instance it will delete it. Check this box and you will get an extra warning if you go to terminate an instance. Stopping an instance will turn it off, but it stays around in your control panel so you can launch it again, but terminating will stop and then delete it. Finally click “Continue”.
Storage Device Configurations are something I have not really figured out yet. There seems to be many storage options such as S3, EBS, and others. I think figuring out storage is a whole other world and something I will need to sort out soon. I would love for my storage to be managed separately then my EC2 servers so I could mount them as needed, and I bet that is how it works I just have not explored it yet. For now just leave this as it is and click “Continue”.

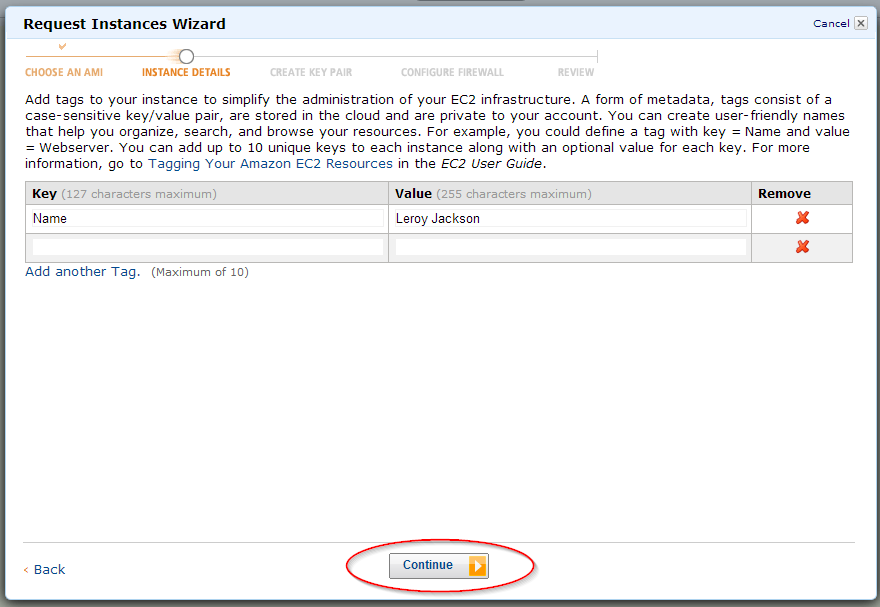
Tags!! OMG, tags are everywhere. I guess if you have 1000 of these servers you can tag them to be able to find them later. Well I name everything “Leroy Jackson” so here it goes! Click “Continue”.
Now lets associate our Key Pair with this instance. The key pair you made earlier should appear in the list. Select it if needed then click “Continue”.

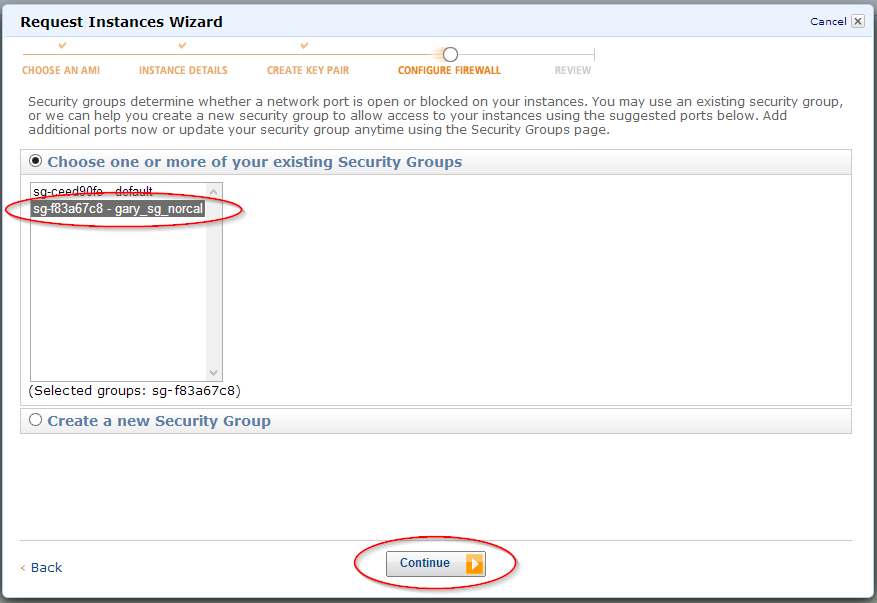
Security group time! All the work before is coming together! In the list of Security Groups, select the one we created earlier. Click “Continue”.
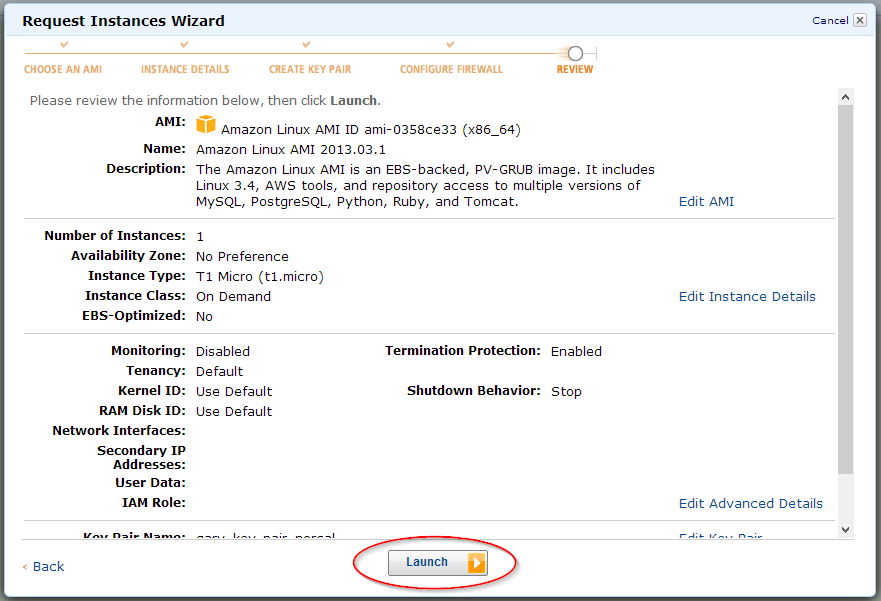
Time to Review. You can review all this info to make sure it is right, if you understand what it all means. Click “Launch” to put this puppy in orbit!
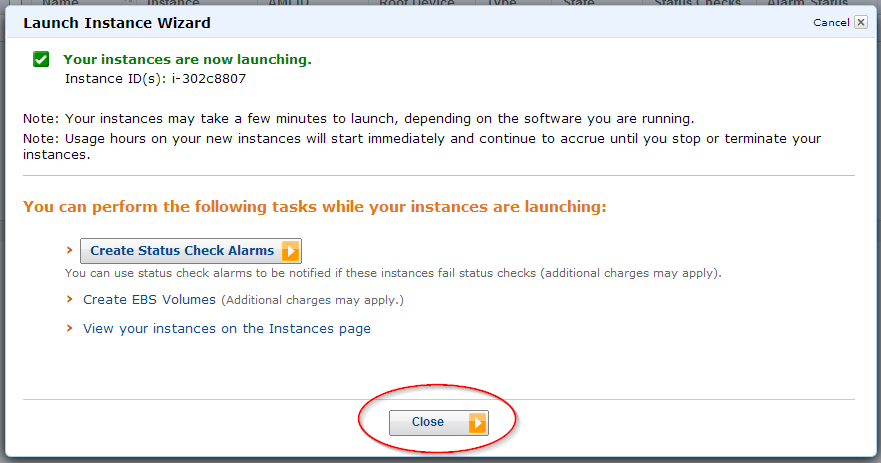
Now we wait will our Instance reaches orbit. Click “Close”.
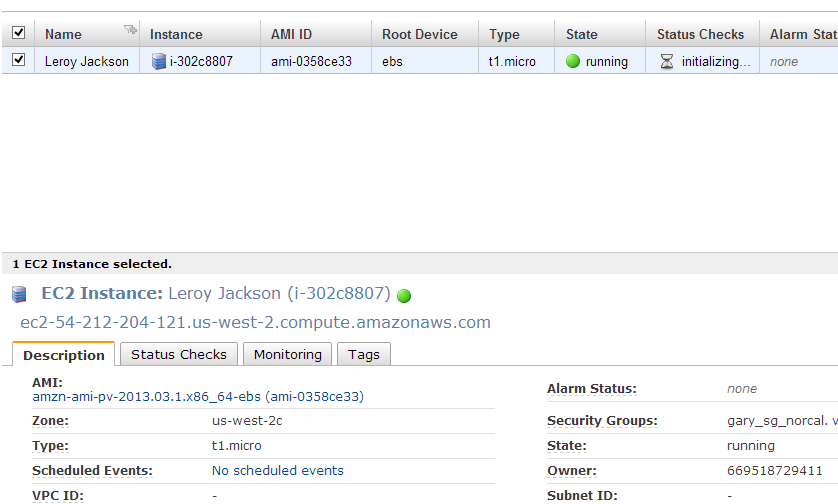
Now you will see the instance in the list. the state may not be “Running” yet, but it will get there. If you click on it you can see some details.
Back to Elastic IP to associate the IP with our new Instance
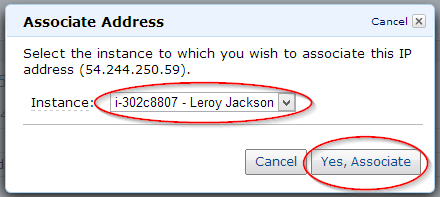
Go back into “Elastic IPs”. Remember this is under “Network & Security”. Click on the IP address you set up earlier. then click “Associate Address”.
A dialog will appear. Select the Instance you created from the “Instance” drop down box, then click “Yes, Associate”.
Connect
Now let’s SSH into this server. the moment of truth!
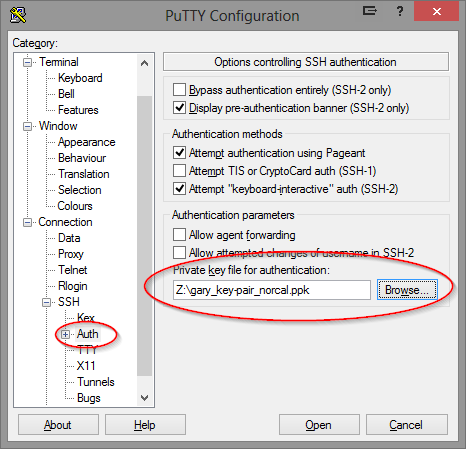
Launch PuTTY. Under Category, expand SSH then click on Auth In the last text box, “Private key file for authentication”, click “Browse” Choose PPK created earlier.
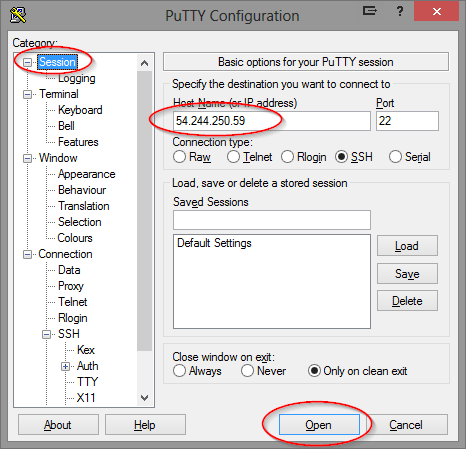
Go back to the “Session” category, and enter the Host Name or IP Address. the Host Name would be what you set up in DNS earlier. If this is misconfigured then you will not be able to connect, so it is probably best to use the IP address as this point to help remove as many factors as possible. Click “Open”.
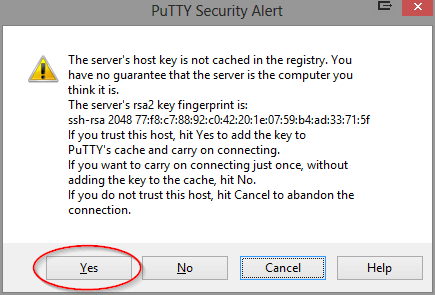
The encryption key fingerprint warning will appear. You just need to trust it at this point and click “Yes”.
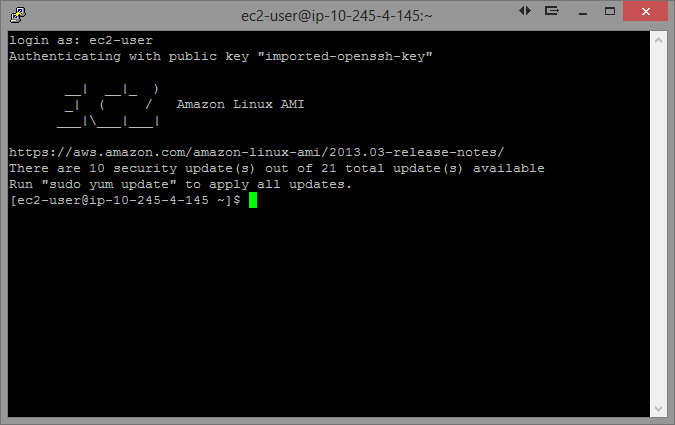
When the SSH window opens, login as “ec2-user”. Your private key will validate you snd you will be logged in. Congrats!
Install Stuff
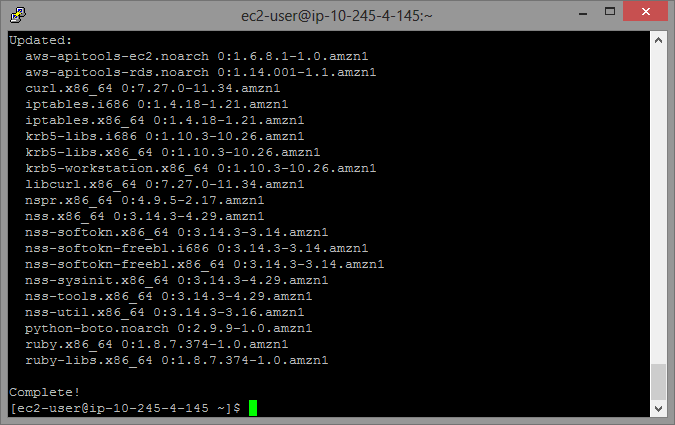
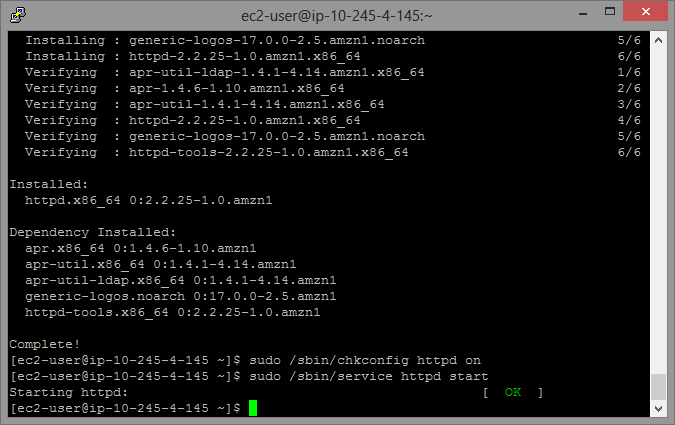
If the login message says there are security updates, go ahead and apply the, by running “sudo yum update”. The packages will be calculated and when prompted enter “y” to confirm the update. When it is complete it will look like this.
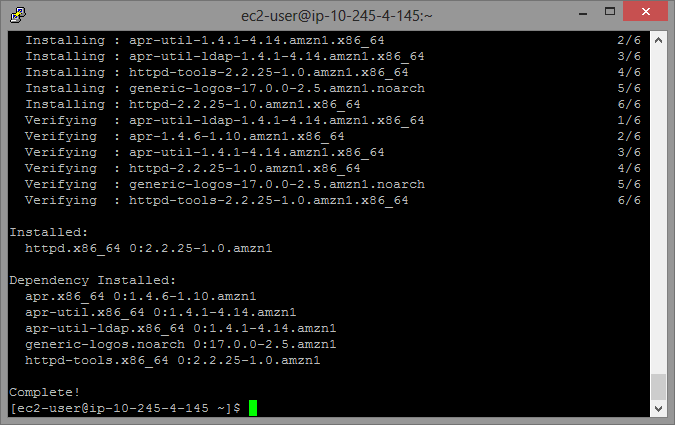
Now install the Apache web server. On Redhat it is called “httpd”. This is one of the reasons I know this AMI is based on Redhat, aside from the fact it uses “yum”. This isn’t any Debian flavor.
Enter “sudo yum install httpd” and enter “y” when you are asked to confirm the install.
This is what it will look like when complete.
Now set the httpd service to start automatically by entering “sudo /sbin/chkconfig httpd on”
No messages means it was setup correctly.
Now start the httpd service by entering “sudo /sbin/service httpd start”. This time you should get an “[ OK ]” message.
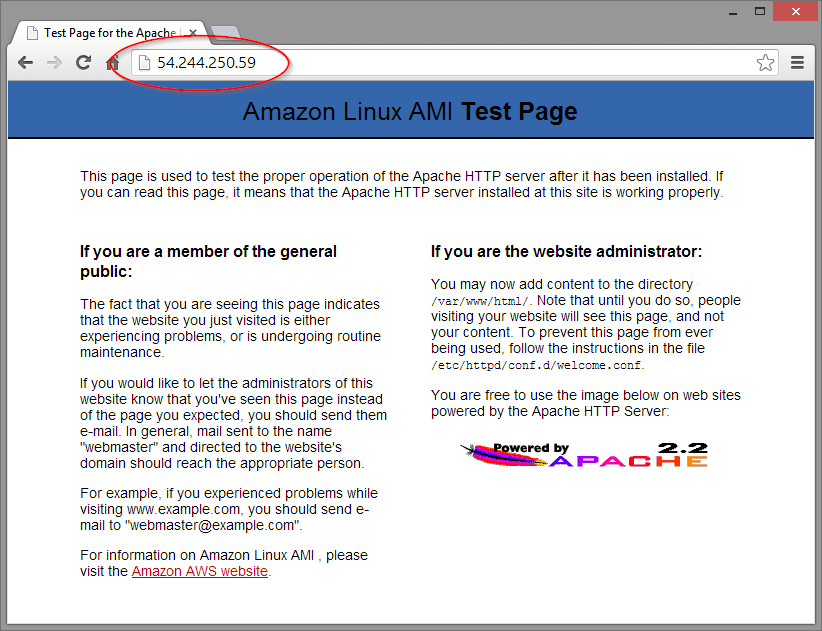
Go to the IP in your web browser and you should see the test page.
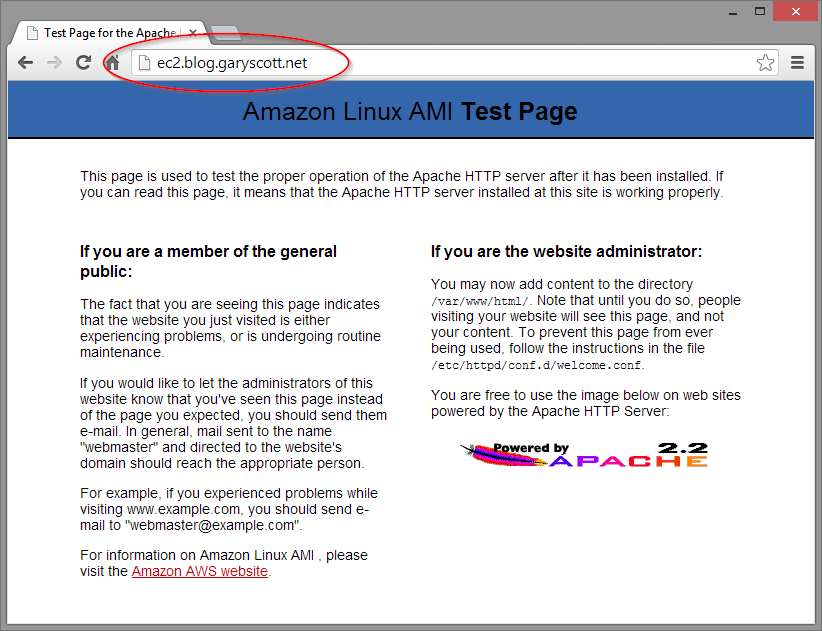
Now go to the domain set up in DNS, see if that is working. Awesome!
Well that is about it. From here you can configure it as you would any other Linux server. Use yum to install software. Enjoy.
Windows
To run a Windows Server the steps are exactly the same except for a few minor differences.
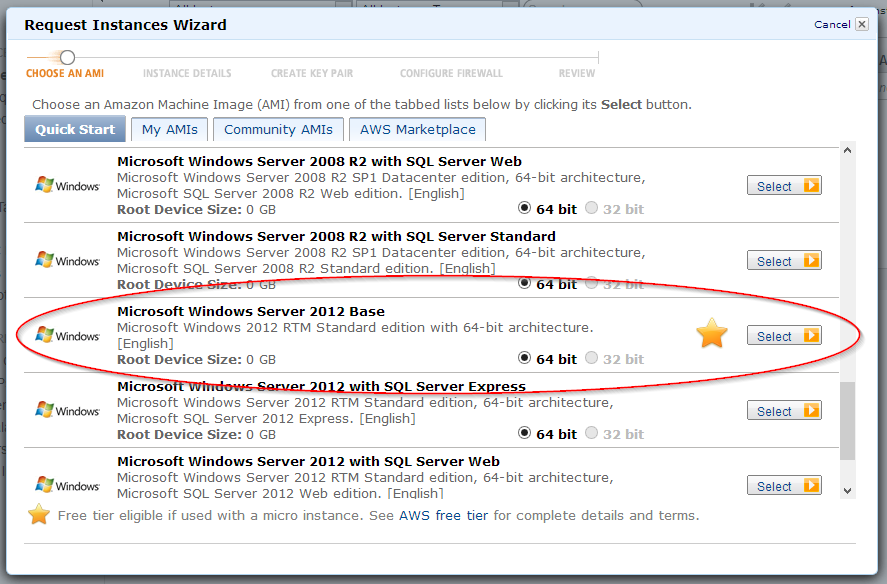
When building an Instance, choose a free Windows version.
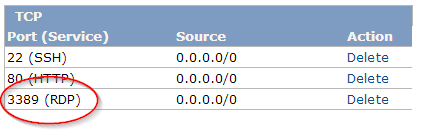
Add RDP to the Security Group Inbound rules so you can use Remote Desktop to connect. If your Security Group will not contain any Linux servers, then remove the SSH rule.
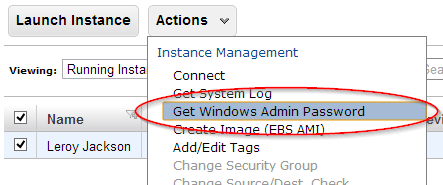
You do not use the Key Pair to connect. You have to get the Administrator password through the Instances control panel. When the Windows Server instance running and selected, click “Actions” then select “Get Windows Admin Password”.
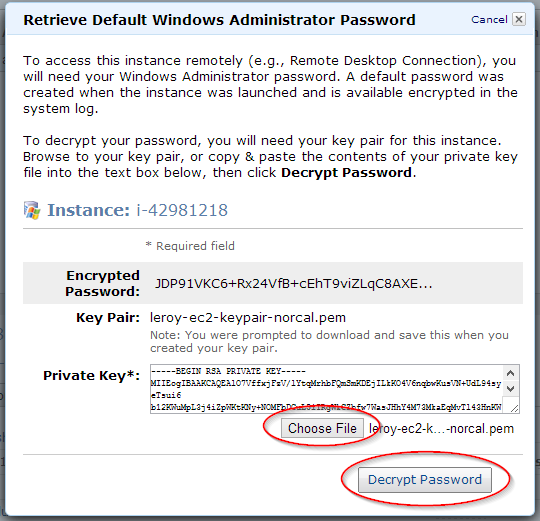
A dialog will appear asking for the private key to this Instance. Choose the PEM file on your computer then click “Decrypt Password”.
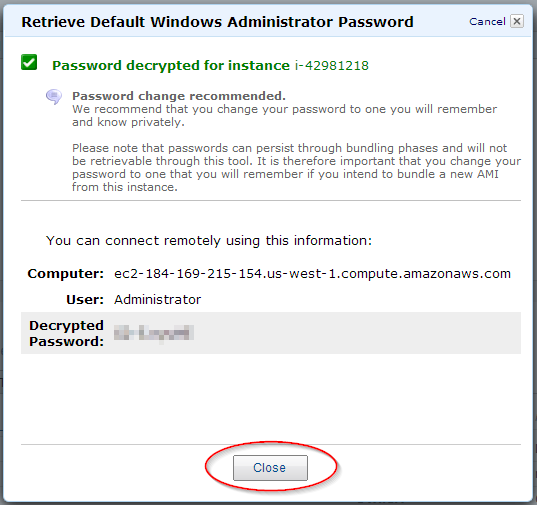
The password will appear on screen. It obfuscated it in the screenshot. You should change it once you login to the server.
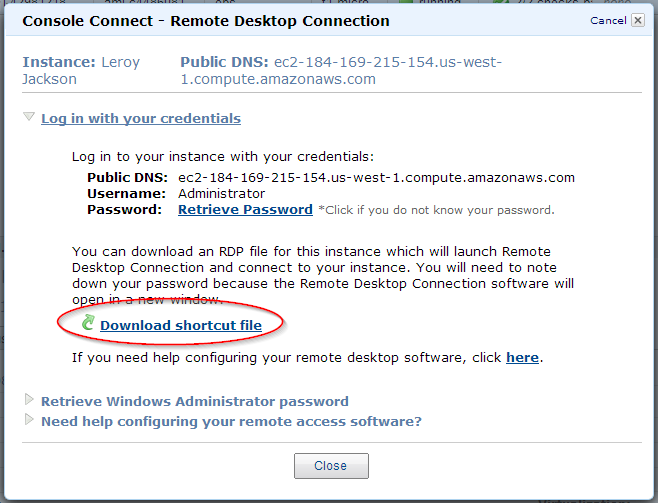
To connect, use Remote Desktop to connect to the IP address or a domain name linked to this server. To find all the needed into just click “Actions” then “Connect”. You can enter this information into the Remote Desktop Connection client or “Download shortcut file” to make it easy! Connect like any other Windows computer. You have used Remote Desktop before?
Easy! Enjoy!